Thursday, April 16, 2015

Planning Meals

Last fall, I made some forms to help me cope with the holidays.  My husband likes to know that everything is taken care of and these forms helped me feel like I knew everything was covered.  

I'm not able to upload to this site on blogspot, so I've posted them on a Wordpress site HERE.  If you scroll down to the Family Forms, I've posted 4 different Guest Meal worksheets.  I use these for holiday meals or larger family get togethers.  

The other forms I've posted are the ones I use for my kids' birthday parties.  I let my kids decide what they want for breakfast, lunch, and dinner on their birthdays and I give them the Birthday Day Meals form.  I use the birthday party form when I plan the parties :)


Thursday, April 9, 2015

Taking your blood pressure

A few weeks ago, I had a stress reaction to wearing a Vivofit bracelet.  I broke out in hives for 4 days and after a few days I realized I was having a hard time breathing.  I saw the dermatologist about the hives, but I wasn't quite sure what to do about the breathing.  I figured it would calm down after a few days, but the next time I was in a grocery store, I took my blood pressure to make sure that was okay in light of my other reactions.  It was easy enough to do.  I realized that it can be helpful to have a blood pressure monitor around if there are any questions.  High blood pressure runs in my family and I'm working on managing my stress.  I've never had high blood pressure before and I'm hoping I won't.  But, I recognize that it's a good thing to keep track of.

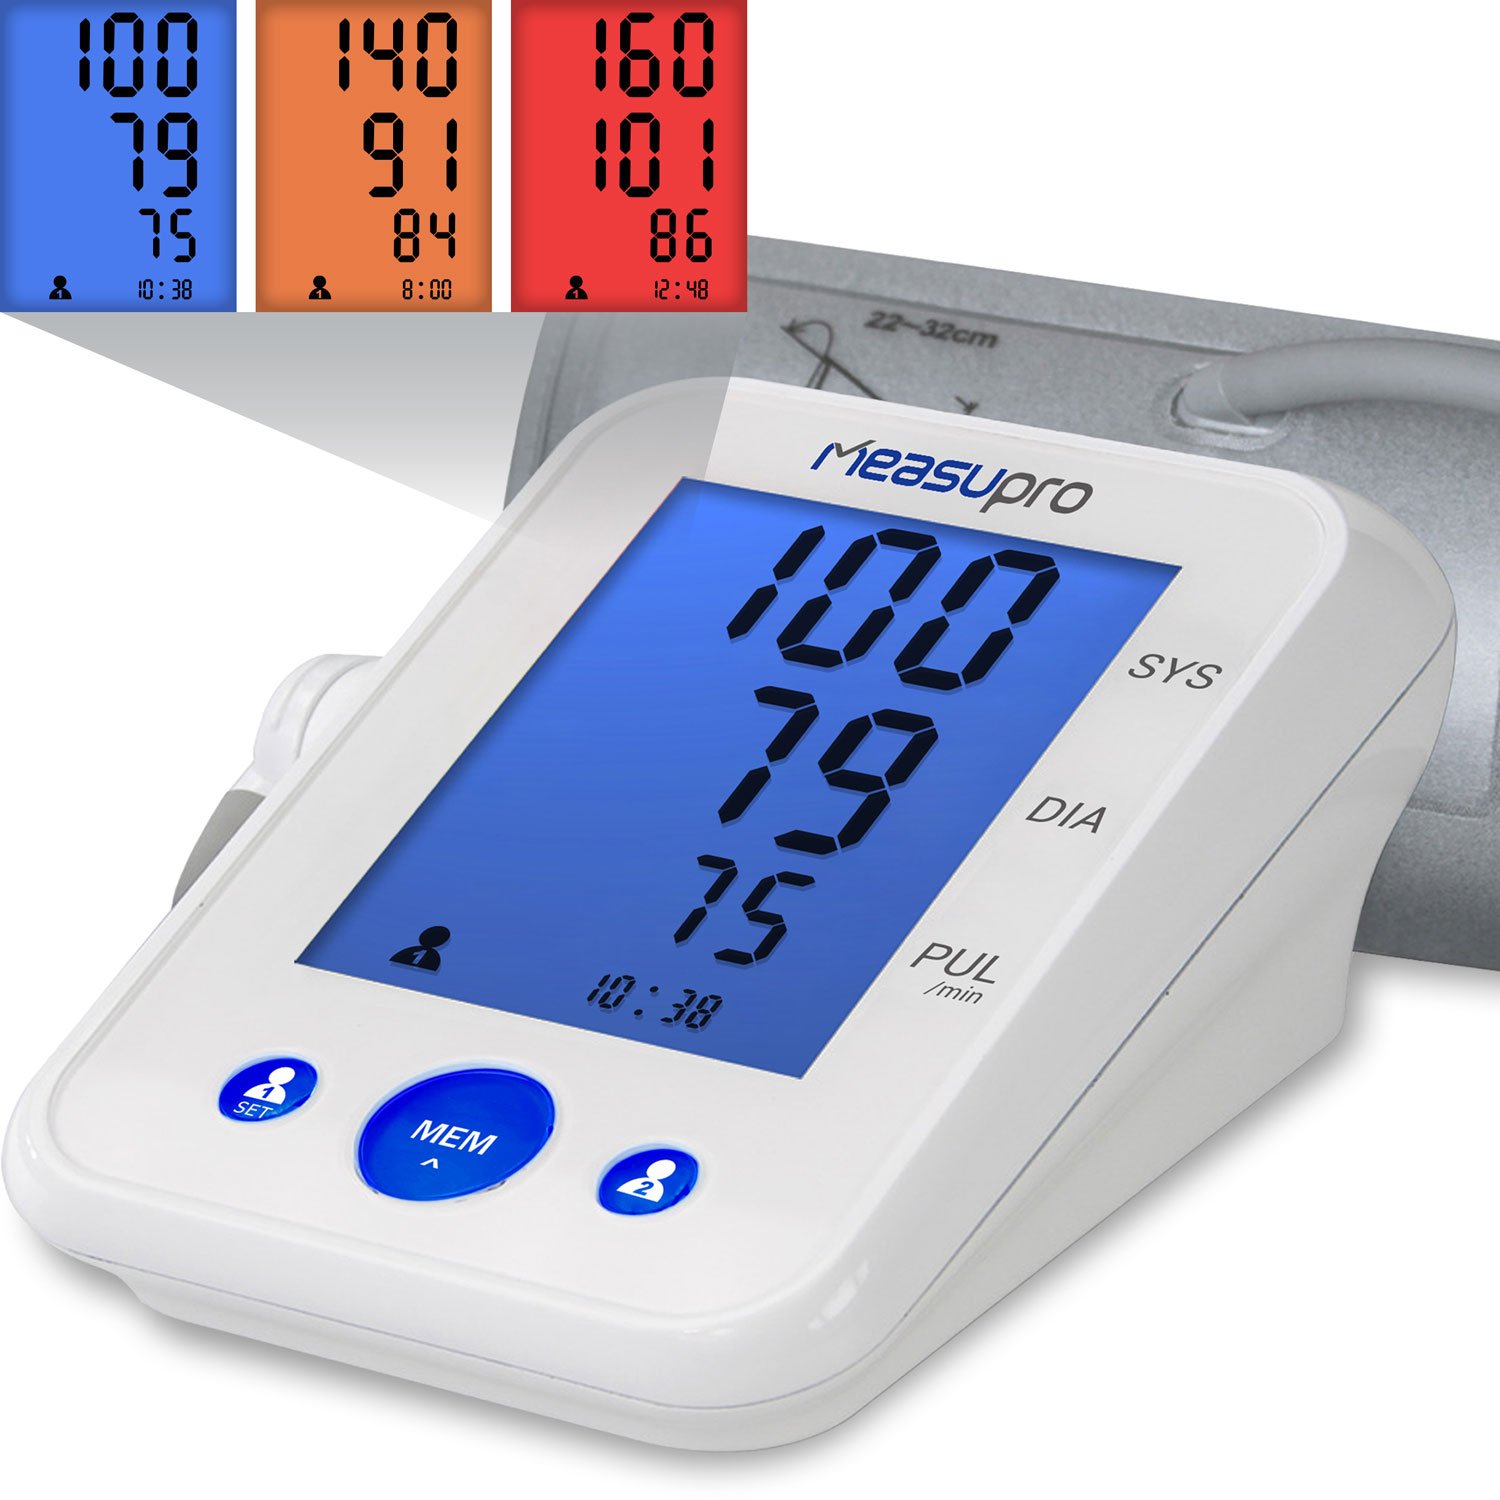
So, I tried a blood pressure monitor at home by Measupro, the BPM20A.  This blood pressure monitor is very easy to use. The instruction manual gives very specific directions about how often and how to use it. I love that it records two people (up to 60 records). The date and time are recorded with the machine. It only takes AAA batteries which are very inexpensive to replace. The only direction that is missing is that you should plug the arm cuff into the side. The numbers are very clear, big, and easy to read.

As a person who has never used one of these myself before, I found it easy to follow. The white knob from the cuff goes into the side of the base. This is the one direction that is omitted and you do have to push it in. The directions do say to rest for 5 minutes before using (which is difficult for me with 3 kids running around that I need to take care of), but I rested for 2 or 3 minutes and then used it. My blood pressure was fine. The manufacturer does recommend sitting in the same location at the same time each day to measure your blood pressure--so that you can control more variables and get a more consistent reading. This makes sense. Also, for those who don't know which measurement to choose, you'll want to choose the mmHg in the US.


When I looked around at the prices of various monitors, it was interesting that they range in price from about $30-$50 or even more.  This one is moderately priced at $45.  

I am both pleased and surprised by how easy this was to set up and use!


Please note that I was sent a complimentary monitor by MeasuPro to review.

Monday, April 6, 2015

My Easter Ham

I did not grow up eating ham on Easter, so I have very little experience cooking ham!  Two years ago, I discovered the amazing trick of cooking a ham in a crock pot...

Cook a bone in ham (non spiral-sliced type) in a large crockpot.  ALL DAY.  It will fall apart like corned beef and be salty--in an especially yummy way.  Put 1 cup of liquid in with the ham and some brown sugar if you'd like.  This is a cheap way to make a cheap ham really yummy.

But, for Easter, I get a spiral sliced ham.  Last year, I tried the oven cooking method at 275 degrees.  I placed it in a pan and covered it in aluminum foil (I think), but after 2 hours, it still wasn't warm in the center.  So, we sliced it off the bone and had to heat it in the microwave so that we could eat on time.

With that memory on my mind--of past hams not hot inside--  I looked online for directions.  I had a spiral sliced ham to heat again this year and I really wanted my endeavor to be successful in heating it through.  So, after looking around, I settled on how I was going to do it... and it worked!!

Directions for heating a spiral sliced ham:
Heat oven to 325 degrees.
Take ham out of wrapper.  Place ham inside a Reynolds oven bag (I used a turkey size.)  The directions on the bag say to put 1 Tbsp of flour in the bottom.  Then, you tie the bag with some cooking twine.  The bag comes with a metal twist tie, but I wasn't comfortable using it.  So, I folded the end over and tied it.  The plastic bag isn't supposed to go over the pan, so this helps it stay tighter.  Then, Cut six 1/2" slits around the top.  Cook a 10 lb. ham for 1 hr. 30 min.  Check at 1 hr. 15 min.

Here's a link to the cooking info on Reynolds' site.   http://www.reynoldskitchens.com/media/3020138/orgoventempstob.pdf
A second faq I found helpful is:
 http://www.reynoldskitchens.com/media/13943325/oven_bags_faq.pdf

I so thankful and pleased that it worked!  My ham heated through!  Yippee!  I am definitely doing it this way in the future.  Easter is trickier than other holidays because go to church and get home around 1 pm and want to eat around 3 pm.  This method of doing the ham is going to make our Easter dinner so much easier from now on!

I made two sauces to serve on the side:  Pineapple Sauce and a simple mustard sauce.
Thursday, April 2, 2015

Cracking Eggs Cleanly...

Yippee!!!!!  Yesterday, my kids and I dyed Easter Eggs along with another boy from church.  I do it every year in conjunction with stuffing the eggs for our church egg hunt.  Planning it this way makes it fun for the kids and for me and I know that I won't procrastinate dying eggs and miss it.  

My kids love hard boiled eggs.  But, in recent years, they have been a thorn in my side.  Every time I tried to peel one, the peel would stick.  I could never get a cleanly peeled egg.  Until today!!  My mom is always looking for fun tips on how to cook eggs.  She's the one who told me how to cook them:

Place eggs in cold water in pan.  Bring to a boil.  Place lid on pan.  Turn off heat and let sit for 15 minutes.  Then, drain and eat.  

Less energy used to cook and this method works well--for the cooking.

But, my mom found a new tip for the cracking this week and this is it:

Gently crack your egg(s) all over.  Then, place them in a bowl of water for a few minutes.  Don't try and leave them there for just 30 seconds.  They'll still stick.  But, 2-3 minutes will do the trick.  Pull out the eggs one by one and peel!  

I was so amazed and pleased that this worked.  Deviled eggs with smooth surfaces!  Yippee!!!

It's the little things that can make one smile!

Wednesday, April 1, 2015

Not as simple as it might seem...

I have taught myself how to do many craft projects.  Scrapbooking, quilting, calligraphy...  But, I have always struggled with helping my children make beaded necklaces.  My knots never seem to stay!  

Needless to say, I was thrilled when I opened up an envelope a few days ago and I found 3 helpful books inside.  #1  Beaded Jewelry:  Wirework Techniques, #2 Beaded Jewelry:  Knotting Techniques, and #3 Beaded Jewelry:  Stringing Techniques.  These are fairly small books (probably 5 x 7 inches) and thin (about 1/4").  But, they are packed with great information!  Sometimes it is true that great things come in small packages...

Storey published these three books by Carson Eddy, Rachael Evans, and Kate Feld.  They answered so many questions I've had over the years, but have felt silly for wanting to ask!  I know many people like websites and youtube, but I'm still partial to books.  There are a few reasons why.  

#1  All the information is in one place--ONE place.  I don't have to click around searching for what I can't figure out.  It's all there.

#2  I don't have to sit in front of my computer.  I spend enough time in front of this thing as it is!

#3  I am less distractable...  Oh, what's that other page talking about?  Do I need to read that first?  Oh, that looks more interesting... you get the idea. There's always something else to look at on the interest and so it's easy to miss out on enjoying what's right in front of me.

Those are just a few of my reasons, but basically, I love books.  I prefer books.  And these three are great books that helped me understand how to make jewelry far better than the information I've found on the internet.  

But, back to these books.

Book #1 Wirework Techniques 
This book covers the basics about wire, basics about chain types you can use (not make yourself), findings (clasp, earrings, etc.), what you need to know about tools and then techniques.  Theses books are black and white so the pictures are drawings, but they are very clear and the directions/drawings are very easy to follow.


Book #2  Knotting Techniques
This book covers cords, clasps, tools, knotting techniques, and pearls.  When using this book (and the others for that matter), you'll want to use either a cookbook holder or a heavy object to keep the book propped open while you work.  The square knot directions were easy to follow and I was very thankful for the information about adjustable ways to end a necklace.  I had always wanted to know how to do this!

Book #3  Stringing Techniques
This was the book that surprised me the most of the three.  I had not realized how interesting it would be to learn about the different types of beads and how helpful it would be to understand them!  The other chapters explain the types of stringing materials and findings.  There is a chapter on beading tools as well as one about planning jewelry.  All of the chapters were easy to understand and full of information.  

If you're interested in beading, but don't have the time to take a class, these books would be a great place to start beyond making a simple string with beads and tying it in a knot.   I think these books are a great introduction for the crafty person who wants to start beading.  But, they will give you information and techniques that you can do an amazing amount with!

We're so focused on being entertained by what we see on the computer screen that we often miss the enjoyment of sitting and doing.  These beading books remind me of how valuable it is to get off this silly computer and do something (like my girls, who are making origami rabbits in the other room at the moment for our church's egg hunt this weekend).  

Please note that I received complimentary copies of these three books for review from Storey Publishing.