Sunday, April 9, 2023

What to do with leftover ham...

 I realize that many families ate ham today for Easter.  We did!  But, what my family doesn't know is that we had some of our frozen leftover Christmas ham for dinner this past Friday.  

It was a super busy week for me and I was exhausted by the time I got to Friday night.  And I still needed to take the kids to youth group and get dinner made in 45 minutes so we could eat together before they left.  Family dinner is really important to my kids and my husband.  And it's important to me.  

Dinner always takes me at least an hour.  I have no idea why, but it does!  So 45 minutes is a tall order for me!  But, I did it and here's what I made--with leftover Christmas ham.

When I froze the ham at Christmas, I divided up the ham into three portions and chopped it up.  So, I took one bag out of the freezer (probably 2 1/2 cups of chopped ham) and placed it in a dish to defrost in the microwave.  

The dish I decided to make was Pasta Carbonara.  

I looked up a few recipes online and then made my own...

Ingredients:

2 cups diced cooked ham

1/2 medium onion minced

1 lb pasta, angel hair or shaped noodles like Penne will work

3 garlic cloves, minced

3 whole eggs

1 cup Italian blend finely shredded cheese (parmesan or shredded provolone would work too)

1/4-1/2 cup half and half (depending on how creamy you want the dish to be, I use 1/4 cup)

Salt and pepper to taste

Directions:

1. Cook noodles as directed on the box, drain, and set aside in sink.

2.  Once noodles are boiling in the pan, saute ham, onion, and garlic over med-high heat, stirring 1x/every minute until crispy in a nonstick frying pan on stove.  When done, place in bowl and set aside.

3.  Crack eggs into a small dish and whisk with the half and half.

4.  Measure out finely shredded cheese.

5.  Once all ingredients are ready (noodles cooked, ham mixture sautéed), place noodles back in warm pan they were cooked in and place pan on burner used for sautéing ham.  Then, turn stove on to med-low heat and add egg mixture.  Stir into noodles for a minute or two, then add in cheese and ham.  Continually stir for another minute or two.  The egg will cook from the remaining heat in pan and the low heat on the stove, plus the heat from the warm noodles and ham.  The cheese will add creaminess (and yumminess to the dish).  Add salt and pepper to taste.  Stir the noodles until you feel they have warmed enough that the eggs are cooked.  This is the strange part about pasta carbonara, but it really does work and it's yummy!

Serve with a green steamed vegetable like green beans or asparagus on the side.


Tuesday, November 13, 2018

Beating Egg Whites

Update: 12/18/22
I need to change this post a little.  Accidentally after I made this post, I only put in half the sugar!  I typically double the recipe below, but then forgot and only put in half the sugar.  My family loved them so much more!!  Now, I double all ingredients of the cookies, but only put in 2/3 cup of sugar.  They are not so super sweet and everyone enjoys them so much more!

...

I have struggled over the years to beat egg whites with my kitchen aid mixer.  It would take around 30 minutes.  The bowl was too large for a few egg whites.  I thought about buying the small bowl insert and special beater a few years ago, but as I read reviews, I noticed that there were a lot of complaints.  I was uneasy about making the $60 investment if I was still going to be frustrated when I attempted to beat egg whites the next time. 

So, instead I bought a hand mixer with a whisk attachment for only $25.  The first time I used it I was so excited!  I was able to beat two egg whites until they were stiff in only a few minutes! 

The main reason I wanted to be able to beat egg whites was so that I could make meringue cookies.  These are a cookie I grew up with and they are a naturally gluten free, lactose free cookie.

Here's my mom's recipe:

Chocolate Chip Meringue Cookies
1/8 tsp cream of tartar
1/8 tsp salt
3/4 cup sugar
2 egg whites
1/2 tsp vanilla
1 cup mini chocolate chips

Beat egg whites till frothy.  (On my hand mixer, this is on speed 1 or 2.)
Add salt and cream of tartar.  Beat until stiff, but not dry.  (I up the speed on my mixer to 3 or 4 for this step.)
Add sugar, 2 Tbsp at a time.  Beat thoroughly after each addition. 
Fold in chocolate and vanilla with a spatula.
Drop from a teaspoon onto a brown paper bag or parchment paper.
Bake at 300 degrees for 30 minutes.  They will lightly brown on top.
Let sit for a few minutes before eating. 

They are crumbly so you can't put more than one layer in a storage container.  This recipe made about 18 cookies.

If you make them, I hope you enjoy them!  I can only eat one at a sitting because they're so sweet, but they are one of my family's favorites!


Wednesday, October 24, 2018

That time of year... the great clothing swap!

Yesterday was the day.  It was time to pull out the buckets of clothes in the attic and find out if I had any jeans to fit my girls.  

Thankfully, I did!

Over the years, I've tried to make the swap less stressful, but I've found that with three kids I need to let go of my plans for a day and just plug away at it.  When I've tried to homeschool the same day as the great swap, I would just get stressed out!  

I've worked to keep the bins of clothes well labeled, but it always took a lot of work.  At the time, I didn't realize that the bins were less work than going shopping would have been!  Now I do understand that.  

When my kids were really little, I used to garage for all of their clothing.  For sizes up to a 5T, I would 25 or 50 cents for a piece of clothing.  I would come across garage sales that wanted several dollars for a piece of clothing, but unless it was a winter coat, I knew we didn't need it.  Little kids go through a lot of clothing and garage saling is a great way to find little kids clothes!  

As my kids got older, I was so fortunate to have a few families at the church we attended who gave their hand me downs to us.  And then when my kids grew out of them, I handed them down to other families in the church!  I would go through the clothes when my kids were done with them and think about the personalities of the children at church--and give the clothes to the kids I thought would like them!  It was so much fun.  My kids loved seeing kids where the clothes to church after them, too!

But, things began to change around the time we moved away from that community.  My girls were approaching the sizes that they will be as adults and there were fewer hand me downs because other girls were grown to the heights they will remain!  And my son approached the age where hand me downs were fewer because the boys ahead of him got so much use out of their clothes and they didn't have a lot of life left in them.  

So, this year, I've had to figure out how to fit more shopping into our schedule for shoes and clothing.  I buy things as needed.  Every time I find something when I'm in a crunch for time, I am thankful!  Whether it's shoes because my son's shoes have holes in them, or finding shorts that my daughters and I are both comfortable with.  I am thankful.  More and more I find that clothing my children involves a lot of trust in God.  

Trusting God that He will help me find clothing my kids and I are both happy with.  Trusting God that He will help me find clothing that helps my kids look like other kids.  Trusting God that our budget will balance when needs come up.  

As for this year's swap yesterday...  

My kids have all grown this spring and summer.  3/4 of my son's pants didn't fit him anymore so I had already made a trip to Walmart to get 3 pairs of athletic pants and 3 pairs of khakis for church and the week.  I knew I still needed 2 or 3 pairs of jeans for him and I found those in the bucket I had for him!  And for the girls, I found enough jeans that I had picked up at garage sales this summer to find several pairs that fit each of them!  Yay!  

I often ask other moms where they shop because I'm always looking for new ideas of where to find clothing for my kids, so I thought I'd share in this post the places that I like to shop. 

Here's what I've found so far...

Girls:
Shoes:  garage sales, Marshalls
I found several pairs of boots this summer for my girls for $1-$3 each.
Pants/Jeans:  Old Navy (watch for sales), garage sales
I aim for 50 cents or a dollar a piece at garage sale for pants, jeans, and shorts (no holes, or big spots)
Shorts: Old Navy, Target for athletic shorts (they had some that weren't short shorts!
Tshirts:  Life is Good (for one of my daughters), Target for athletic shirts for my other daughter
Special shirts/Sweaters:  garage sales
I rely on garage sales for special pieces--church shirts and sweaters.  A lot of friends I know love Uptown Cheapskate and they utilize this place as a way to consign things their teenagers grow out of and then use the credit to buy pieces that are new to them.
Dresses:  Ross, garage sales
When we moved to where we live now, my girls needed dresses for church.  Our old church was much more casual and they only needed jeans or capris.  But, here we needed dresses.  I found that we could get casual dresses at Ross for between $10-$15 each, which is less expensive than Target.

Boys:
Shoes:  Ross, Outlet stores, generic vans for church--Old Navy
My son is rough on shoes, he gets a pair of pull on shoes for church and a pair of tennis shoes for every day.  Summer was different.  I picked up flip flops on sale at Old Navy for the pool and Khombu sandals at Costco.  A good friend tipped me off to that one--they lasted all summer and only cost $10!
Shorts:  Target
Target has been a great place for basics!
Shirts:  Walmart, garage sales
Pants:  Walmart, Target

Before my kids went to bed last night, the buckets returned to the attic empty--all except for one.  I don't have a lot to store anymore.  But, in some ways, that makes it much easier!  I have less to keep track of and I know better what I need to keep an eye out for over the winter and into the early spring!  I went to bed thankful the clothing swap was done and even more thankful for God's provision of clothing for my children.  

Matthew 6:25-34

25“For this reason I say to you, do not be worried about your life, as to what you will eat or what you will drink; nor for your body, as to what you will put on. Is not life more than food, and the body more than clothing? 26“Look at the birds of the air, that they do not sow, nor reap nor gather into barns, and yet your heavenly Father feeds them. Are you not worth much more than they? 27“And who of you by being worried can add a single hour to his life? 28“And why are you worried about clothing? Observe how the lilies of the field grow; they do not toil nor do they spin, 29yet I say to you that not even Solomon in all his glory clothed himself like one of these. 30“But if God so clothes the grass of the field, which is alive today and tomorrow is thrown into the furnace, will He not much more clothe you? You of little faith! 31“Do not worry then, saying, ‘What will we eat?’ or ‘What will we drink?’ or ‘What will we wear for clothing?’ 32“For the Gentiles eagerly seek all these things; for your heavenly Father knows that you need all these things. 33“But seek first His kingdom and His righteousness, and all these things will be added to you.
      
34“So do not worry about tomorrow; for tomorrow will care for itself. Each day has enough trouble of its own.


Sunday, October 14, 2018

Advice I remembered about kitchens...

Years ago, I was in a friend's house talking with her about her kitchen.  She mentioned something to me that she had read on an organizer's website.  I never went to the website and found the advice she mentioned, but I have tucked away the advice and pulled it out every single day since.

The advice was about where to start when organizing your kitchen.  The friend said the organizer said to start with your counters!  Clean them off.  Clear everything off of them that doesn't absolutely have to be there. 

So, when we moved last December into a new home, I knew immediately that our new kitchen was going to be a big adjustment for me.  No kitchen island.  Less counter space.  Many fewer cupboards.  Choices to be made about what was important and what wasn't...  And solutions to be found.

This morning when I made biscuits, eggs, and bacon for my family, I realized that I'm used to this new kitchen now. 

Here are some of the ways I've adjusted:

1.  Our coffee maker and our nespresso machine sit on the sideboard in our dining room.  It's close to the kitchen, but not in the kitchen.

2.  The coffee bean ceramic container and grinder sit on one counter in the corner because I have to clean up after the coffee bean dust and I want that in the kitchen.  At the other end of that counter section sits my vita mix blender base and toaster.  We switched from a toaster oven to toaster because it takes up less room.  The blender canister stays inside a cupboard. 

3.  There's a tiny piece of counter between the refrigerator and pantry closet.  I placed the knife block there.  It made use of the space!

4.  Next to my stove, I put a small round lazy susan with my cooking essentials:  Salt, Pepper, Toothpicks, cooking spray, olive oil, and honey.  These are all things I need to grab as I'm cooking and it saves time having them right there.

5.  In the corner of the L sits my Kitchenaid.  I remember that my grandmother and aunt stored their Kitchenaid mixers away when I was a kid, but it's so heavy for me to lift.  But, I can easily move it in and out of the corner by just pulling it forward to use.  Next to the mixer sits a stainless steel canister with the basic tools I need while cooking: a flat whisk, a round nonstick whisk, a metal spatula, a thin metal cookie turner, a thin plastic turner (for eggs), a thicker plastic turner, 2 rubber spatulas, a metal turner, a slotted plastic spoon, and a wooden paddle.  I'm careful about not adding to this container and making it too crowded.  If I put too much in, it makes getting things out quickly frustrating to me.  Behind it, I have a plastic chopping board leaned up against the backsplash.  We have granite countertops and chopping boards like to slip on it; so I used a hot glue gun to put a small dollop of glue in each corner of the board and now it doesn't slip!

6.  Other than those items, the only other thing I keep on the counter is a container of liquid soap. 

7.  One of the puzzles I faced when we moved in was what to do with our dirty dishes and clean dishes that I had handwashed, but that needed to dry.  My solution for the dirty dishes has been to put as much as I possible can in the dishwasher.  Anything that can't be put in the dishwasher gets cleaned as I cook (within reason).  We have a bar countertop which I make the most of.  I found two silicone drying mats at Aldi that I placed on top of the bar.  That's where I put dishes to dry--up off the countertop I use and out of the way, but still close at hand. 

8.  The other things I put on the bar countertop section are a double metal basket with fruit and onions and a rectangular basket that I keep bread and rolls in.  I tried to store bread in the pantry, but it molded too fast because of the climate we live in.  Keeping it on the countertop keeps it close to my mind and reminds me to use it!  The only other thing on that counter is our betta fish.  I enjoy looking up from the sink and seeing Spartacus II, the fish, every time I look up! 

When I garage sale, I'm always looking for baskets, things I can use to help organize my family more!  I just found the basket that sits on my kitchen counter last weekend.  The loaves of bread had been sitting loose on the counter before that in disarray.  Somehow baskets and containers make everything feel more organized and clean!  Baskets show my family where things belong, where to put them back after they use them!

I've learned a lot from cooking in this kitchen and my cooking has changed.  Elaborate meals are more daunting, but that isn't necessarily a bad thing.  Making simpler meals means that I am generally less rushed and that I can enjoy cooking a little more.  I'm learning bit by bit how to make the most of whatever space I'm cooking in!   


Friday, July 20, 2018

Quitting Prime

For several years, we've had Amazon Prime.  But this year when they said they were going raise the annual fee by 20%, we found ourselves questioning the decision.  Did the fee justify how much use we were getting out of it?

Music...  we prefer Apple Music and don't use Prime Music.
Movies/TV... we have cable that we can watch on the internet as easily as Prime.
Shipping...  This is the big one.  Being able to order one item and have it ship for free in two days is the big attraction about Amazon Prime.

But, over the past year, we've had many items not arrive in two days.  In fact, they even took a week for several things we ordered and one time the item was pushed off by several months until I finally cancelled it, went to Barnes and Noble and purchased it that day.  I realize that the biggest convenience of Prime is not having to leave my home and still purchase items that we want or need.

So, we decided to cancel our Prime Membership and see if we could live without it.  I went through the process and cancelled it.  But, then I discovered that Amazon still automatically renewed it at the old rate.  Hmm...  I was faced with a choice to let it continue for a year or not.  It bothered me that they would renew it against my wishes.  I never like it when companies do that.  (I had Hallmark's HMNow online service charge me for a year membership even though I wasn't getting the service earlier this year.)

So, I went through the process to cancel again and this time it took.  Thankfully.

I was curious to see how this would affect what we bought and how much we would still use Amazon.  We like to purchased used books most of the time anyways, so Prime never saved us money on those.  The amount of purchases we've made through Amazon has severely dropped off by probably 95%.  I don't feel deprived.  I can still make purchases that I really need to that are over $25 and get free shipping.  It may take a week, but if I really need something now I can just go to a store.

Amazon is huge.  I realize this.  It was interesting to hear this week about the Prime Day crash on the site.  I didn't feel like I was missing out on anything.  I haven't bought anything on Prime Day the past few years.  I'm glad that we have been able to forgo needing to have Prime!

Do you have Prime?  Do you think about quitting Prime?

Sunday, July 8, 2018

Shrimp 'n Grits

My anniversary was this weekend and so I made a special brunch dish for my husband.  I decided on Shrimp and Grits.  I looked for a recipe and then used it as a base and in the end what I made didn't look much like what the original recipe prescribed, but we loved it!  So, here goes...

Shrimp 'n Grits

1 pound of raw frozen shrimp, medium size works well

Defrost shrimp in a colander in the sink by running cold water over it. 

6 slices of bacon

Start cooking 6 slices of bacon in a skillet.  I place the bacon in the pan first and then turn it on to medium low heat so that it will cook slowly and not burn.  Turn the bacon over frequently so that it won't burn.

Once the bacon is under control, start the grits...

4 cups water
1/2 tsp salt
1/4 tsp pepper

Bring water to boil.  Add salt and pepper and 1 cup of quick cooking grits.  Stir till mixed and lower the stove to medium or low-medium heat.  Stir every 30 seconds or so.  Cook grits until they're thickened and then taste to see if they're soft enough.  They should take about 5-8 minutes or so depending on how soft you want them. 

1 cup shredded jack cheese
3 Tbsp. butter
3 Tbsp. lime juice, optional

When grits are cooked, remove from heat and stir in jack cheese and butter (and lime juice).  Put a lid on the pan to keep them warm and set aside.

2 large cloves of garlic, minced

Once the bacon is cooked through, set it on a plate lined with paper towels to soak up the grease.  Set the kitchen burner to medium high heat and add in the garlic.  Layer the shrimp in one layer in the pan.  Cook 1-2 minutes on each side until the shrimp are pink.  Then you know they're cooked!  Let the shrimp cool just a little bit and then pull off the shells.  Then chop them into larger chunks.

1/3 cup julienned red bell pepper
1 cup thinly sliced green onions
3 Tbsp. cilantro, chopped
2 Tbsp. lime juice

Crumble the bacon and toss into the pan over low heat with the cilantro, lime juice, green onions, red bell pepper, and shrimp.  Toss thoroughly to mix the flavors!

Ladle a portion of grits into a dish and top with the shrimp and bacon mixture!  Service some sliced limes on the side if you prefer!

This version of shrimp 'n grits turned out really well for me!  If you try it, I hope you'll enjoy it!


Making Chips Stretch

We had some friends over for lunch today after church and as I was getting the food ready to accompany the bratwurst we had on the menu, I realized I had only one bag of chips and it wasn't a big bag.  But, I also had some pretzels, so I thought I would spruce them up to make them a bit more appealing and they were a hit!

Here's the recipe I made...

Sweet + Salty Pretzels

5 cups pretzels (I used thin stick pretzels)

Put in mixing bowl.

3 Tbsp. butter, melted
1-2 tsp. hot sauce (I used Tapatio--mild but tangy), adjust to taste

Mix butter and hot sauce and toss pretzels with butter mixture.

5 tsp sugar
2 1/2 tsp cinnamon
1 tsp salt

Mix together and then sprinkle over pretzels.  Taste to see if they are sweet/salty/cinnamony enough for your taste.

Spread out on a cookie sheet and bake at 325 degrees for 10 minutes.

The original recipe can be found Here on Amanda's Cookin' site.  I decreased the amounts of different ingredients and didn't use coconut oil.   But, these were well loved by my family and my son has already asked that I make another batch tomorrow!  Our guests loved them too and they helped the chips stretch to be enough which was exactly what I had hoped for!

Saturday, June 30, 2018

Inexpensive and fun craft for all ages

It's Saturday afternoon and my kids found themselves with nothing to do.  My middle daughter found this fun craft on Crayola:  Dazzling Dot Painting   

I went upstairs grabbed some watercolors, q-tips, and white paper and we set to town!  My kids all had fun with it.  And I loved seeing the results!

Sunday, June 17, 2018

A Father's Day Treat: Shrimp Cocktail

Today we tried something that we haven't done in years.  I don't think I've ever actually fixed it for my kids before even though it's so simple.

Shrimp Cocktail

I usually buy raw shrimp for cooking at home.  But, today I decided to buy some cooked shrimp for Shrimp Cocktail.  I bought 16-20/lb size cooked shrimp.

Instead of buying cocktail sauce, I quickly looked up a recipe on my phone while we were in the store and discovered I'd be able to whip it up very quickly at home, but I needed some creamed horseradish.

Here's what I made...

Cocktail Sauce
1/2 cup ketchup
1/2 tsp. horseradish
1/2 tsp. worcestershire sauce
squeeze one wedge of lemon juice into the sauce (I squeezed 2-3 wedges).

For the spicy cocktail sauce person, modify the amount of horseradish.  I took about 1/3 of the mixture out and put it in a separate bowl and added an extra teaspoon of creamed horseradish.

The best thing about making cocktail sauce at home is that you can adjust the zinginess of the sauce.  I could make it non-zingy for my daughter and very zingy for my husband!

Sunday, May 20, 2018

Looking nice

When I was growing up, I had one pair of pants in sixth grade.  I lived in an area that didn't get very cold, so I didn't need more than one pair.  But, the reason I only had one pair that year was equal parts that I didn't need more than one pair and that my mom couldn't afford to buy me more than one pair.  When some kids in my art class made fun of me one week for wearing that pair of pants twice in one week, I remember feeling really bad.  But, I don't remember ever blaming my mom for it.

I was also at that awkward age where I didn't want to garage sale for clothes--because if I bought clothes in our neighborhood than the kids we bought them from would know.  They would know that I was wearing their castoffs.  And they would look down on me even more.  I was embarrassed.  So, instead of wearing clothes from garage sales, I had less.  Either way I was going to get comments made to me and looks from the kids at school, it was just a question of which reason was going to prompt those comments and looks...  All through middle school the comments about the clothes I wore and their brands invaded my world.  It didn't stop in high school until I found a group of friends that didn't care.  I avoided the girls who cared about those things.  But, those experiences have had a lasting impact on me and I know it.

One of the ways I've seen the lingering effects is in the concern I've had for the clothing my own children wear and a desire to provide for them.  When my girls were very young, I had an older woman say to me one time insensitively that all of that was for my good--that God had purposefully not given me more clothes.  The comment came in the context of a conversation in which I had expressed concern for my own kids having enough clothes.  While it is true that God did use that experience in my life, the woman's tone did not have any compassion in it--acknowledgement that what I went through hurt.

My girls are entering their teenage years and it is interesting to begin walking through this time with them.  We moved six months ago from a place where I had lots of area to store clothes for sizes ahead and where I had friends who were kind enough to pass their hand me downs on to me.  I was in a church community where kids didn't look down on other kids for wearing the clothes they'd grown out of.  They had worn hand me downs themselves.

On Sunday at church, I had the chance to talk with my girls and a few other teenage girls from church.  My girls don't mind clothes from garage sales.  And I'm very grateful.  We live in a larger area than where I grew up and my kids don't go to public school so they don't go to school with kids that I would buy clothes from around here when I garage sale.  And I have found that homeschool kids tend to aware that their parents are stretching their incomes because many of them are only one income families.  I haven't noticed the same attitudes about clothes among homeschoolers that I experienced going to public school growing up.

I was talking with a friend last night while our kids played a soccer game about this.  She agreed with me about how kids are and the comments they make.  But, what can we do about it?  Given that this is how the world is, how can we help our kids learn to be frugal, learn not to look down on others because of what they wear, learn to feel comfortable in their own skin--whether they are wearing hand me downs, clothes from a garage sale, or new clothes?

I don't think there's a one size fits all set of answers to these questions.  But, we can tell our kids stories.  That's what seems to connect with my girls and my son.  Stories give context without being preachy.  I tell stories about what I've learned.  Stories about what I'm still learning about myself, friendship, clothes, money, and people.  I point out to them the cost of new clothes and rejoice when we find treasures at yard sales or thrift stores or in the clearance section of stores--for things we need.

A few weeks ago, after I had a chance to go to some garage sales in our neighborhood, I talked to my daughter about the four sweaters and shirts I had gotten for her.  I told her what each one would cost given the item and brand in a store.  She was shocked.  The four items I had paid $3.00 for in all would have cost $150 new.  They were in good shape and had no stains.  We had a good discussion about it. 

Then yesterday, she looked through the clothes at a rummage sale we went to and found a navy and white Old Navy dress she liked for a dollar.  When we brought it home, the arm holes were large and the V was too deep.  I looked at it with her and made a few stitches on each side to bring in the arms.  Then, I added a snap to the V and it was fixed!  She wore it to church today and loved it! 

What are your thoughts about kids and clothes?  Garage Saling and clothes?  Helping them make good financial choices when it comes to shopping?


Sunday, April 15, 2018

On the Hunt in Nature with Kids!

I just want to include a quick post about a new book on my desk...

Do you have a child between the ages 4 and 8 years old who loves nature and hunting for insects, plants, and birds?

If you do, the book in front of me would be your child's alley!  On the Nature Trail is a new book published by Storey books.  It's like a Cub Scout or Brownie (Girls Scouts) badge in a book!  The cover will make any kid want to open it!  It made my kids want to sit down with it right away!


Inside the cover is a page of stickers for "nature patches".  Then, we move on to Trail Tips (which are great of course and totally appropriate for this age!).  Then we move to twelve different sections... including leaves, birds, toads, flowers...  Each section has examples of different samples so that kids can identify what they are looking at.  In the midst of these sections, there are great, super easy nature activities to do with your kids, like the music with acorns and nature critters you can make together!  


This book has awesome pictures and is so well formatted.  It's easy to read and follow.  The spiral binding makes it easy to turn the pages and for the book to lie flat when you want it to!  Awesome!  If you're looking for a gift for a kids who's a nature lover this is the perfect book!

Storey Books has a great sweepstakes that you can enter HERE!  Enter the sweepstakes by April 23rd!

Please note that I received a complimentary copy of this book for review from Storey books, but these opinions are entirely my own!  


Monday, January 22, 2018

House Repairs

We moved into a new home in a new state about a month ago.  I have been consumed with unpacking, settling, and getting what we need for our new home. 

Yesterday, I finally began to work on what needs to be done to the house.  We tried to buy a house that didn't need anything besides new paint, but that wasn't to be...

When we first moved in, my husband fixed the water tubing on the refrigerator and I found glass in the dishwasher which I was thankfully able to get out!

Last week, the microwave wouldn't stop running, which meant a call on the home warranty.  It got fixed, but then kept running again two days later.  So, another call needed to be made and the appliance repairman is coming this week. 

At the same time, another call needed to be made because seven light switches in the house don't work properly.  So, the electrician is also coming this week. 

In the past, we've owned older homes that needed a lot of work--big projects.  We hope that this house will not be quite that bad!  So far we have small projects, but they have surprised me. 

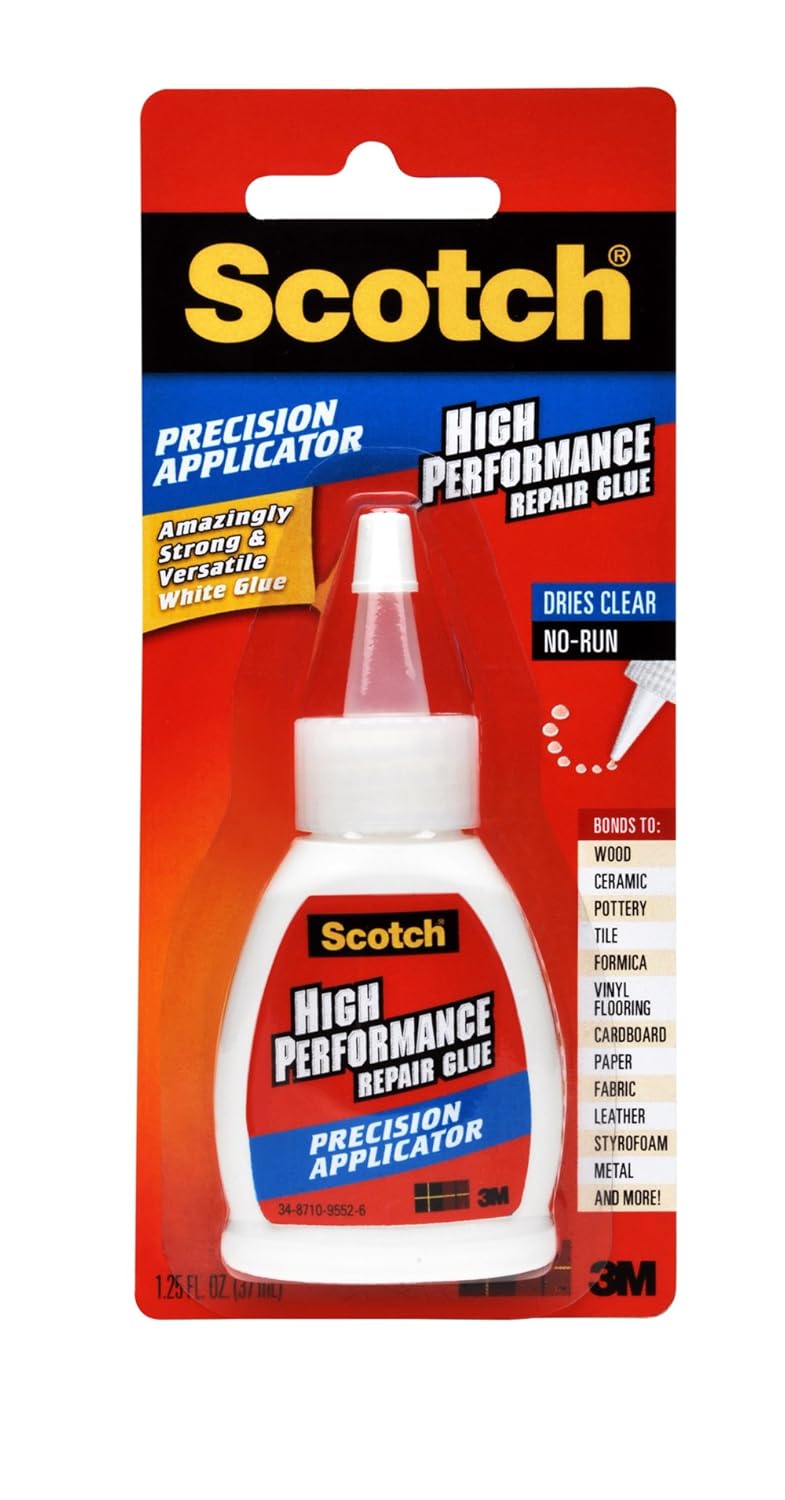
The biggest one so far is the tape on all of the bathroom and laundry room cabinets.  Instead of fixing the doors on all of the cabinets, the previous owner put transparent tape on all of the doors when the white covering on the doors began to separate from the mdf boards.  So, today I pulled all of the tape off of the cabinets and then cleaned off the remaining adhesive with a damp rag and baking soda.  Then,  I used Loctite Crazy glue for the difficult spots and this glue below by Scotch for the remainder of the gluing.  To insert the glue in between the gap in the boards and the white vinyl outside, I used a stainless steel nail file with a point.  I dipped it in the glue bottle, then put in the gap.  I repeated this over and over! 
We weren't present at the home inspection and somehow our realtor and home inspector missed that the previous owner had done this on all of the cabinets except for the kitchen cabinets. 

Thankfully, this glue worked really well when I inserted it using the file.  We are not planning on replacing the cabinet doors! 

Another small project I did was to touch up the stain on the inside panels of the kitchen doors on the outside.  I used this stain 
I had both the oak and mahogany colors.  I put a small bit on a rag and rubbed it over the surface of the panels.  They looked so much better instantly!  I'm thankful this project was easier and faster than the first! 

Home ownership is an interesting thing.  I'm starting to realize that there is always something that can be revitalized! 

Thursday, November 23, 2017

Letting Go

Wow.  It's been one of the hardest weeks of my life.  Although I think there are some other weeks that are right up there when I think about it.  But, I read a quote on another gal's post Here from Leonard Cohen
                            
"Everything is broken.  That's how the light gets in."  

Breaking is something that we see as a bad thing, but maybe it's not all bad.  I know that I act like I have it all together when I'm really just holding it together like everyone else.  Breaking brings reflection and humility.  The breaking has always made me realize not to say "That won't happen to me."  

I'm very transparent, though, so once someone assumed I wasn't looking at my heart because the person thought my transparency meant I was sharing my heart at the same time--the breaking and healing of my heart.  I wasn't.  That part I only trust to a few close friends who understand me. 

But, the relationship between what other people see of me, my transparency, and my heart has taught me something else that I always keep in mind.  Those few friends that I trust--they have tough parts of their lives too--that they've shared with me.  The sharing shows me that we all have messy lives.  And we all have tough parts of our lives that we don't show other people most of the time--usually those parts are the toughest parts of our lives!  

I made a stupid mistake yesterday.  I've been kicking myself ever since.  Really hard.  I haven't let it go.  But, is that what God wants for me?  I feel sorry for my mistake.  I know what I did wrong.  It was humbling.  Why have I been kicking myself so hard?  I think because of fear.  Fear of what my mistake will mean.  But, should I be afraid of that?  No.  Over and over in God's Word, I read that I should not be afraid.  

One of my favorite verses is Psalm 112:7-8

They will have no fear of bad news;
    their hearts are steadfast, trusting in the Lord.
Their hearts are secure, they will have no fear;
    in the end they will look in triumph on their foes.


Who is my foe?  We know from God's Word that ultimately our foe is Satan.  My foe is my fear.  Satan has been feeding my fear.  It keeps me from the peace of trusting God.  

A dear friend emailed me today that she doesn't let go of her mistakes easily and that she has to ask God's forgiveness for that.  Her words made me think.  Would I want my kids to be so hard on themselves and not forgive themselves the way I am not doing?  No!  Do I need to ask God's forgiveness for not forgiving myself?  I think I do.  

My kids kept saying to me yesterday that God is in control.  It's easy to take that for granted when things are easy, but it's so much harder when things are tough and when we are stuck.  I believe it in my head, but I need to remember it in my heart, too.


Friday, November 10, 2017

Another Plant Killer...

Actually, that's not the best title for this post, but it's what many people think when they ponder house plants.  I've heard so many people over the years tell me that they can't grow green things. 

My philosophy when it comes to outdoor plants is to put things in the ground and see if they grow!  I suppose it's a little more complicated than that, but not much.  If the dirt didn't like to grow things, then putting in a raised bed is an easy solution or using big pots.  Sun is the key.  Picking spots for plants where they get enough sun, but not too much.  Sometimes those spots get sun that's too hot.  But, that's why I generally go with hardy plants.  Outside plants that I find tend to be easier to grow are green beans, tomatoes (smaller ones--large ones can be more finicky), strawberries (propogate a lot) as long as you don't have rabbits or deer that like to come eat them, roses, basil, bulbs (like daffodils, irises, lilies, and tulips).  Bulbs are by far the easiest and I love them because it's always a surprise then they bloom!  Dig a little hole, put in a bulb, and then cover it up. And wait for it to sprout (either in the fall or spring depending on the bulb). 

But, when it comes to indoor plants, I feel like all of the people who have told me that they can't grow green things or that they kill plants.  I haven't known how to take care of them... which is why I'm so excited about the book I just sat down to read (in 30 minutes!). 

House Jungle:  Turn Your Home Into a Plant-Filled Paradise! 


This small book packs a huge punch with all the helpful information in it!  It will appeal to anyone who likes to draw with its fun watercolor illustrations.  The book begins with what you need and how to care for houseplants.  Then, it goes on to talk about the different types of house plants and which ones will be okay with shade and which ones like sunshine.  In each section, the author, Annie Dornan-Smith does a wonderful job of writing simply, but descriptively.  What she shares in this book has inspired me to pursue decorating my home with indoor plants and has made me think it may be possible!

If you've ever wanted to keep indoor plants, but have felt intimidated by how to take care of them, I highly recommend checking this book out!   It would also be a fun and creative gift for someone (along with a small house plant) in the middle of winter when we all long for the green of the outdoors! 

Please note that I received a complimentary copy of this book for review from Storey Books, but I love this book and these opinions are entirely my own!

Thursday, November 9, 2017

New Horse Book for Girls who love Horses!

A few years ago, I was in the bedroom of a friend's daughter to see how they were decorating her new room.  I noticed the stack of horse pictures on the wall.  Over the next few years, as my middle daughter's love of horses grew, I saw her begin to collect pictures of horses from magazines and tape them up on her bookcase and walls.  But, like most moms, I wanted her to have some posters of different sizes to put up on her walls instead of cut out pictures. 

Soon we are going to be moving again and my daughter will have a chance to decorate her new room, so I've been looking for fun posters she can decorate her room with.  I came across a great book of posters for her to use that I know she's going to be excited about!

Sitting in front of me is Wild For Horses: Posters and Collectible Cards.   


There are two larger size posters and 24 single page posters (10" x 12").  On the backs of each poster is some fun information about horses.  Some of the posters have inspirational words on them, but most are simply full-color pictures of horses.  At the back of the book are 24 trading cards with a different horse breeds on each one.  These are a great size and will be easy to keep together and enjoy.  If you're looking for a fun book of horse posters, I'd definitely check this one out!  It would be a great birthday or Christmas gift!

Please note:  This book is a little tricky to find on Amazon if you only search for Wild for Horses.  You need to type in the whole title or use the ISBN# 9781612128887. :)

Please note that I received a complimentary copy of this book for review from Storey books but that these opinions are entirely my own. 


Wednesday, November 8, 2017

Baking for Kids!

When my girls were younger, I started looking for a good kids' cookbook.  I love to cook and I wanted my kids to have a cookbook that they could learn to cook from with simple recipes.  I started comparing the books at the library and the bookstores.  I was shocked by how much I disliked most of them!  Several of them had tiny print.  Some of them didn't have any basic directions for the kitchen or explanations of cooking tools.  Many of them had recipes that I knew my kids would never want to cook!  A lot of the directions were overly complicated. 

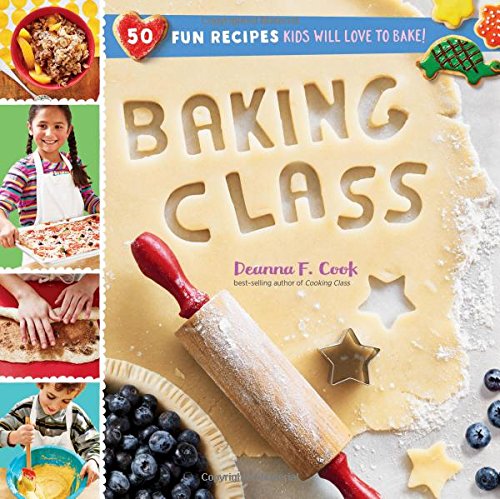
So, I was really excited a few years ago when I came across Cooking Class by Deanna Cook.  This cookbook had just what I was looking for--great photos, directions, kitchen rules, and recipes that kids would want to cook!  It even had fun stickers and recipe cards at the back of the cookbook. 


This year Storey Books published another great cookbook for kids by Deanna Cook, Baking Class.  I absolutely love this cookbook!  From beginning to end, I know it is going to make kids want to cook
and parents smile. 

The first section of the cookbook covers vocabulary, cooking equipment and ingredients, cooking safety, and measuring (which is very important in baking!).  This section is done so well.  I was impressed.  I know that many cookbooks try to save money with the printing by using drawn pictures for these sections, but photos are so much more effective in conveying what the ingredients look like and what the vocabulary of baking means. 

From there, the cookbook is divided into recipe sections that cover breakfast, quick snacks, and desserts.  The recipes range from super easy, to medium, to a little more difficult.  I loved the breakfast recipes and compared them to recipes I currently use.  The scone recipe is very similar, although I omit the salt because I use salted butter.  I would caution one direction on the scone recipe in particular--kids are directed to use a pizza wheel or a knife to cut the scones and I would pass on the pizza wheel.  Kids tend to press hard on things and they could easily mar the cookie sheet.  A butter knife would be a better choice.  Other than that, I loved the other recipes for breakfast and I know many of them will likely become new additions to my children's breakfast repertoire. 

Moving on to the other sections a couple of things stood out to me.  First, the recipes generally did not use a stand mixer.  They either used a pastry blender and spoon or a hand mixer.  Both are easier for kids to control.  Second, there were fun pictures that grabbed my attention like the Monkey bread on the Monkey Munch Banana Bread page.  I know that this is probably the very first thing that my children are going to make from this cookbook since monkeys are the favorite animal of my family. 
Also, I am also looking forward to my children making bread.  The pictures explaining to kids how to kneed are great illustrations and make sense.  I can't wait for them to try!

Frankly, I've looked at a lot of cookbooks and I think adults are going to love this as much as their kids.  The pictures on the buttercream frosting page are going to be super duper helpful!  Frosting can be tricky and the directions and pictures will help children be much more successful in their attempts at frosting. 

The pictures will make kids smile and want to spend time in the kitchen.  But, the recipes and directions will make mom, dad, and grandparents smile!  I think it would be best for kids ages 6 and up, but younger kids could easily participate in making the recipes--they just wouldn't be able to read the directions and do some what is required on their own. 

Is there anything I don't like about this cookbook for kids?  I have just a few minor tweaks.  Nothing major.  I prefer Snickerdoodles that have cream of tartar--the recipe here is a plain cinnamon sugar cookie.  And I wouldn't refrigerate pie dough quite so long before working with it--it can get very tough to work with.  But, other than those few minor things, it's great! 

If you're looking for a fun Christmas gift for a kid you know who loves to cook or is interested in cooking, I highly recommend checking out this cookbook!  It's one of the best around! 

Please note that I received a complimentary copy of this cookbook for review from Storey books, but these opinions are entirely my own and I love this book!

Monday, November 6, 2017

Christmas is coming...

November has arrived.  I'm not ready to play Christmas music in November or even really think about it much, but there is one part of Christmas that I start early--making a list of the gifts I plan on giving my family and friends. 

I have found over the years that the best Lego sales are during November, not December, and my kids all love Legos.  So, I plan on being on the lookout in the coming weeks...

This year, we're probably moving in December, so I feel the need to make sure I'm more on top of my planning than usual.  I don't even know where we'll be living when Christmas comes this year.  I know where one box of lights is in my garage and I plan on making decorations with construction paper with my kids no matter where we are.  I also plan on getting my family's gifts together and keeping them in a box together.  Thankfully, I do know where the wrapping paper is and it's not in storage! 

But, this year is going to be different for us.  We're not settled.  We don't know what to expect and I know extra flexibility and creativity is going to be required.  We do know that we'll be together and celebrating Christ's birth as a family.  And really, that's what's most important anyways. 

Tuesday, October 31, 2017

Awesome Needle Craft Book for Kids

I have a collection of craft books in our home because my middle daughter loves to make a wide assortment of crafts.  But, I have never seen her as excited about any book in this collection as she is about the newest addition to that collection...

Stitch Camp: 18 Crafty Projects for Kids & Tweens by Nicole Blum and Catherine Newman


This book tackles the most popular fiber arts:  sewing, knitting, crochet, felting, embroidering, and weaving.  In the last few years, I have noticed how popular felting and weaving have become and they are new additions to the others which have long been popular hobbies.  It feels like all of these hobbies have been going through a revival and much of that is due to fun projects like these in this book!

In my middle daughter's words, "The directions are easy to follow.  The crafts are really cute and fun to make!  I can't wait to learn so much more from this book!"

When this book arrived at our home, I didn't even get to look at it for days on end.  My middle daughter absconded with it to her room and wouldn't let it go!  She started by making the bean bags and had already made ten of them within a few days.  She enjoyed them, and so did everyone she gave them to. 

Each section begins with directions about the craft and then follows with project directions.  After the project, more directions are included--followed by a project that needs those skills.  This pattern is repeated throughout the book, so that the child builds skills while doing projects along the way.  As a mom, I love that the materials for the projects aren't expensive.  I was impressed that there was even a note for left-handed crafters--suggesting that they look at the illustrations in the mirror and think about doing them backwards!  This was a thoughtful inclusion.  I think this Christmas I'm going to use several of these projects for my girls to make for others as gifts.  The Art Pillow is one that I know will be loved and easy to mail! 

A week after the book's arrival, a good friend of mine was visiting (who Sami wanted to share the book with) who gave this book a raving review as well.  She looked through it and was thoroughly impressed by the directions and crafts.  She wished for the book herself as an adult even though she already knows how to do each of the types of crafts included in this book. 

This book is one that I highly recommend if you have a child who loves to craft!  It's a treasure!

Please note that I received a complimentary copy of this book for review from Storey Books, but that these opinions are my own. 

Taking care of ourselves and the ones we love

We moved a little over a month ago and it feels like my children have had one injury after another!  First it was my son's broken toe the week before we moved.  That was followed by a jammed finger for my oldest daughter and then another jammed finger for my son.  Then, yesterday my oldest daughter and I lost control of Molly and she went after two dogs (who thankfully were behind a fence).  As we grabbed for the leash, Autumn's hands and mine got abrasions from the leash.  It was tough.  Autumn's hands got some bad scrapes.  They didn't bleed, but they were deep and they stung.  Mine stung too, but they weren't as bad. 

What surprises me is how quickly something can happen and how quickly someone can get hurt!  It's so hard when it's my kids.  I find that my big thing is to first calm them down.  Then, to figure out how to care for the injury. 

I used to keep a huge, heavy Mayo Clinic book on my shelf, but with this last move I took it to Goodwill so that it will find a new home.  But, a new small book has taken up residence in its place.  It's The Natural First Aid Handbook.  It tackles different topics, but ones that are more relevant to our lives.

The Natural First Aid Handbook was written by Brigette Mars who is an herbalist.  So, it is a first
aid book geared towards using more natural remedies. If you love essential oils, then this book would be right up your alley!  But, even if you're not (like me), it has a lot of helpful information.  For example, I liked the sections on Frostbite and Diarrhea.  She included several helpful pieces of information that I will definitely put to use!  Drawn illustrations are included when they are helpful to have. 

But, most of all, I love the size of this book.  In a world where everything seems to be getting bigger and bigger, this small book packs a huge punch.  I know that many people ask the question today, why do I need a book?  I can find everything I need online...  While it is true that we can find a lot of information online, that finding process takes time.  It's much faster and more efficient to have a compact reference book on the shelf that's easy to find when it's needed! 

Please note that I received a copy of this book from Storey books for review but that these opinions are my own. 


Tuesday, October 17, 2017

Moving and Adjusting

This past summer has been a crazy one for our family.  We put our house on the market and planned on moving when it sold.  In the midst of that, my husband got a new job.  Then, we got a contract.  But, just as we were moving things into storage... it fell through.  Then, we went on vacation and as we were coming back the contract went active and we had 2 1/2 weeks to move.

I came to remember the craziness, stress, and busyness of moving!  I also had forgotten how expensive it is to move!  What are the costs of moving?

It depends...

1.  Boxes and tape.

I was so blessed this time to have two friends who gave me a great amount of moving boxes that were in great shape!  For weeks, I made the rounds of local liquor stores to collect beer boxes--they're the perfect size for books so that they wouldn't be too heavy to move.  My family is full of readers, so we need lots of these boxes.  I packed at least 80 of these boxes for this move.

I bought 12 rolls of packing tape on Amazon.  It was the cheapest deal around--and it's cheaper than buying cheap duct tape.

I did also buy 1 roll of colored duct tape and put a small piece on each box that needed to go inside our home when we moved to separate them from the boxes that would be stored in the garage.


2.  Storage.

As we were getting ready to move the first time, we were going to get a pod... except that when we talked on the phone to the sales person, we realized we would have to get 3 or them.  3...  The glitch for us was that they were going to be placed on our parking pad which had wires over top of the pad and they weren't quite high enough for delivery of the pods.  They would also have to be delivered at different times, picked up and then another would be put in its place.

Complicated.

The cost of the pods was something we also hadn't realized.  It sounds inexpensive when you have 1 pod.  But, the pick up, storage, and delivery of the pods was going to cost us $1400 for 2 months.  That was with a 10% discount code that I found online.

I'm grateful we canceled the pods...
Because the contract fell through.

If we'd used pods, we would have been committed to the cost for a month.  There isn't any coming and going from that decision.

So, instead we decided to move things into self storage.  We chose a place nearby and began moving boxes.  Self Storage prorates the rent through the end of the month, but does not refund any unused portion of that month once it is paid for.  They will do automatic payments so that you don't miss a payment and lose your stuff!

When our contract fell through, we only lost $189 instead of $750 that would have been our POD investment.

In the end, when our house went under contract a month later, we opted to make choices about what to keep and get rid of.  What couldn't fit into our temporary home or garage are needed to find new homes--either with friends or through the Goodwill nearby via a donation.

3.  A Moving Truck.

When it came time for us to move, we rented a moving truck through Penske.  The choices we looked at were Uhaul and Penske.  They have different cost structures.  The cost breaks even at 100 miles.  More than 100 miles, Penske was the cheaper option.  But, if you can get the AAA discount with Penske, then Penske is cheaper after going only 52 miles.

4.  Movers (or Friends and Family)

I live with pain.  My husband and I knew we needed help.  One of my friends who moved earlier this summer hired movers to help them.  We have a church family that we sent an email out to--to ask for help.  Their help was such a blessing!  We had 15 people show up Saturday morning to help us move everything into the truck and had 8 people show up on the other end to help us take everything out.  We could never have done it without them!  Because of the help of our friends, we were able to return the truck in less than 24 hours!

5.  Food

This is one that I had forgotten about.  One of the biggest gifts we were given the day before we moved was a meal!  A friend brought us dinner-- a dinner that was enough for us to eat on Saturday after we had moved in.

I bought bagels, cream cheese, coffee, and orange juice for workers at the beginning.  On the other end, I bought subway sandwiches for lunch.

But, there's another extra cost for food--meals that we needed to eat out because our home took 5 days to unpack and for trips while we were looking for a new place to live and had to eat out.

6.  The in-between

I've discovered that everyone takes a different amount of time to unpack.  Some things go missing or can't be found for a little while.  The trick is figuring out what you need to replace in the meantime and what you need to make do without until you find it!


Moving is complicated and full of different costs a long the way... these are the ones that I've been learning about!