My kids are nowhere near college, but I think about college once in a while. Mostly I think about it when I listen to friends talk about their children's applications to college and attending college. I also think about it when I listen to college grads talk about their loans.
There was an article in the Baltimore Sun about financial aid packages this year. Many schools have added a disclaimer to the financial aid packages they've been sending out this year. The disclaimer is something about funds subject to change. The increase in disclaimers is because of the federal budget's situation and sequestration. There has been an added uncertainty to colleges' ability to guarantee loans this year.
As my husband and I have juxtaposed the amount of loans colleges are offering to students for one year's attendance beside the reality of the job market today, we have become more and more aware of the challenges young people face.
An interesting thing came up the other day in a discussion with a friend about how to pay off college loans. I did not have college loans, but my husband did. When I went through grad school, I lived on a shoe string budget and attended a program I could afford. I used a small savings account I had to pay for one year of my tuition. And I worked. I substituted, worked a second job for the church I attended, and housesat whenever I had the opportunity. I had this strong conviction that I needed to make it through grad school without debt.
In our culture, it has become an accepted way of thinking to live with debt. Debt beyond a mortgage and car payment.
What does having debt do? It locks up your budget. It obligates you to paying certain amounts each month--usually for a long span of time.
Someone told me that a lot of folks are now giving the advice to grads with loans to just pay the minimum on their student loans. Hmmm... I wondered the reasons why when I heard it, so I googled "college loan repayment advice minimum payment". I read several articles and gathered that financial advisers are giving the advice to pay the minimum and instead: save a buffer first, then put some aside for retirement, start an IRA, pay off credit card debt, invest--and then pay off your loans. Really? I read a few more articles and found the advice is pretty mixed. Some folks say pay them off fast, some don't.
What I noticed is that the articles who advocated putting off paying student loans didn't mention a few things.
#1 They didn't mention how monthly payments lock up your budget and can make it much less flexible to cope with emergencies and life changes.
#2 They didn't mention the stress of living with debt.
#3 They didn't mention that it's hard to get an investment that will pay more than you owe in interest nowadays.
#4 They didn't mention that if you marry after graduation and you both have debt, your burden grows. It doesn't shrink.
In my mind, I have always thought it a good idea to pay off student loans faster. Loans are a burden that can lock up your budget. I couldn't think of an exception. But, I learned about one today.
In the case of some service sectors like medicine where loans are astronomical, students take out their loans with the understanding that if they pay the minimum for 25 years, then the rest of the loan will be cancelled out. The minimum payment is a percentage of their income. In the case of some, these loans can never feasibly be repaid unless the former student comes into an enormous windfall of funds.
I asked the friend who explained this to me what they thought of other student loans. The person explained that their friends are all paying off their loans ahead of schedule. If it wasn't for the cancellation after 25 years, he/she likely would do the same thing. But, it simply isn't realistic to do so.
I think I'm on the same page as Dave Ramsey. I was just on his website and his step #1 is to build a $1,000 emergency fund. #2 is to pay off all debt, excluding your house. His tip is to pay off the smallest loan first--and I would say the same thing. Pay off the smallest college loan first. Then, move on to the next. There's a sense of satisfaction and a feeling you can do it once you get one loan paid off.
My husband and I found ourselves in this situation a few years ago. Because of vehicle purchases and emergency house repairs, we tightened our belts and worked hard at paying off that debt. God was so gracious and provided the means to do that. But, that experience has made me not want to end up with several loans again if I can help it.
I worry about college students who are taking out huge amounts of loans today and what it will mean for their lives in the future. I know I shouldn't worry, but I do. Debt may be invisible, but it's still carries a lot of weight around with it.
Wednesday, April 10, 2013

Crock Pot Ham
My ham went well on Easter. But, I did discover that 10 hours on high in a large crockpot would be better than 8 hour. Ours was in the crock pot for 8 hours this Easter. It was very good. But, not as good as my first ham a while back that was cooked for 10 hours.
So: Cooking time for Crock Pot Ham: 10 hours.
I wrote a recipe for how I fix it a while back here: http://makingthingsstretch.blogspot.com/2013/01/crock-pot-ham.html
If you tried it, I hope it turned out well!
So: Cooking time for Crock Pot Ham: 10 hours.
I wrote a recipe for how I fix it a while back here: http://makingthingsstretch.blogspot.com/2013/01/crock-pot-ham.html
If you tried it, I hope it turned out well!
Saturday, March 23, 2013
Homeschooling Posts
In my mind, it has been getting confusing about where to post my thoughts about homeschooling because lately my mind is focusing on both curriculum and on it being affordable or free. So, I think I'm going to move all of my homeschooling thoughts over to my lovetopaint blog. I am also going to move my page for free worksheets and sites that I love over there as well from this blog. Making Things Stretch is going to stick to ways I find to save money, thoughts I have about being frugal, hobbies, homemaking, cooking, and recipes I come up with. So, if you're interested in reading those thoughts, I'm going to post them over at http://lovetopaint.blogspot.com
Friday, March 22, 2013
Handwriting Practice
A few years ago, I started using Handwriting Without Tears for our handwriting curriculum. I realized last year, though, that Handwriting Without Tears is really focused on public schools, not homeschoolers. I wouldn't say they are unfriendly to homeschoolers (many homeschoolers use the program), but I wouldn't say they are exactly friendly either. They are focusing their marketing and curriculum efforts primarily on equipping classroom teachers. So, I haven't really wanted to purchase more workbooks from them. I suppose that sounds silly. In any case, I have my kids practice their handwriting each day during grades K-4. In third grade, I do have my kids learn how to write in cursive. I enjoy it and I think that it is beautiful. I think kids learn a lot from practicing cursive. It is often easier to write quickly than manuscript.
I have found several great free printing and cursive websites that I am using, am going to use in the future, and have already used. After my children have practiced the letters singularly, I am going to write a list of 4-8 words on large lined paper for them to copy 3 times each. Another exercise is for them copy words out of a beginning picture dictionary and make their own picture dictionary. One more idea is for my child to find their favorite picture book and copy it one sentence at a time as copywork/handwriting practice. My daughter Sami loves to do this just because she wants to.
In terms of what letters to introduce first, kidzone groups the lowercase cursive letters into similar shaped letters. I am going to follow this plan with Sami next year. Handwriting without Tears lists their order HERE if you'd like to use other worksheets and follow their order. With printing, I've found that most printing worksheets go from A to Z.
I have found several great free printing and cursive websites that I am using, am going to use in the future, and have already used. After my children have practiced the letters singularly, I am going to write a list of 4-8 words on large lined paper for them to copy 3 times each. Another exercise is for them copy words out of a beginning picture dictionary and make their own picture dictionary. One more idea is for my child to find their favorite picture book and copy it one sentence at a time as copywork/handwriting practice. My daughter Sami loves to do this just because she wants to.
In terms of what letters to introduce first, kidzone groups the lowercase cursive letters into similar shaped letters. I am going to follow this plan with Sami next year. Handwriting without Tears lists their order HERE if you'd like to use other worksheets and follow their order. With printing, I've found that most printing worksheets go from A to Z.
Wednesday, March 20, 2013
Corned Beef Hash
For St. Patrick's Day, I fixed corned beef in the crock pot, roasted potatoes with rosemary and olive oil, and steamed cabbage. One of my husband's favorite meals after St. Pat's is a breakfast of corned beef hash. I looked up some recipes online and this is what I ended up fixing:
Corned Beef Hash
Saute 1/2 small onion, minced with 2 Tbsp. of butter. Add 2 cloves of garlic (sliced or minced) and 1/2 red bell pepper chopped. Chop 1 1/2 cups roasted potatoes into pieces the size of a fingertip. Add potatoes and 1/2-3/4 cup chopped corned beef hash. Saute until well mixed and softened. Sprinkle with pepper.
No need to add salt.
The rosemary from the potatoes flavors it nicely.
Other recipes for hash call for adding beef broth, but my husband prefers it this way. Chopped and softened, but not mushy.
One last note... A friend lent us the a cookbook about how to use knives. I learned a helpful tip from it that I hadn't known. GARLIC When it comes to chopping fresh garlic, peel the clove off the bulb. Then, slice through the outer wrapping and slice the clove in half lengthwise. You can pull out the germ if it has grown if you wish. The germ is supposed to make it more bitter if it has grown. The outer casing will peel off very easily now. Slice and mince the clove of garlic.
Corned Beef Hash
Saute 1/2 small onion, minced with 2 Tbsp. of butter. Add 2 cloves of garlic (sliced or minced) and 1/2 red bell pepper chopped. Chop 1 1/2 cups roasted potatoes into pieces the size of a fingertip. Add potatoes and 1/2-3/4 cup chopped corned beef hash. Saute until well mixed and softened. Sprinkle with pepper.
No need to add salt.
The rosemary from the potatoes flavors it nicely.
Other recipes for hash call for adding beef broth, but my husband prefers it this way. Chopped and softened, but not mushy.
One last note... A friend lent us the a cookbook about how to use knives. I learned a helpful tip from it that I hadn't known. GARLIC When it comes to chopping fresh garlic, peel the clove off the bulb. Then, slice through the outer wrapping and slice the clove in half lengthwise. You can pull out the germ if it has grown if you wish. The germ is supposed to make it more bitter if it has grown. The outer casing will peel off very easily now. Slice and mince the clove of garlic.
Tuesday, March 19, 2013
How Do Foodies Go Gluten-Free?
I have had several friends go gluten-free and we tried at my husband's doctor's suggestion for a short time. It's a challenging endeavor. You have to completely change how you cook and eat. I have a very good friend who's done an amazing job doing that because her husband has celiacs. In her case, she needs a lot of family food recipes. But, if you aren't cooking for a family and you are looking for more gourmet recipes with complicated tastes, then what do you do?

Well, a few weeks ago, a new cookbook arrived in the mail. It was The Complete Gluten-Free Whole Grains Cookbook by Judith Finlayson.

If you are an adult who has just been diagnosed with celiacs
or gluten intolerance or a gluten allergy and you love to cook, then this may
be a great cookbook for you. Who this
cookbook is not for? Parents with little
kids (like me). The recipes in this
cookbook draw on a wide variety of gourmet flavors and combinations. In the beginning, there is a section about
how to cook and store gluten-free whole grains including corn, amaranth,
buckwheat, millet, oats, quinoa, sorghum, and different varieties of rice. What I especially like about this section is
that the author explains how to cook many of them with a rice cooker,
microwave, or slow cooker which makes it seem much more doable to cook these
grains I'm not used to.
The recipes are unusual.
They include a wide range of flavors, as I mentioned before. In the breakfast section, you'll find a
recipe for almond-flavored millet with cherries. In the main dish section, you'll find
southwestern turkey stew with cornmeal dumplings and salmon and wild rice cakes
with avocado-chili topping. For flours,
she relies primarily on sorghum, tapioca, a little rice, and coconut. Xanthum gum is also an ingredient you'll need
for many of the recipes in this cookbook, though in very small amounts. I found it to be most affordable to purchase
Bob's Red Mill's Xanthum Gum at our local grocery store when it was on special
one week for $6 a pound. I was surprised that sorghum was often the author's choice for flour. My good friend explained to me that sorghum does have a distinct flavor that you have to get used to if you haven't cooked with it before. So, if the sorghum flour isn't to your liking, I would try a substitution before giving up on a particular recipe. I read on one blog that you can substitute white rice flour for sorghum, but that the author of that blog found this to make for blander recipes.
Unfortunately for me, I can't say that I tried any of these
recipes and that's because I know my little kids, who are normally my taste
testers aren't quite as experimental as these recipes. My plan was for my husband to be my taste tester, but that also didn't work out when he decided to not stay on the gluten-free track. But, we have lots of foodie friends and I
know from our conversations with them that these recipes would be right up
their alleys.
So, if you're a foodie who can't have gluten now--I'd try this cookbook! Amazon does not have a preview available of the cookbook, but you can find one HERE on Robert Rose's website.
Please note that I received a complimentary copy of this cookbook for review from the Robert Rose Publishing.
So, if you're a foodie who can't have gluten now--I'd try this cookbook! Amazon does not have a preview available of the cookbook, but you can find one HERE on Robert Rose's website.
Please note that I received a complimentary copy of this cookbook for review from the Robert Rose Publishing.
Friday, March 15, 2013
Upholstery Stain
We've had our couches for ten years. They're in pretty good shape all things considered. But, one of them has had a stain on the right seat cushion. It's not super noticeable--but I knew it was there. I think it's always made my husband wonder how long they would last. Today was our cleaning day. Every Friday, I pull out my checklist and the kids' lists for cleaning. I glanced at that spot when I was in the living room and wondered why I hadn't tried rubbing alcohol yet. So, I went to the bathroom to get it out. I grabbed a rag, squirted the liquid on the couch and began rubbing. I was shocked to turn over the rag and see that it really had picked the dirt up off of the couch.
I came back a little while later to check on it. It looks great! Yippee! It reminded me that there are a lot of ways to save money. One of the big ones is just making something last longer. I'm hopeful our couch will now last a lot longer and save us some money in the process!
I came back a little while later to check on it. It looks great! Yippee! It reminded me that there are a lot of ways to save money. One of the big ones is just making something last longer. I'm hopeful our couch will now last a lot longer and save us some money in the process!
"Not so" free return shipping
Free return shipping sounds like an awesome thing. It makes it sound like you can purchase something and return it if it's the wrong size, then get the right size sent to you--all for free. Well...
not exactly.
Or at least that's what I discovered yesterday. I have really only returned things to Amazon. Amazon does send free return shipping labels if an item was damaged in delivery. If I receive something from a third party seller who is selling on Amazon, usually the return shipping cost falls with me.
Yesterday, I had to return my husband's boots to Revzilla, a motorcycle apparel company. Their customer service is easy to deal with. But, I learned something important in the process. The initial shipping to us is free and when they receive the returned item, the will send the replacement size for free. BUT, the shipping to return the item to Revzilla is not free. If you speak to their customer service, you can pay $7.45 and they will email a prepaid UPS shipping label.
Zappos is another site that offers free returns. But, on their website they specify that they will pay for the return shipping.
So, the lesson I learned is to read the fine print! Some return is shipping is free and some is not. In this case, Revzilla was kind enough to give us a free return shipping label because this was the first time we had returned something to them.
not exactly.
Or at least that's what I discovered yesterday. I have really only returned things to Amazon. Amazon does send free return shipping labels if an item was damaged in delivery. If I receive something from a third party seller who is selling on Amazon, usually the return shipping cost falls with me.
Yesterday, I had to return my husband's boots to Revzilla, a motorcycle apparel company. Their customer service is easy to deal with. But, I learned something important in the process. The initial shipping to us is free and when they receive the returned item, the will send the replacement size for free. BUT, the shipping to return the item to Revzilla is not free. If you speak to their customer service, you can pay $7.45 and they will email a prepaid UPS shipping label.
Zappos is another site that offers free returns. But, on their website they specify that they will pay for the return shipping.
So, the lesson I learned is to read the fine print! Some return is shipping is free and some is not. In this case, Revzilla was kind enough to give us a free return shipping label because this was the first time we had returned something to them.
New Page
Along the top bar, there's a new page for free worksheets and pages I love. I tend to post my curriculum reviews and homeschooling thoughts on my other blog: lovetopaint.blogspot.com. But, I thought I'd post that page here, because this blog is all about the ways I try to save money and the arts of homemaking (ie. cooking, gardening, photography, etc.). My plan is to update it periodically!
Thursday, February 28, 2013
Mashed Potato Soup
My family likes meatloaf and mashed potatoes. But, we always end up with extra mashed potatoes that never get eaten and then end up in the trash. So, I decided to make a soup with them. With sequestration coming, I've been mindful daily of not wasting food and how we spend our money. So, here's my recipe...
Mashed Potato Soup
1 medium or large onion, chopped
2 Tbsp. butter
Saute onion in butter until softened and beginning to brown. Add 1/2 tsp. dried thyme. Saute for a minute until fragrant.
Add 4 cups chicken broth and left over mashed potatoes. In this case, I think I had 3 cups of mashed potatoes left. Vary the chicken broth with how much mashed potatoes you have--you don't want it too runny. Use a whisk to mix in the potatoes. After it is all mixed, let it simmer for 5 minutes.
Then put soup in a blender and puree. Return soup to pot. Simmer until it is the thickness you desire. As it cooks, it will thicken.
Add 1 tsp. brown mustard, 1/2 cup half and half, and 1 or 2 cups cheddar cheese. You can also add 1 or Tbsp. of butter to give it a richer taste. Add salt and pepper to taste.
Brown a ham steak in a separate fry pan and chop into bite size pieces. Add ham to soup.
Serve. My family often likes to throw in a few croutons when it is served.
So, that's our soup. My husband was not looking forward to it and was skeptical, but he was surprisingly happy with how it turned out! My kids all ate it too. The best part is that there's no more leftover mashed potatoes in our refrigerator!
Mashed Potato Soup
1 medium or large onion, chopped
2 Tbsp. butter
Saute onion in butter until softened and beginning to brown. Add 1/2 tsp. dried thyme. Saute for a minute until fragrant.
Add 4 cups chicken broth and left over mashed potatoes. In this case, I think I had 3 cups of mashed potatoes left. Vary the chicken broth with how much mashed potatoes you have--you don't want it too runny. Use a whisk to mix in the potatoes. After it is all mixed, let it simmer for 5 minutes.
Then put soup in a blender and puree. Return soup to pot. Simmer until it is the thickness you desire. As it cooks, it will thicken.
Add 1 tsp. brown mustard, 1/2 cup half and half, and 1 or 2 cups cheddar cheese. You can also add 1 or Tbsp. of butter to give it a richer taste. Add salt and pepper to taste.
Brown a ham steak in a separate fry pan and chop into bite size pieces. Add ham to soup.
Serve. My family often likes to throw in a few croutons when it is served.
So, that's our soup. My husband was not looking forward to it and was skeptical, but he was surprisingly happy with how it turned out! My kids all ate it too. The best part is that there's no more leftover mashed potatoes in our refrigerator!
Saturday, February 23, 2013
February Doldrums
When I was a kid, my grandma always made jam and jellies. My mom learned how, but I never did. I wish I had. I've honestly been very intimidated by canning. So, I have been looking for a good cookbook to help me learn how. Two years ago I reviewed a canning cookbook published by Storey Publishing. The recipes were good and it had a ton of information, but many of the recipes used Pomona pectin--which happens to be quite expensive. One of my prerequisites for a cookbook I'll use over and over is that the recipes use affordable ingredients. That one didn't fit the bill. So, I've continued to look for a solid canning cookbook that would fit easily on any cookbook shelf (since the cookbook space in my kitchen has filled up) that would help me feel like I can tackle canning jam and be successful at it.
So, I was excited to discover that the publisher of Simply in Season, Herald Press, published a canning cookbook: Saving the Seasons: How to Can, Freeze, or Dry Almost Anything.

This book is a nice size. It's a thin volume, but it's just the right size for all the information that I found on the pages inside.
I asked a friend of mine to look it over and give me her opinion of the cookbook. She is an expert canner who is well known in my church for her jams, jellies, salsas, and condiments! She liked it. She loved the pictures and was very interested to find out who the photographer was. She was tempted to purchase the cookbook just for the photographs! Her opinion is that is a great book for beginners - clear directions, good explanations, The step by step pictorial directions are easy to follow. The recipes are a good selection and are almost identical to the recipes she already uses--which have worked well for her for years. She also thought there was a good selection of tomato based canning recipes. The Farmer's Market Salsa recipe looked interesting to her. She did try the marmalade recipe and it turned out just the recipe said it would.
When I opened up this cookbook, I was immediately reminded of all the things I love about Simply in Season. Both cookbooks are simply written and are easy to understand. I did love the photographs. The photographer did a wonderful job of capturing candids, portraits, and still lifes. Saving the Seasons has the basic recipes that I want and more. I don't have tons of time to look all over the internet for good directions and illustrations of how to can. I need all the information in one place. In the back of the cookbook, the author biographies reveal that Mary runs a CSA from her family's farm. Susanna is her daughter. Susanna is now involved in urban community farming in Pittsburgh, PA. Mary has had lots of customers over the years ask for canning recipes. This cookbook was the fruit of her effort to provide them with a good place to start. I think the authors succeeded in doing just what they set out to do. I am even inspired to seriously consider purchasing a dehydrator. The information included answered one of my big questions--like the financial cost of using a dehydrator vs. an oven.
This cookbook isn't as large as many canning cookbooks, but it's a lot more useable than many I've seen. It will have a place in my kitchen for many years.
If you're interested in canning and haven't done much before, I'd highly recommend this cookbook! It is one that will be easy to use and follow. And-- there's always the great pictures to look at!
Please note that I received a complimentary copy of this cookbook for review from Herald Press.
Soup!
The best food for winter meals is soup. I didn't grow up eating soup much. Southern California weather and wearing shorts on Christmas Day. But, now that I live where it snows and is cold throughout the winter, I love soup. It warms one's bones on a chilly day.
Since I didn't grow up eating soup, I don't exactly have a lot of family soup recipes to make regularly. I've found a few along the way from Simply in Season and America's Test Kitchen's Family Cookbook.
But, when I saw a cookbook titled 300 Sensational Soups, I was very excited to try some new soups!

This cookbook by Carla Snyder and Meredith Deeds is packed with easy to follow recipes and great pictures. It's published by Robert Rose Publishing and as usual they've done a great job making this cookbook easy to cook from.
I made two soups and my mom made one. The first soup I made was a corn chowder with ham. I used some leftover ham cooked in my crockpot a few weeks ago. My family gobbled up the soup and we had only enough leftovers for one bowl.
The second soup I made was the Wild Mushroom and Orzo Soup with Italian Meatballs. The soup was rich and flavorful. I would recommend diluting it a little bit though. We found it almost too strong. The meatballs in the soup were spiced wonderfully and yummy. My pickiest eater wouldn't eat it, but mushrooms aren't a vegetable she's willing to eat.
My mom made the Creamy Chicken Noodle Soup. She found it to be too thick and very mild. Many of the soups do call for heavy cream. She was surprised that she didn't like it more.
This is one of those cookbooks that gives you great recipes to start with. Adjust the thickness and flavors to your family's tastes. With the corn chowder, I used frozen corn. With the wild mushroom soup, I substituted regular white mushrooms. These are more affordable substitutions for me that don't sacrifice a lot of flavor. I also often substitute milk plus some butter for half and half. 1 cup milk plus 3 Tbsp. butter can be substituted for 1 cup half and half. 1 cup half and half can be substituted for 1 cup of heavy cream to help make a recipe lighter and healthier.
If you're looking for a soup cookbook with yummy recipes, I'd definitely check this one out!
Please note that I received a complimentary copy of this cookbook for review from Robert Rose Publishing.
Since I didn't grow up eating soup, I don't exactly have a lot of family soup recipes to make regularly. I've found a few along the way from Simply in Season and America's Test Kitchen's Family Cookbook.
But, when I saw a cookbook titled 300 Sensational Soups, I was very excited to try some new soups!

This cookbook by Carla Snyder and Meredith Deeds is packed with easy to follow recipes and great pictures. It's published by Robert Rose Publishing and as usual they've done a great job making this cookbook easy to cook from.
I made two soups and my mom made one. The first soup I made was a corn chowder with ham. I used some leftover ham cooked in my crockpot a few weeks ago. My family gobbled up the soup and we had only enough leftovers for one bowl.
The second soup I made was the Wild Mushroom and Orzo Soup with Italian Meatballs. The soup was rich and flavorful. I would recommend diluting it a little bit though. We found it almost too strong. The meatballs in the soup were spiced wonderfully and yummy. My pickiest eater wouldn't eat it, but mushrooms aren't a vegetable she's willing to eat.
My mom made the Creamy Chicken Noodle Soup. She found it to be too thick and very mild. Many of the soups do call for heavy cream. She was surprised that she didn't like it more.
This is one of those cookbooks that gives you great recipes to start with. Adjust the thickness and flavors to your family's tastes. With the corn chowder, I used frozen corn. With the wild mushroom soup, I substituted regular white mushrooms. These are more affordable substitutions for me that don't sacrifice a lot of flavor. I also often substitute milk plus some butter for half and half. 1 cup milk plus 3 Tbsp. butter can be substituted for 1 cup half and half. 1 cup half and half can be substituted for 1 cup of heavy cream to help make a recipe lighter and healthier.
If you're looking for a soup cookbook with yummy recipes, I'd definitely check this one out!
Please note that I received a complimentary copy of this cookbook for review from Robert Rose Publishing.
Friday, February 22, 2013
Freezing doorway!
Yesterday, I went over to our front door and was surprised to feel how cold it was by the door. I was so puzzled. I caulked around the outside of the inside trim of the door last spring when I realized cold air was pouring in there. I couldn't understand why it was so cold. We have a storm door on the door and I'd caulked... what else could be wrong?
I went over to the door and held my hand up to the door frame. First, I put my hand around the outside of the trim. No air coming in.
Then I put it up to the gap between the frame and the door.
Air. Air!!!
Why?
I moved my hand around and discovered that the air was coming from where the trim meets the door frame. I wish I could draw a picture to illustrate.... but since I can't--picture an arch of the door trim around your door frame. Last year, I caulked on the outside where the trim met the wall. Now the air was still coming in where the trim meets the frame on the inside edge!
I pulled out a tube of clear caulk from the basement and quickly caulked all four edges where the trim meets the door frame.
This morning I went over by the door frame.
It felt warm. It felt WARM! YIPPEE!
Caulk is a wonderful thing. A very wonderful thing :)
I went over to the door and held my hand up to the door frame. First, I put my hand around the outside of the trim. No air coming in.
Then I put it up to the gap between the frame and the door.
Air. Air!!!
Why?
I moved my hand around and discovered that the air was coming from where the trim meets the door frame. I wish I could draw a picture to illustrate.... but since I can't--picture an arch of the door trim around your door frame. Last year, I caulked on the outside where the trim met the wall. Now the air was still coming in where the trim meets the frame on the inside edge!
I pulled out a tube of clear caulk from the basement and quickly caulked all four edges where the trim meets the door frame.
This morning I went over by the door frame.
It felt warm. It felt WARM! YIPPEE!
Caulk is a wonderful thing. A very wonderful thing :)
Free Piano Practice Page
In practicing and teaching piano at home, I realized that I needed an efficient record sheet for my kids to mark their practice days, but I didn't want to waste a lot of paper. I made a sheet that I've posted here.
As I start making my own printables for homeschooling, I'm going to be posting them on this blog: http://lovetopaint.wordpress.com/ Wordpress allows me to attach files easier than blogger. On my wordpress blog, I keep my lists of favorite books and resources.
As I start making my own printables for homeschooling, I'm going to be posting them on this blog: http://lovetopaint.wordpress.com/ Wordpress allows me to attach files easier than blogger. On my wordpress blog, I keep my lists of favorite books and resources.
Thursday, February 14, 2013
More Spelling Notes
A friend of mine was over today and we were talking about spelling. I showed her my girls' notebooks and I explained a few details that I missed in my last post.
When I started using Spelling Power two years ago, I did read the 96--96!! pages of small type instructions before we began. There were a few things that I have really appreciated that the author instructs teachers to do.
1) As you're giving the pretest, correct the word right after it is misspelled. Dictate to a child how to correctly spell the word. Don't correct it yourself afterwards (common public classroom procedure).
2) Have students practice the words they miss on the pretest. Students don't have to copy all 10 words multiple times when they can spell them correctly. On Tuesday and Thursday, my children will practice the words they miss. On Wednesday in our routine, I plan on my children putting all 10 words in alphabetical order and sorting them.
3) This plan addresses auditory, visual, and kinesthetic learners. For kinesthetic learners, I would specifically make a hands-on list of activities for Thursday's spelling.
Happy Spelling!
PS Sami has been so glad to go back to Spelling Power this week!
When I started using Spelling Power two years ago, I did read the 96--96!! pages of small type instructions before we began. There were a few things that I have really appreciated that the author instructs teachers to do.
1) As you're giving the pretest, correct the word right after it is misspelled. Dictate to a child how to correctly spell the word. Don't correct it yourself afterwards (common public classroom procedure).
2) Have students practice the words they miss on the pretest. Students don't have to copy all 10 words multiple times when they can spell them correctly. On Tuesday and Thursday, my children will practice the words they miss. On Wednesday in our routine, I plan on my children putting all 10 words in alphabetical order and sorting them.
3) This plan addresses auditory, visual, and kinesthetic learners. For kinesthetic learners, I would specifically make a hands-on list of activities for Thursday's spelling.
Happy Spelling!
PS Sami has been so glad to go back to Spelling Power this week!
Wednesday, February 13, 2013
Free Spelling Curriculum
This week I've been thinking 1) about Sami and Spelling and 2) about how I can save money on curriculum for homeschooling. I was telling my husband briefly about spelling and his response was, "Why can't she just copy the words like we always used to do?" He thought my dwelling on finding the perfect spelling curriculum should come back to rote memory. Sami had been telling me that she doesn't like Spellwell. She just wanted to go back to Spelling Power. I just hadn't gotten my mind around how to use it with her in order to make it work well for her. So, that's what I worked on yesterday.
For spelling, you need a set of lists.
http://www.k12reader.com/ has lists for grades 1-5
http://www.aaaspell.com/grade1.htm has lists for grades 1-8
http://www.allaboutlearningpress.com/free-spelling-lists has lists for grades 1-7
Inside my girls' spelling notebooks is this information:
For spelling, you need a set of lists.
http://www.k12reader.com/ has lists for grades 1-5
http://www.aaaspell.com/grade1.htm has lists for grades 1-8
http://www.allaboutlearningpress.com/free-spelling-lists has lists for grades 1-7
Inside my girls' spelling notebooks is this information:
Weekly
Spelling Plan
Monday:
Pretest
Copy words that
are misspelled 3 times.
Tuesday: 10 Step Spelling Sheet
Wednesday:
1) Write down the spelling rule
(paraphrased in mom’s words).
2) Sort Words into categories
3) Write words in
alphabetical order
Thursday:
Copy spelling rule on the top of today’s activity sheet. Choose a spelling activity from Spelling
Activity Sheet.
Friday: Post Test
I am using the lists from Spelling Power. An older copy of spelling power can be found on ebay for $5.
On Tuesday, they use an age appropriate 10 step spelling sheet.
Here's a link to an example: http://highland.hitcho.com.au/10stepstudy.pdf
and directions: http://www.spellingpower.com/spbucd/recordbooks/howtostudyaword.pdf
I compiled age appropriate activity sheets. Here's the 2nd/3rd grade sheet:
Spelling Activities 2/3
1. Write
each spelling word without its vowels. Replace each vowel with a line.
2. Write
your spelling words in crayon or pen. Write each consonant letter in red and
each vowel in blue.
3. Write the
words and cross out all of silent letters.
4. Write
each spelling word in a rainbow of colors. First, write the words with a
red crayon. Trace over the words with a blue crayon. Finally, trace the words
again with a green crayon.
5. Write
your spelling words as fractions. The
number of vowels is the numerator and number of consonants is the denominator.
6. Write
your words with all the letters scrambled up. Then ask a parent or sibling to unscramble the
words in your notebook. Correct that person’s work.
7. Write
each spelling word. Next to each word, write two additional words of at
least three letters that can be spelled using the letters in the word.
8. Use
letter tiles to spell out this week’s words.
9. Use each
spelling word in a sentence. Correct spelling and grammar count!
10. Write
your spelling words on cards (make two sets) and play "Memory Match"
with them against a sibling or parent.
11. Use a
thesaurus to write a synonym for each word.
12. Write
your words by arranging the letters in alphabet pasta. Glue them on paper
or do it on a table or counter at home.
13. Use
a dictionary to write a definition for each word. (You can borrow a
dictionary from school if you do not have one at home.)
14. Locomotive Words - Write the entire list end-to-end as one long
word, using different colors of pens or crayons for each word.
15. Draw a picture to illustrate
each word
and the 4th/5th grade sheet:
Spelling Activities, 4/5
You may choose 1 activity
to complete.
1. Write
each spelling word without its vowels. Replace each vowel with a line.
2. Write
your spelling words in crayon or pen. Write each consonant letter in red and
each vowel in blue.
3. Write the
words and cross out all of silent letters.
4. Write
each spelling word in a rainbow of colors. First, write the words with a
red crayon. Trace over the words with a blue crayon. Finally, trace the words
again with a green crayon.
5. Write
your words with all the letters scrambled up. Then ask a parent or sibling to
unscramble the words in your notebook. Correct that person’s work.
6. Write
each spelling word. Next to each word, write two additional words of at
least three letters that can be spelled using the letters in the word.
7. Use
letter tiles to spell out this week’s words.
8. Spelling
Math: Which spelling word has the highest value? Which word has
the lowest value? Do any words have an equal value? Vowels are worth 1
point and consonants are worth. “y” is worth 3 because it can sound like a
vowel, but is a consonant
9. Use each
spelling word in a sentence. Correct spelling and grammar matter.
10. Draw and
color a picture. "Hide" the words in the picture. Do
not color over the words.
11. Write
your spelling words on cards (make two sets) and play "Memory Match"
with them against a sibling or parent.
12. Use a
thesaurus to write a synonym for each word.
13. Write a
letter to a friend/relative, in proper letter format, using your spelling
words. Underline each word.
14. Write
tongue twisters for using at least 12 of your spelling words. Example-
spelling word: some- Sally saw some seals
in the sea.
15. Write
your words by arranging the letters in alphabet pasta. Glue them on paper
or do it on a table or counter at home.
16. Cut
out letters from headlines or ads in newspapers or magazines. Use the letters
to spell your spelling words. Paste the letters on paper.
17. Write
a song using all of your spelling words.
18. Use your spelling words to write a short story. Your story must include all
of the words.
19. Use
a dictionary to write a definition for each word.
20. Scrambled words-Write your words, then write them again
with the letters mixed up.
21. Locomotive Words - Write the entire list end-to-end as one long
word, using different colors of pens or crayons for each word.
As a side note--all of these ideas were duplicated on multiple websites. I chose the ones that I knew would fit our family and ones we were already doing. I also modified the ideas on these sheets so that they would be appropriate and work well for my kids. It was interesting to see that many people are using the same spelling activities.
As a side note--all of these ideas were duplicated on multiple websites. I chose the ones that I knew would fit our family and ones we were already doing. I also modified the ideas on these sheets so that they would be appropriate and work well for my kids. It was interesting to see that many people are using the same spelling activities.
So, that's how my family does spelling. A notebook, paper, lists, and a few copies!
Friday, February 8, 2013
Decluttering
Something has been on my mind for several months since my mother in law brought up a discussion with me. The discussion centered around the idea of being organized, specifically keeping one's home and life organized. She observed that people have varying degrees of organization in their homes. I mentioned that once I went fishing for encouragement for someone about the neatness of my home and came up empty. The woman blithely responded that she supposed my home was picked up--that it was sort of picked up. I was discouraged. "Really?" I thought. I had been trying really hard to keep my home picked up and had 3 children ages 1, 3, and 5 at the time.

I also have open cupboards in my kitchen and once someone commented to me about how messy they were. I had just neatened them a few days before. "Really?" I thought. I'm sure I've written about these two experiences before because they made a huge dent in my morale about how hard I work to take care of my home.
After my mother in law and I spoke, I realized that there is a price that is paid both for disorganization and organization. The price I pay for organization is stress. I have three kids who are getting older bit by bit. They are able to help more and more each year. I am so thankful to be able to share the responsibility with them! We homeschool, so we live in our home day in and day out. The more you live in a home, the more mess there is to manage and pick up. So our house is constantly in use and subsequently is constantly being picked up.
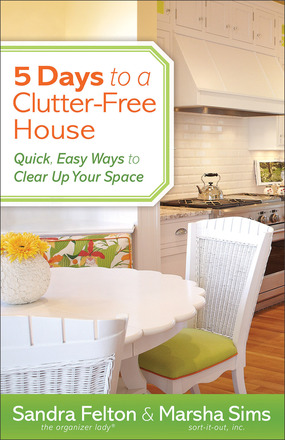
Recently, I received a book about decluttering your home--with a big 1-2 punch. The book is titled 5 Days to a Clutter-Free House, Quick, Easy Ways to Clear Up Your Space by Sandra Felton and Marsha Sims. I was curious about their advice. What can you do when you find yourself with a cluttered home? But, also, how can you help a friend who wants to declutter their home?
In the introduction, the authors start off with what I think is a great approach! They explain that it is the characteristics of creative, disorganized people that make them such wonderful people to be around. In the same chapter, they go on to answer the question-- "What about guys?" on pg. 11. Their answer "Whether we like it or not, women usually care more and carry more responsibility for the house than men." They take a very gentle tone towards the reader of this book and I like that--a lot. They approach decluttering from a positive angle.
Their approach is to gather a team to be in this with you, the reader. In 5 days, the team boxes up everything that is causing the clutter. Then, you go through the clutter one box at a time. When I declutter my home periodicaly and packed before we moved last year, I purged as I went. I know that works for me. My one concern about this method is--where do you put the boxes? Not all homes are big enough to stack boxes out of the way.
How to purge the boxes is something the authors cover and I thought they had a great list of questions to ask yourself as you purge.
At the beginning of the book, God is mentioned. The scripture about two being better than one is cited as a good reason for decluttering as a team. And later in the book, the authors talk about taking care of things being for God's glory. Mostly, though, they focus on the primary goal of decluttering being greater happiness and enjoyment of beauty. Because the book only mentions God on a few occasions, I don't think someone who reads this book and isn't a Christian will be offended. But, from my perspective, I think that the bits of beauty that we sin in our world are reflections of God. Happiness isn't my goal in life. Happiness is a very fleeting thing so I think it is problematic for happiness to be the ultimate reason to seek organization. An organized home won't automatically equal happiness. But, that's really just my 2 cents. On the whole, there are some good ideas and food for thought for folks wanting to do some serious decluttering.
Please note that I received a complimentary copy of this book from Revell Books for review.
Sunday, February 3, 2013
Lowering Energy Bills
I've written a lot of posts about the house we bought a year ago. It was the house that most met our needs of the homes on the market at the time. What we didn't realize was all of the issues we would face after purchasing the home. Tons of repairs have been needed. One of my areas of concern were the utility bills. The first month was insane. The second wasn't much better. I was so worried! What had we gotten ourselves into! Over the spring, summer, and fall, we worked bit by bit on various repairs around the house.
We...
1) caulked around all of the windows and french doors.
2) replaced the back door and added storm doors to the back and front doors.
3) added insulation around the front door behind the hot water baseboard heater (the air was pooring in through a small hole!
4) put foam into the cracks of a few windows that weren't shut completely (and wouldn't shut).
5) got rid of an electric water heater that was not in use but was being heated!
I still plan on insulating the water pipes in the basement that take the hot water to the shower and the dishwasher. But, it is on my list of things to do. And I haven't gotten to it yet.
We also lowered the temperature on the thermostat 2 degrees last month.
I watched as we approached winter. I hoped our bill would stay under $300, but I wasn't sure how much to hope for. Thankfully, with all of these changes, our electric/gas utility bill was almost $100 lower than it was last February--and it was 3 degrees cooler each day on average. Our electricity usage was 33% lower and our gas usage was 10% lower. Our bill is now comparable to the home we lived in before we moved here. Our old home was two stories and was 500 sq. ft. smaller. I really didn't think we would be able to get the bill this close to our old bill. I am so thankful!
Now on to insulating those water pipes!
We...
1) caulked around all of the windows and french doors.
2) replaced the back door and added storm doors to the back and front doors.
3) added insulation around the front door behind the hot water baseboard heater (the air was pooring in through a small hole!
4) put foam into the cracks of a few windows that weren't shut completely (and wouldn't shut).
5) got rid of an electric water heater that was not in use but was being heated!
I still plan on insulating the water pipes in the basement that take the hot water to the shower and the dishwasher. But, it is on my list of things to do. And I haven't gotten to it yet.
We also lowered the temperature on the thermostat 2 degrees last month.
I watched as we approached winter. I hoped our bill would stay under $300, but I wasn't sure how much to hope for. Thankfully, with all of these changes, our electric/gas utility bill was almost $100 lower than it was last February--and it was 3 degrees cooler each day on average. Our electricity usage was 33% lower and our gas usage was 10% lower. Our bill is now comparable to the home we lived in before we moved here. Our old home was two stories and was 500 sq. ft. smaller. I really didn't think we would be able to get the bill this close to our old bill. I am so thankful!
Now on to insulating those water pipes!
Melted Crayon and Clothing
I told one of my friends about my shirt and rubbing alcohol last week. She told me about crayon and WD-40. One of her kids had left a crayon in their pants one time when she did the wash. It didn't cause issues in the washing machine, but it did in the dryer. She looked up a solution online and found that you could spray WD-40 on the crayon smudges and then wash it out and wash the pants again. The first two batches, she let the WD-40 sit on the jeans for 30 minutes and then washed it out. The last pair though she forgot and though the WD-40 dissolved the crayon, it left an oil stain behind.
Her advice when you find crayon on clothes after they've been in the dryer?
1) Wipe out and clean the inside of the dryer drum well. Baking soda and a damp rag will get any off that doesn't come off with a rag on its own. If you're still concerned, wet down some old towels and then run them through the dryer first to make sure no crayon is left behind.
2) Spray the crayon spots with WD-40 and let it dissolve the crayon. Wait 30 minutes and then rinse out pants. Run them through the washer and dryer.
Her advice when you find crayon on clothes after they've been in the dryer?
1) Wipe out and clean the inside of the dryer drum well. Baking soda and a damp rag will get any off that doesn't come off with a rag on its own. If you're still concerned, wet down some old towels and then run them through the dryer first to make sure no crayon is left behind.
2) Spray the crayon spots with WD-40 and let it dissolve the crayon. Wait 30 minutes and then rinse out pants. Run them through the washer and dryer.
Friday, February 1, 2013
Free Photography Unit for Kids
I wrote a 9 lesson photography unit for my children in January. I've posted it on my Wordpress blog because Google will allow me to insert images, but not pdf files. If you'd like to have a copy, you can it find it here:
http://lovetopaint.wordpress.com/book-review-requests/
I wanted to make it available for free on teacherspayteachers.com, but there is a charge for every download. On Wordpress, people can view the file and print it without having to download it.
If you take a look at it or use it, let me know what you think!
As I have other resources that I've written, I plan to post them on that page.
http://lovetopaint.wordpress.com/book-review-requests/
I wanted to make it available for free on teacherspayteachers.com, but there is a charge for every download. On Wordpress, people can view the file and print it without having to download it.
If you take a look at it or use it, let me know what you think!
As I have other resources that I've written, I plan to post them on that page.
Subscribe to:
Posts (Atom)