A few coffee notes...
My husband and I love coffee. I make STRONG coffee. It's not thick like mud, but it's definitely strong. I do this because I like to put half and half and sugar in my coffee and I prefer for it not to taste watery. My husband and inlaws all like it this way (and they don't put any cream in it it) too.
Here's my ratio: 2/3 cup whole beans (before grinding) to 28 oz. water
It's funny to think back over our coffee journey. I've discovered that me, along with every other coffee lover I know, likes to have a consistent cup of coffee. This is a valuable thing.
There are some folks who say you must use a burr grinder--that it's the only way to go.
I'll respectfully disagree. A blade grinder costs only about $15 ($1 at a garage sale) and will last you longer than a burr grinder. When using a blade grinder, I hold down the button for a count of 15. (not 1 one thousandth--just one two three...)
Last week, my husband picked up a bag of casi cielo for me from Starbucks. Casi Cielo is one of Starbucks less bitter roasts and we have enjoyed it in the past. It usually sells for $14.95 a pound. I was curious to see how it compared to our regular coffee.
As I settled into my first cup, I discovered that it wasn't any better than our regular coffee! I was surprised, but not really. Starbucks overprices its goods and sells an experience/habit as much as it sells a product.
Our current coffee mix is a half caf mix from World Market. I like it. A lot. I mix the medium roast caf whole bean Tarrazu with the decaf dark roast Italian Blend. I use the coupons and then purchase it on Wednesdays (when you get double coffee credits) and usually end up paying a little over $6 per pound--which is the best price I've found over the years for half caf. I order it online and it gets shipped very quickly to my doorstep. I do pay for shipping, but I find that the coupons and coffee credits offset this. Make sure to sign up for their World Market Explorer program and input your number on each purchase to get credit for your coffee purchases.
Thinking back, we started out with coffee from Costco. Their house blend is roasted by Starbucks and some clubs carry a decaf version. I always mixed the decaf house coffee with a different medium roast from Costco. This worked out to be about $6.50 a pound, I think.
But, Costco is far, so I switched several years ago to BJ's because it was closer to us. Unfortunately, the discontinued their whole bean decaf coffee and again I had to go searching for a good whole bean decaf coffee. That was how I ended up at World Market. We don't have a World Market store near us (though I wish we did!) and I began to purchase the coffee online. We do have to buy 4 1/2 pounds at once, but I store it in a sealed tupperware bin and have yet to be disappointed in it. I make about 40-50 oz. of coffee in the morning each day to give you an idea of how fast we go through it.
One of my brother in laws asked me this weekend what I would buy if I had to go to the grocery store for cheap coffee. My answer was 8 o'clock Columbian whole bean. It's a solid, consistent bean. My husband likes it more than I do, though.
Tuesday, January 19, 2016

Thursday, January 7, 2016
Chocolate
Tomorrow I'm having dental surgery. Ugh. Double Ugh--if there is such a thing. My mom called yesterday and encouraged me to eat what I wanted today. So, I did. Sort of. I had apple waldorf salad while on the run during a busy day. We went to Mexican food for dinner. And then I came home to have some chocolates for dessert. But, I didn't have just any chocolates. They were special.

I found a treasure today when I was shopping at Aldi. As I was walking down the aisle between the produce and leftover Christmas candy, I paused. My oldest daughter had seen something that caught her eye. And then my eye caught something as well....
A few years ago, a friend of my husband's gave him two chocolates that she'd brought home with her from a recent vacation to Italy. They were called Witor's Noir. I loved them! So, I looked all over the internet to try and find them, but I couldn't find anywhere that I could order them. World Market had them--I even went to a store an hour and a half away (when I was in the area) to try and find them! Then, a friend gave my mom a few chocolates and she shared one with me. I was so shocked to discover that the chocolate she gave me was the same brand that I'd been looking for. I called the woman who gave her the chocolates and she explained that she had found them at BJ's. So, a week later, I headed over to the store and tried--in vain--to find them. No luck. I asked at the front counter and was informed by a clerk that they'd been out of them for several weeks. I was so disappointed! At that point, I gave up. I searched online a little bit more and discovered that these chocolates had also been sold at Costco, so of course I checked there as well. Again, none were to be found.
But, today, in the middle of the Christmas candy display at Aldi, there they were! I was shocked with disbelief! On my cell phone, I called the woman who gave them to my mom long ago to alert her--and she was thankful for my call. Then, I bought three packages and brought them home.
I opened one up tonight and they were very good, just as I had hoped. I know it may sound crazy to go to such lengths to find something and then not find it. But, it's fun to go looking for something. Finding the chocolates today was such an unexpected blessing from the Lord amidst the stress of anticipating my surgery tomorrow!
So, just in case you ever happen to come across these chocolates in your corner of the world and you wonder if they are any good...

They are!
On one final note, I found this picture on Amazon. It turns out that you can now buy them there--for $25 for 2 packages. When I was at Aldi this afternoon, one package only cost $3 (regularly $4). I'm not quite sure that one package would be worth $12.50, but I think I probably would have paid $8 for a package because they are 12 oz. packages.
...
Sunday, January 3, 2016
Knights and Castles
A few weeks ago, my kids and I had the chance to attempt to put together a paper castle, complete with knights and catapult. Our attempt, was... well, unsuccessful. I had high hopes starting in, but those hopes were quickly dashed when I realized how much patience it would take to put it all together.
The castle was a part of a book, Build! a Knight's Castle: A Paper Toy Archaeology by Annalie Seamon, published by Storey Publishing. Earlier in the fall, I reviewed Storey's book for children wanting to be a pet doctor. That book was very easy for my kids to use and assemble. But, a castle is obviously much more complicated...

The book is rated for ages 8 and up. My 7 1/2 year old gave up very quickly. My 10 year old successfully pushed in the tabs on several pieces--and I actually learned a thing or two from her. But, she didn't have the patience to see it through. So, I helped my 7 1/2 year old to put together parts of it. I think the book would be best for a 9 or 10 year old with help as needed.
For the boy who loves David Macaulay's book Castle and other detailed books about medieval times, this would be a fun book. The book comes from a different point of view since it is looking at the castle from an archaeologist's perspective. My son read the information about the castle with great interest. I liked that the author explains the conclusions and gives the support for the archaelogical conclusions you can make about the past based on what remains.
The pieces of the castle all punch out very easily. With this, I was very pleased. What I wished for, though was a clearer list of how to fit the pieces together. I think it was the author's intention that kids would work as an archaeologist might and figure out how the pieces fit together. But, it would have been nice to have a cheat sheet for parents to give the child clues or an inserted sheet in the back with a decoder or something like that for when the child needs help.
If you have a child who regularly likes to put together paper projects like this or loves castles, then I can imagine he/she would enjoy this book. My children are unfortunately not as patient as I thought they were. My son can build enormous lego sets, but paper is a different matter. I learned that from this book.
Please note that I did receive a complimentary copy of this book for review from Storey Publishing.
The castle was a part of a book, Build! a Knight's Castle: A Paper Toy Archaeology by Annalie Seamon, published by Storey Publishing. Earlier in the fall, I reviewed Storey's book for children wanting to be a pet doctor. That book was very easy for my kids to use and assemble. But, a castle is obviously much more complicated...

The book is rated for ages 8 and up. My 7 1/2 year old gave up very quickly. My 10 year old successfully pushed in the tabs on several pieces--and I actually learned a thing or two from her. But, she didn't have the patience to see it through. So, I helped my 7 1/2 year old to put together parts of it. I think the book would be best for a 9 or 10 year old with help as needed.
For the boy who loves David Macaulay's book Castle and other detailed books about medieval times, this would be a fun book. The book comes from a different point of view since it is looking at the castle from an archaeologist's perspective. My son read the information about the castle with great interest. I liked that the author explains the conclusions and gives the support for the archaelogical conclusions you can make about the past based on what remains.
The pieces of the castle all punch out very easily. With this, I was very pleased. What I wished for, though was a clearer list of how to fit the pieces together. I think it was the author's intention that kids would work as an archaeologist might and figure out how the pieces fit together. But, it would have been nice to have a cheat sheet for parents to give the child clues or an inserted sheet in the back with a decoder or something like that for when the child needs help.
Please note that I did receive a complimentary copy of this book for review from Storey Publishing.
Saturday, December 12, 2015
Hamburgers!
Yippee! We just finished dinner and it was a success! When I was growing up, my mom often made hamburgers for dinner and I loved them. But, I've never been able to make hamburgers as an adult that I just loved--until tonight.
My husband and I were talking the other day about how I should try and figure out how to make them well at home because I've been very disappointed with the hamburgers that we've had out lately (except for 5 Guys Burgers and Fries). So, tonight I set out to do that. I looked up "how to make great hamburgers on the stove" and found several great tips on a few sites. Here's the sum of those directions that worked for me.
#1 Use a cast iron pan and heat it up first. Cast iron can heat up dry, so it's okay to turn on the pan before you start cooking. Then, put a tablespoon or two in the pan and let it heat until it shimmers.
#2 Form your patties loosely. I'd always formed them pretty tightly before. 3/4" thick was what I read was best. Season lightly with salt and pepper or we use Montreal Steak/Hamburger seasoning.
#3 Cook the patties for 4 minutes on a side. Don't flip. Don't check. 4 minutes on the first side, then flip over. After 3 minutes, put a small pad of butter on the burgers and put a piece of cheese on top. Cover for the last minute with a lid. If you aren't putting cheese on them, just let them cook for 4 minutes without covering and then remove from the pan to serve.
#4 Don't cook more than 2 or 3 burgers at a time in your pan. I know I used to crowd the pan with 4 or 5 burgers at one time. Not any more!
I only used 80/20 hamburger, not even sirloin or 90/10. My family loved them! I loved them, too. I also loved that it only took me 30 minutes to get dinner on the table--which is a record for me. I served the burgers with lettuce, buns, pickles, and condiments. On the side, I served steamed asparagus drizzled with olive oil and sea salt.
I'm so excited to have actually made dinner in 30 minutes tonight and that my family loved it!
Additional notes:
1. Using the Hamburger Montreal Seasoning helps a lot.
2. DON'T use preformed patties. They won't cook through in time. In fact, they'll be totally red in side! One of the keys is to have a loosely formed patty from fully defrosted ground beef.
My husband and I were talking the other day about how I should try and figure out how to make them well at home because I've been very disappointed with the hamburgers that we've had out lately (except for 5 Guys Burgers and Fries). So, tonight I set out to do that. I looked up "how to make great hamburgers on the stove" and found several great tips on a few sites. Here's the sum of those directions that worked for me.
#1 Use a cast iron pan and heat it up first. Cast iron can heat up dry, so it's okay to turn on the pan before you start cooking. Then, put a tablespoon or two in the pan and let it heat until it shimmers.
#2 Form your patties loosely. I'd always formed them pretty tightly before. 3/4" thick was what I read was best. Season lightly with salt and pepper or we use Montreal Steak/Hamburger seasoning.
#3 Cook the patties for 4 minutes on a side. Don't flip. Don't check. 4 minutes on the first side, then flip over. After 3 minutes, put a small pad of butter on the burgers and put a piece of cheese on top. Cover for the last minute with a lid. If you aren't putting cheese on them, just let them cook for 4 minutes without covering and then remove from the pan to serve.
#4 Don't cook more than 2 or 3 burgers at a time in your pan. I know I used to crowd the pan with 4 or 5 burgers at one time. Not any more!
I only used 80/20 hamburger, not even sirloin or 90/10. My family loved them! I loved them, too. I also loved that it only took me 30 minutes to get dinner on the table--which is a record for me. I served the burgers with lettuce, buns, pickles, and condiments. On the side, I served steamed asparagus drizzled with olive oil and sea salt.
I'm so excited to have actually made dinner in 30 minutes tonight and that my family loved it!
Additional notes:
1. Using the Hamburger Montreal Seasoning helps a lot.
2. DON'T use preformed patties. They won't cook through in time. In fact, they'll be totally red in side! One of the keys is to have a loosely formed patty from fully defrosted ground beef.
Wednesday, November 11, 2015
Pumpkin Soup Recipe
When I made my menu for the month on Sunday, I decided that every Wednesday would be "Soup Day". I didn't decide what soups I was going to make, though. Tonight, I looked on my counter and saw a cooking pumpkin and decided I would make a pumpkin soup. I looked through my cookbooks for ideas and found one in a Moosewood cookbook. I started from there and then made my own. I changed it so much that the method and ingredients are very different. Here's the recipe I came up with (my whole family really liked it--even my pickiest eater):
Middle Eastern Pumpkin Soup
Middle Eastern Pumpkin Soup
2 cups diced onions
2 Tbsp. Olive oil
1 cup peeled and sliced carrots
2 ½ cups chopped pumpkin (½”
chunks)
1 ½ tsp salt
2 ½ cups chicken broth
1 ¼ cups apple juice
¼ cup tomato sauce
¼ cup water
1 tsp cumin
½ tsp nutmeg
½ tsp cinnamon
½ tsp paprika
1-2 cups diced cooked chicken (I used some from 2 leftover chicken thighs that I cooked on Sunday)
Directions:
- Dice onions and saute in olive oil.
- Begin chopping carrots. When they are chopped, add to the onions. Then, peel and cut the fresh pumpkin (or butternut squash) into small cubes (1/2”) and add to the onions. Saute for a few more minutes.
- Add liquids and spices. Cook over medium heat.
- Simmer for 15 minutes and then check vegetables for softness. Continue cooking until vegetables are soft, but not mushy. Then, put 2 cups of soup in blender and puree. Return pureed mixture to pot and mix in.
- Add chicken and stir till chicken is heated.
- Optional: You can serve sour cream on the side to dollop onto the soup.
Monday, November 9, 2015
Lunch
One thing my family jokes about regularly are my forms. There is a sense that they simultaneously chuckle about them, are thankful for them, and wonder about them! I have forms we use for holidays, vacations, setting the table, planning birthday parties, cleaning the house, and even a form to help the kids know what to put in their lunches when they pack them.
This year we joined a homeschool co-op, so once a week my kids and I pack up our lunches and head to "school". I'm teaching a middle school writing class and tutoring reading. My Thursday mornings are filled with preparations to teach. It's been interesting to watch my kids and I get used to this new part of our routine. My kids are responsible for packing their backpacks and getting their lunches made.
A normal part of our routine at home is for the kids to make their own lunches. When I ran out of time the first week before class, I asked my kids to make their own lunches and--one for me. I quickly wrote down on a piece of paper what to put in each lunch. They did just what I asked. The next week I typed up what I'd written the week before and laminated it. Now, they pull out the list each week to make their lunches.
Here's the list I typed up...
This year we joined a homeschool co-op, so once a week my kids and I pack up our lunches and head to "school". I'm teaching a middle school writing class and tutoring reading. My Thursday mornings are filled with preparations to teach. It's been interesting to watch my kids and I get used to this new part of our routine. My kids are responsible for packing their backpacks and getting their lunches made.
A normal part of our routine at home is for the kids to make their own lunches. When I ran out of time the first week before class, I asked my kids to make their own lunches and--one for me. I quickly wrote down on a piece of paper what to put in each lunch. They did just what I asked. The next week I typed up what I'd written the week before and laminated it. Now, they pull out the list each week to make their lunches.
Here's the list I typed up...
Making
Lunches:
- Juice Box or Capri Sun
- Sandwich
- Fruit
- 2 cookies
- Napkin
- Snack: string cheese, granola bar, pretzels, etc....
I know it probably seems funny to have such a simple list typed up, but lists do help me and my kids. I'm thankful for them. My forms and lists will probably be one of those things that my kids laugh and smile about when they are grown adults raising their own kids!
Tuesday, October 13, 2015
Fun and Artistic Cookbook
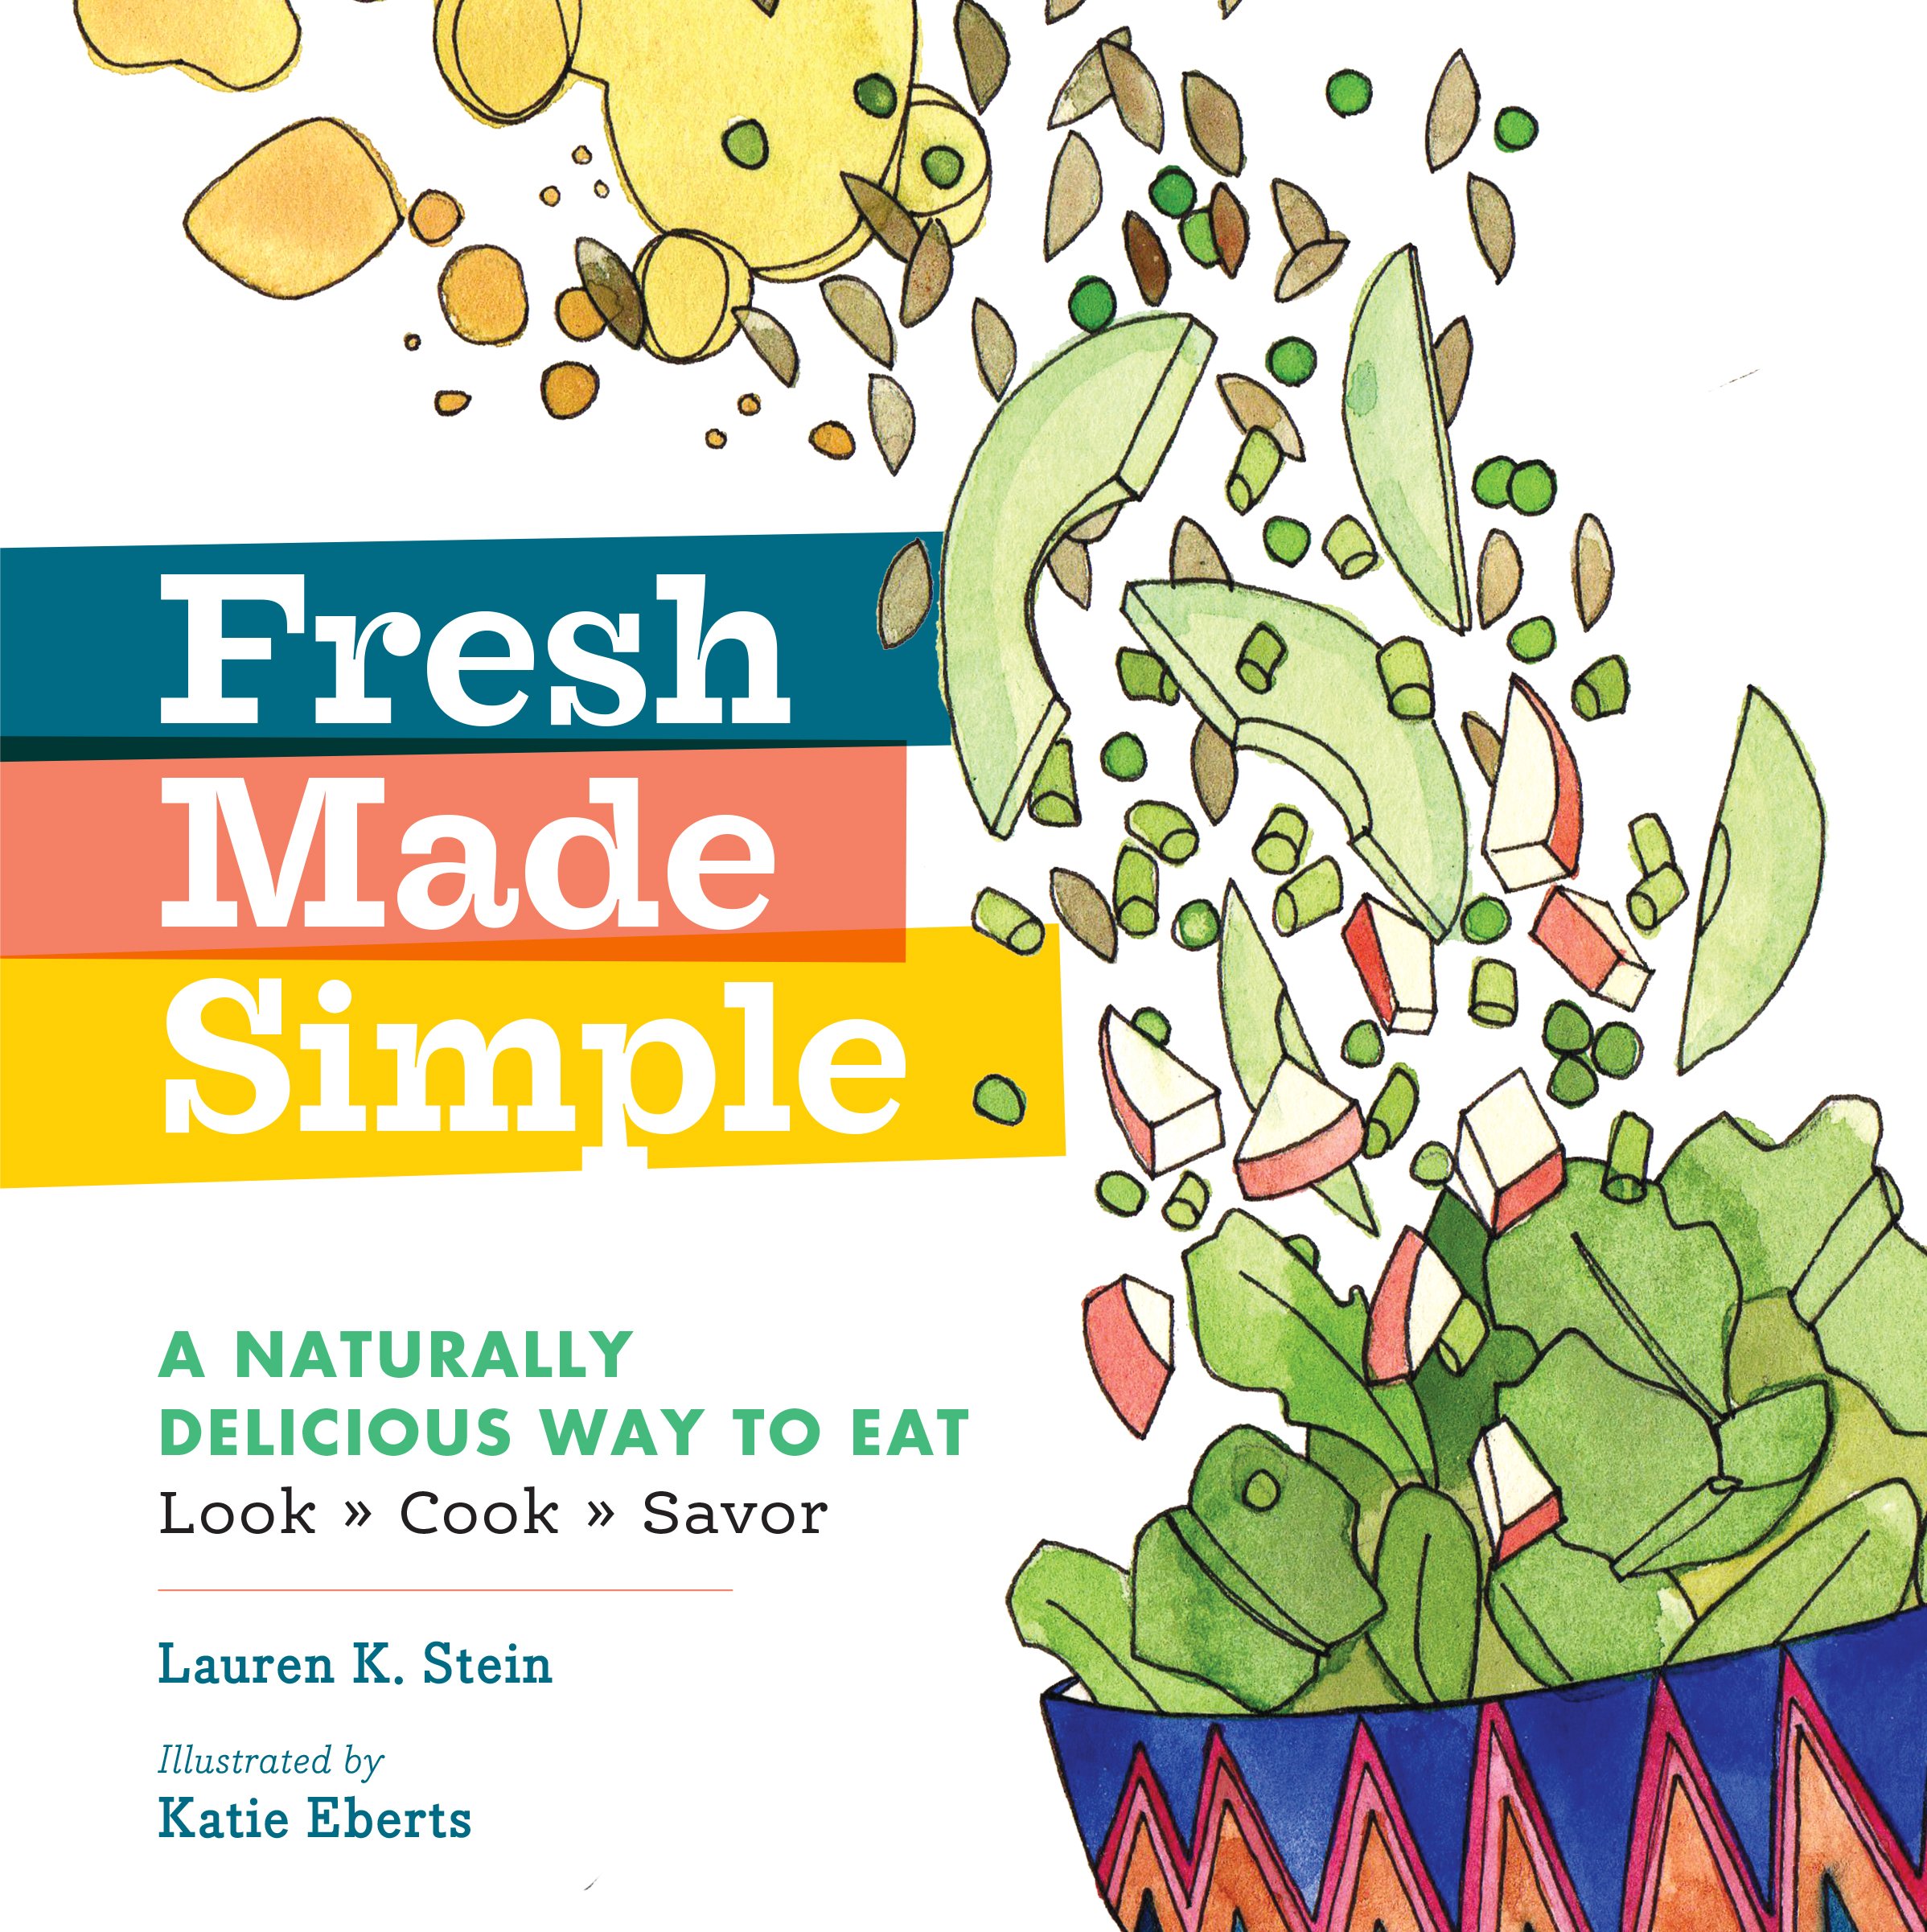
Every once in a while, I come across a cookbook that is unique. That's the case of a new cookbook Storey is publishing by Lauren K Stein, illustrated by Katie Eberts. Fresh Made Simple is actually full of simple recipes. Most "simple" recipe cookbooks aren't actually simple. But, this one is.
 Lauren and Katie worked together to create a fun and artistic cookbook. Each recipe uses five ingredients or less. Directions are as simple as can be. The only direction I actually disagreed with was the one for carmelized onions. The authors wrote that you should cook them low and slow--they didn't happen to mention that you have to cook them low and slow for a very long time. But, other than that, I agreed with the recipes and thought they were all well written and drawn.
The recipes cover breakfast, lunch, salads, spreads, simple dress-ups for desserts, and drinks. I loved the two cheese plate pairings! I never know what fruits and accompaniments to put with cheeses. What I loved most, though, about this cookbook is that it straddles a tricky line. Most gourmet cookbooks that are appealing use expensive ingredients. This cookbook, on the other hand, used a lot of normal ingredients and just a few unusual cheeses for some of the recipes. Most of these ingredients regularly inhabit space in my kitchen.
On Amazon, you can see a preview of this cookbook and I'd recommend you go check it out. It's fun to look at it. Katie Eberts' artwork is creative, energetic, and visually appealing.
In honor of their cookbook, I made an attempt (see below) to illustrate my favorite avocado sandwich. I find that trying to imitate art is one of the best way to appreciate art more and my attempt definitely made me appreciate this cookbook!

 Lauren and Katie worked together to create a fun and artistic cookbook. Each recipe uses five ingredients or less. Directions are as simple as can be. The only direction I actually disagreed with was the one for carmelized onions. The authors wrote that you should cook them low and slow--they didn't happen to mention that you have to cook them low and slow for a very long time. But, other than that, I agreed with the recipes and thought they were all well written and drawn.
The recipes cover breakfast, lunch, salads, spreads, simple dress-ups for desserts, and drinks. I loved the two cheese plate pairings! I never know what fruits and accompaniments to put with cheeses. What I loved most, though, about this cookbook is that it straddles a tricky line. Most gourmet cookbooks that are appealing use expensive ingredients. This cookbook, on the other hand, used a lot of normal ingredients and just a few unusual cheeses for some of the recipes. Most of these ingredients regularly inhabit space in my kitchen.
On Amazon, you can see a preview of this cookbook and I'd recommend you go check it out. It's fun to look at it. Katie Eberts' artwork is creative, energetic, and visually appealing.
In honor of their cookbook, I made an attempt (see below) to illustrate my favorite avocado sandwich. I find that trying to imitate art is one of the best way to appreciate art more and my attempt definitely made me appreciate this cookbook!

Please note that I received a complimentary copy of this cookbook for review from Storey Publishing.
Monday, October 5, 2015
Tackling my house... and my life.
This school year has been full of adjustments for my kids and for me. We joined a homeschool co-op for the first time in five years and so we go one day a week to meet with other parents and students for classes. I'm teaching a class to middle schoolers on writing. On another day of the week, my kids and I head over to a friend's house for French lessons and then to another mom's house for flute lessons.
One of the things that has complicated our co-op day is getting home, getting food into stomachs, heading to Violin lessons, then back home to pick up more children, and then on to soccer practice. But, this past week, my son asked to quit violin and just keep up with piano lessons. My husband agreed and so I get to return his violin today to where we have been renting it from.
Amidst getting used to a new school schedule and roster of activities, I decided to clean my house. When my kids were little, I used to do this every year and go room by room. I haven't done the deep cleaning in my house for two to three years. I felt it was time. So, three weeks ago, I started cleaning, going room by room. The smaller rooms were easier to tackle. Many years ago, I had a friend tell me about how Larry Burkett advised paying off debt--to start with the smallest debts first so that you would feel as if you'd accomplished something. This is the same way I start tackling my house--by starting with the smallest bathroom.
Last week it was time to clean my kitchen. It took me a whole week. I have open cupboards. Many people comment about them when they come to visit and ask if I like them. In truth, I do. I love them. But, there is a downside to having open cupboards. They get very dusty over time and everything has to be taken out once a year, shelves have to be dusted and cleaned, and then everything is reorganized and put back in place. Amidst tackling school and normal life, my kitchen took me a whole week to clean. I wasn't finished until Saturday morning when I tackled my range hood and stove. Every time I clean out my kitchen I ask myself what I need and don't need. Then, I purge and pass things on. It helps. This time I finally moved the spice rack from one wall to the opposite long wall and swapped it with our wall clock. My whole family is thrilled with the results. After almost 4 years in this house, my kids can finally sit down at the kitchen table without knocking their heads on the rack.
Cleaning tips from my kitchen that have helped me...
+ I have organized my pantry with many shoebox sized plastic bins to help keep things in place. When I need cake decorations or snacks or trail mix, I can go to the right box, instead of having things falling all over the shelves. I like the shoebox sized bins because they're cheap at around a $1 each.
+ We have a stainless hood and stove. I use baking soda and a damp rag (a regular dishrag) to clean the inside and outside of the hood. Baking Soda is the only thing I've found that can easily cut through the grease. Once all the grease is gone, I can use my Norwex green and purple cloths to clean and polish it.
+ Going through my pantry is helpful because it reminds me of what I really use and don't use. I find each time I purge, I have to throw away a few food items that I thought I would use, but never did. This time I was very thankful for the reminder and kept it on the forefront of my mind when I went to the grocery store the next day.
This week, my homeschool room and the basement remain. A friend once told me about the Fly Lady. The advice she took from the site was to start with her kitchen counters. The Fly Lady advises to declutter for 15 minutes a day. That's how I am with cleaning my hardest rooms. Every day, I do something. This morning, I swept the basement. Later this morning, I'm going to begin tackling the clothes area and sorting the homeschool books I banished to the basement a month ago.
But, before I can tackle more of my basement, I need to head to the dreaded dentist and get some schooling done ;) Little by little, I'll get there... the blessing is that my house feels more organized again and it feels a little lighter!
One of the things that has complicated our co-op day is getting home, getting food into stomachs, heading to Violin lessons, then back home to pick up more children, and then on to soccer practice. But, this past week, my son asked to quit violin and just keep up with piano lessons. My husband agreed and so I get to return his violin today to where we have been renting it from.
Amidst getting used to a new school schedule and roster of activities, I decided to clean my house. When my kids were little, I used to do this every year and go room by room. I haven't done the deep cleaning in my house for two to three years. I felt it was time. So, three weeks ago, I started cleaning, going room by room. The smaller rooms were easier to tackle. Many years ago, I had a friend tell me about how Larry Burkett advised paying off debt--to start with the smallest debts first so that you would feel as if you'd accomplished something. This is the same way I start tackling my house--by starting with the smallest bathroom.
Last week it was time to clean my kitchen. It took me a whole week. I have open cupboards. Many people comment about them when they come to visit and ask if I like them. In truth, I do. I love them. But, there is a downside to having open cupboards. They get very dusty over time and everything has to be taken out once a year, shelves have to be dusted and cleaned, and then everything is reorganized and put back in place. Amidst tackling school and normal life, my kitchen took me a whole week to clean. I wasn't finished until Saturday morning when I tackled my range hood and stove. Every time I clean out my kitchen I ask myself what I need and don't need. Then, I purge and pass things on. It helps. This time I finally moved the spice rack from one wall to the opposite long wall and swapped it with our wall clock. My whole family is thrilled with the results. After almost 4 years in this house, my kids can finally sit down at the kitchen table without knocking their heads on the rack.
Cleaning tips from my kitchen that have helped me...
+ I have organized my pantry with many shoebox sized plastic bins to help keep things in place. When I need cake decorations or snacks or trail mix, I can go to the right box, instead of having things falling all over the shelves. I like the shoebox sized bins because they're cheap at around a $1 each.
+ We have a stainless hood and stove. I use baking soda and a damp rag (a regular dishrag) to clean the inside and outside of the hood. Baking Soda is the only thing I've found that can easily cut through the grease. Once all the grease is gone, I can use my Norwex green and purple cloths to clean and polish it.
+ Going through my pantry is helpful because it reminds me of what I really use and don't use. I find each time I purge, I have to throw away a few food items that I thought I would use, but never did. This time I was very thankful for the reminder and kept it on the forefront of my mind when I went to the grocery store the next day.
This week, my homeschool room and the basement remain. A friend once told me about the Fly Lady. The advice she took from the site was to start with her kitchen counters. The Fly Lady advises to declutter for 15 minutes a day. That's how I am with cleaning my hardest rooms. Every day, I do something. This morning, I swept the basement. Later this morning, I'm going to begin tackling the clothes area and sorting the homeschool books I banished to the basement a month ago.
But, before I can tackle more of my basement, I need to head to the dreaded dentist and get some schooling done ;) Little by little, I'll get there... the blessing is that my house feels more organized again and it feels a little lighter!
The List for the Day
One of my struggles with my family is getting them to put things away. I'm one of those people who picks things up and then puts them away in their spot--most of the time. I think I have to go through my kitchen corner and school desk every other week or so and regroup, sort, and take care of what's there. But, I put my shoes away and hang up my coats.
 My family, though, often doesn't. I do a lot of reminding and asking for children to come put their things away. Every trip from the car to the house involves bringing something back. I realize that somewhere along the way, I learned to do this. I'm not sure exactly when. As I stood near some moms during VBS this summer, one mom was talking with another about her son never remembers to put anything away. So, I knew it wasn't just my kids with this struggle.
In her new book, Taming the To-Do List: How to Choose Your Best Work Every Day, Glynnis Whitwer talks about this struggle to take 3 more steps to put something away. She goes into detail about talking one thing at a time. For her, it started with her bathrobe. She goes on to explain how that applies to us and how to tackle the things we don't have the energy for. I liked Ms. Whitwer's tone in her book. It wasn't critical or harsh like one book I read about organization a few years ago.
There are many things that I agree with in this new book from Bethany House Publishing. For example, on pg. 69, she says, "A wise and loving parent trains children to do things they don't feel like doing, such as get along with siblings, clean up after themselves, and do their homework. Very few children are born with the motivation to act in selfless ways...By teaching them responsibility, we raise children to be mature adults. We train them to do the right thing, and hopefully the benefits are positive enough to reinforce the behavior. Perhaps we need to return to this model of training for ourselves in order to do what's right in spite of how we feel." It's hard to choose to do what we don't want to do in a culture that constantly tells us that we should always be able to do what we want to do.
This quote brings to mind the Life is Good shirts in my drawer. I like the clothing of this company because of the optimistic and fun sayings on the shirts, but I've always twisted the company's slogan in my mind. The slogan is: "Do what you love. Love what you do." Instead of focusing on the idea that we should all do what we love to do and then you'll love what you do, I've always taken this to remind me of Ecclesiastes 3:13: "also that everyone should eat and drink and take pleasure in all his toil—this is God's gift to man." To enjoy our work and food is a gift from God. I think it isn't so much about getting to do what we want to do--but enjoying what God gives us to do.
Ms. Whitwer's book is for someone who really wants to dig in and focus in on getting their to do lists done, but is struggling to get them done. Her book is very matter of fact, yet not condemning or critical. She speaks from her own experience (which I think is always important in this type of book). If you're looking for a book on this subject, this might be one that would encourage you.
Please note that I received a complimentary copy of this book for review from Bethany House Publishers.
My family, though, often doesn't. I do a lot of reminding and asking for children to come put their things away. Every trip from the car to the house involves bringing something back. I realize that somewhere along the way, I learned to do this. I'm not sure exactly when. As I stood near some moms during VBS this summer, one mom was talking with another about her son never remembers to put anything away. So, I knew it wasn't just my kids with this struggle. In her new book, Taming the To-Do List: How to Choose Your Best Work Every Day, Glynnis Whitwer talks about this struggle to take 3 more steps to put something away. She goes into detail about talking one thing at a time. For her, it started with her bathrobe. She goes on to explain how that applies to us and how to tackle the things we don't have the energy for. I liked Ms. Whitwer's tone in her book. It wasn't critical or harsh like one book I read about organization a few years ago.
There are many things that I agree with in this new book from Bethany House Publishing. For example, on pg. 69, she says, "A wise and loving parent trains children to do things they don't feel like doing, such as get along with siblings, clean up after themselves, and do their homework. Very few children are born with the motivation to act in selfless ways...By teaching them responsibility, we raise children to be mature adults. We train them to do the right thing, and hopefully the benefits are positive enough to reinforce the behavior. Perhaps we need to return to this model of training for ourselves in order to do what's right in spite of how we feel." It's hard to choose to do what we don't want to do in a culture that constantly tells us that we should always be able to do what we want to do.
This quote brings to mind the Life is Good shirts in my drawer. I like the clothing of this company because of the optimistic and fun sayings on the shirts, but I've always twisted the company's slogan in my mind. The slogan is: "Do what you love. Love what you do." Instead of focusing on the idea that we should all do what we love to do and then you'll love what you do, I've always taken this to remind me of Ecclesiastes 3:13: "also that everyone should eat and drink and take pleasure in all his toil—this is God's gift to man." To enjoy our work and food is a gift from God. I think it isn't so much about getting to do what we want to do--but enjoying what God gives us to do.
Ms. Whitwer's book is for someone who really wants to dig in and focus in on getting their to do lists done, but is struggling to get them done. Her book is very matter of fact, yet not condemning or critical. She speaks from her own experience (which I think is always important in this type of book). If you're looking for a book on this subject, this might be one that would encourage you.
Saturday, October 3, 2015
Celery
That's all this post is about. Celery.
We went away on vacation a few weeks ago and my mom stayed in our home and took care of our dog. I asked her to eat the food in the fridge that we'd left so that it wouldn't go bad! And she did--just as I'd hoped she would.
But, the celery was left.
I headed to the store the next day and of course picked up some celery expecting it to have gone bad. But, the next morning when I pulled out the celery--it was just fine.
My mom had taken a twist tie and twisted the end of the celery bag shut. It worked and extended the life of my celery! I had never thought of doing this, but I am very glad to learn this new trick.
The trick I've always known helps when celery goes limp. Cut the celery into pieces and place in a tupperware. Once all of the pieces are in the container, fill it with cold water, place the lid on top, and put it in the fridge. Within a few hours, the celery won't be limp anymore. It will stay good for at least another week this way.
So, that's all I know. At least about celery.
We went away on vacation a few weeks ago and my mom stayed in our home and took care of our dog. I asked her to eat the food in the fridge that we'd left so that it wouldn't go bad! And she did--just as I'd hoped she would.
But, the celery was left.
I headed to the store the next day and of course picked up some celery expecting it to have gone bad. But, the next morning when I pulled out the celery--it was just fine.
My mom had taken a twist tie and twisted the end of the celery bag shut. It worked and extended the life of my celery! I had never thought of doing this, but I am very glad to learn this new trick.
The trick I've always known helps when celery goes limp. Cut the celery into pieces and place in a tupperware. Once all of the pieces are in the container, fill it with cold water, place the lid on top, and put it in the fridge. Within a few hours, the celery won't be limp anymore. It will stay good for at least another week this way.
So, that's all I know. At least about celery.
Friday, September 25, 2015
Amazingly Fun Stuffed Animal Vet Doctor Book/Set
Teddy Bear Doctor: A Let's Make and Play Book
Today this book arrived in the mail and my girls were so excited to get started playing. In my middle daughter's words, "MOM, this book is Amazing!" She absolutely loves it. It's a ready made vet/stuffed animal doctor set up in a book. There were stickers and punchouts in the book. Paper animal x-rays, directions on how to assemble and make things, ideas for play, sticker bandaids, and other stickers to use.
My girls set to work making their bedroom and the bathroom into a vet hospital and examining room. The results can be seen in these pictures...

Please sign in!


The kit works for American Girl dolls as well as stuffed animals.

My oldest daughter made the second sign and the first sign is from the book.

The pet vet kit sticker is from the book and there are xrays (hidden from view) in the box.
I would highly recommend this kit for girls 6-10 years old who love to play with their stuffed animals and/or American Girl Dolls. We've purchased several AG doll books and kits (which are all very well made and constructed), but this book was so much simpler for my girls to go right to work on playing with. This book by Deanna Cook is a gem! My girls both give it a huge thumbs up!
Please note that I received a complimentary copy of this book for review from Storey Publishing.
Sunday, September 20, 2015
Attempt at Baked Beans
This morning I decided to make baked beans for our church picnic. After perusing the internet and looking at several recipes, I came up with my own. It turned out well and my family and friends seemed to like it!
Baked Beans
8 oz. chopped ham or bacon, cooked
I had put a ham in the crock pot yesterday for our dinner and used some of this.
3/4-1 medium onion, diced
3 large cans baked beans (I used a brown sugar/bacon flavor baked beans from Aldi)
1/2 cup barbecue sauce (I used Trader Joe's BBQ sauce)
1/2 cup brown sugar
1/4 cup cider vinegar
1 Tbsp spicy brown mustard/deli mustard
1 Tbsp ketchup
1. Saute onion in 1 Tbsp of canola oil.
2. Place baked beans in crock pot.
3. Add sauteed onion and all other ingredients. Stir well.
4. Cook in 4 qt crock pot on high for 6 hours.
Serve!
Baked Beans
8 oz. chopped ham or bacon, cooked
I had put a ham in the crock pot yesterday for our dinner and used some of this.
3/4-1 medium onion, diced
3 large cans baked beans (I used a brown sugar/bacon flavor baked beans from Aldi)
1/2 cup barbecue sauce (I used Trader Joe's BBQ sauce)
1/2 cup brown sugar
1/4 cup cider vinegar
1 Tbsp spicy brown mustard/deli mustard
1 Tbsp ketchup
1. Saute onion in 1 Tbsp of canola oil.
2. Place baked beans in crock pot.
3. Add sauteed onion and all other ingredients. Stir well.
4. Cook in 4 qt crock pot on high for 6 hours.
Serve!
Saturday, September 19, 2015
All-in-One Cookbook Book!
I love cookbooks. They make me want to cook! I have many friends who love to look for recipes on the internet. But, I'm a print person. I love the feel of a book in my hands. Somehow, it's easier for my eyes to focus on a page in front of me than on a computer screen without all the ads surrounding what I'm trying to look at.
But, there is only so much room on my shelf. So, new additions to my cookbook shelves are few and far between. Every once in a while, though, I come across a book that I'm really excited about! This is the case of the cookbook that's sitting in front of me on my desk right now.

But, there is only so much room on my shelf. So, new additions to my cookbook shelves are few and far between. Every once in a while, though, I come across a book that I'm really excited about! This is the case of the cookbook that's sitting in front of me on my desk right now.
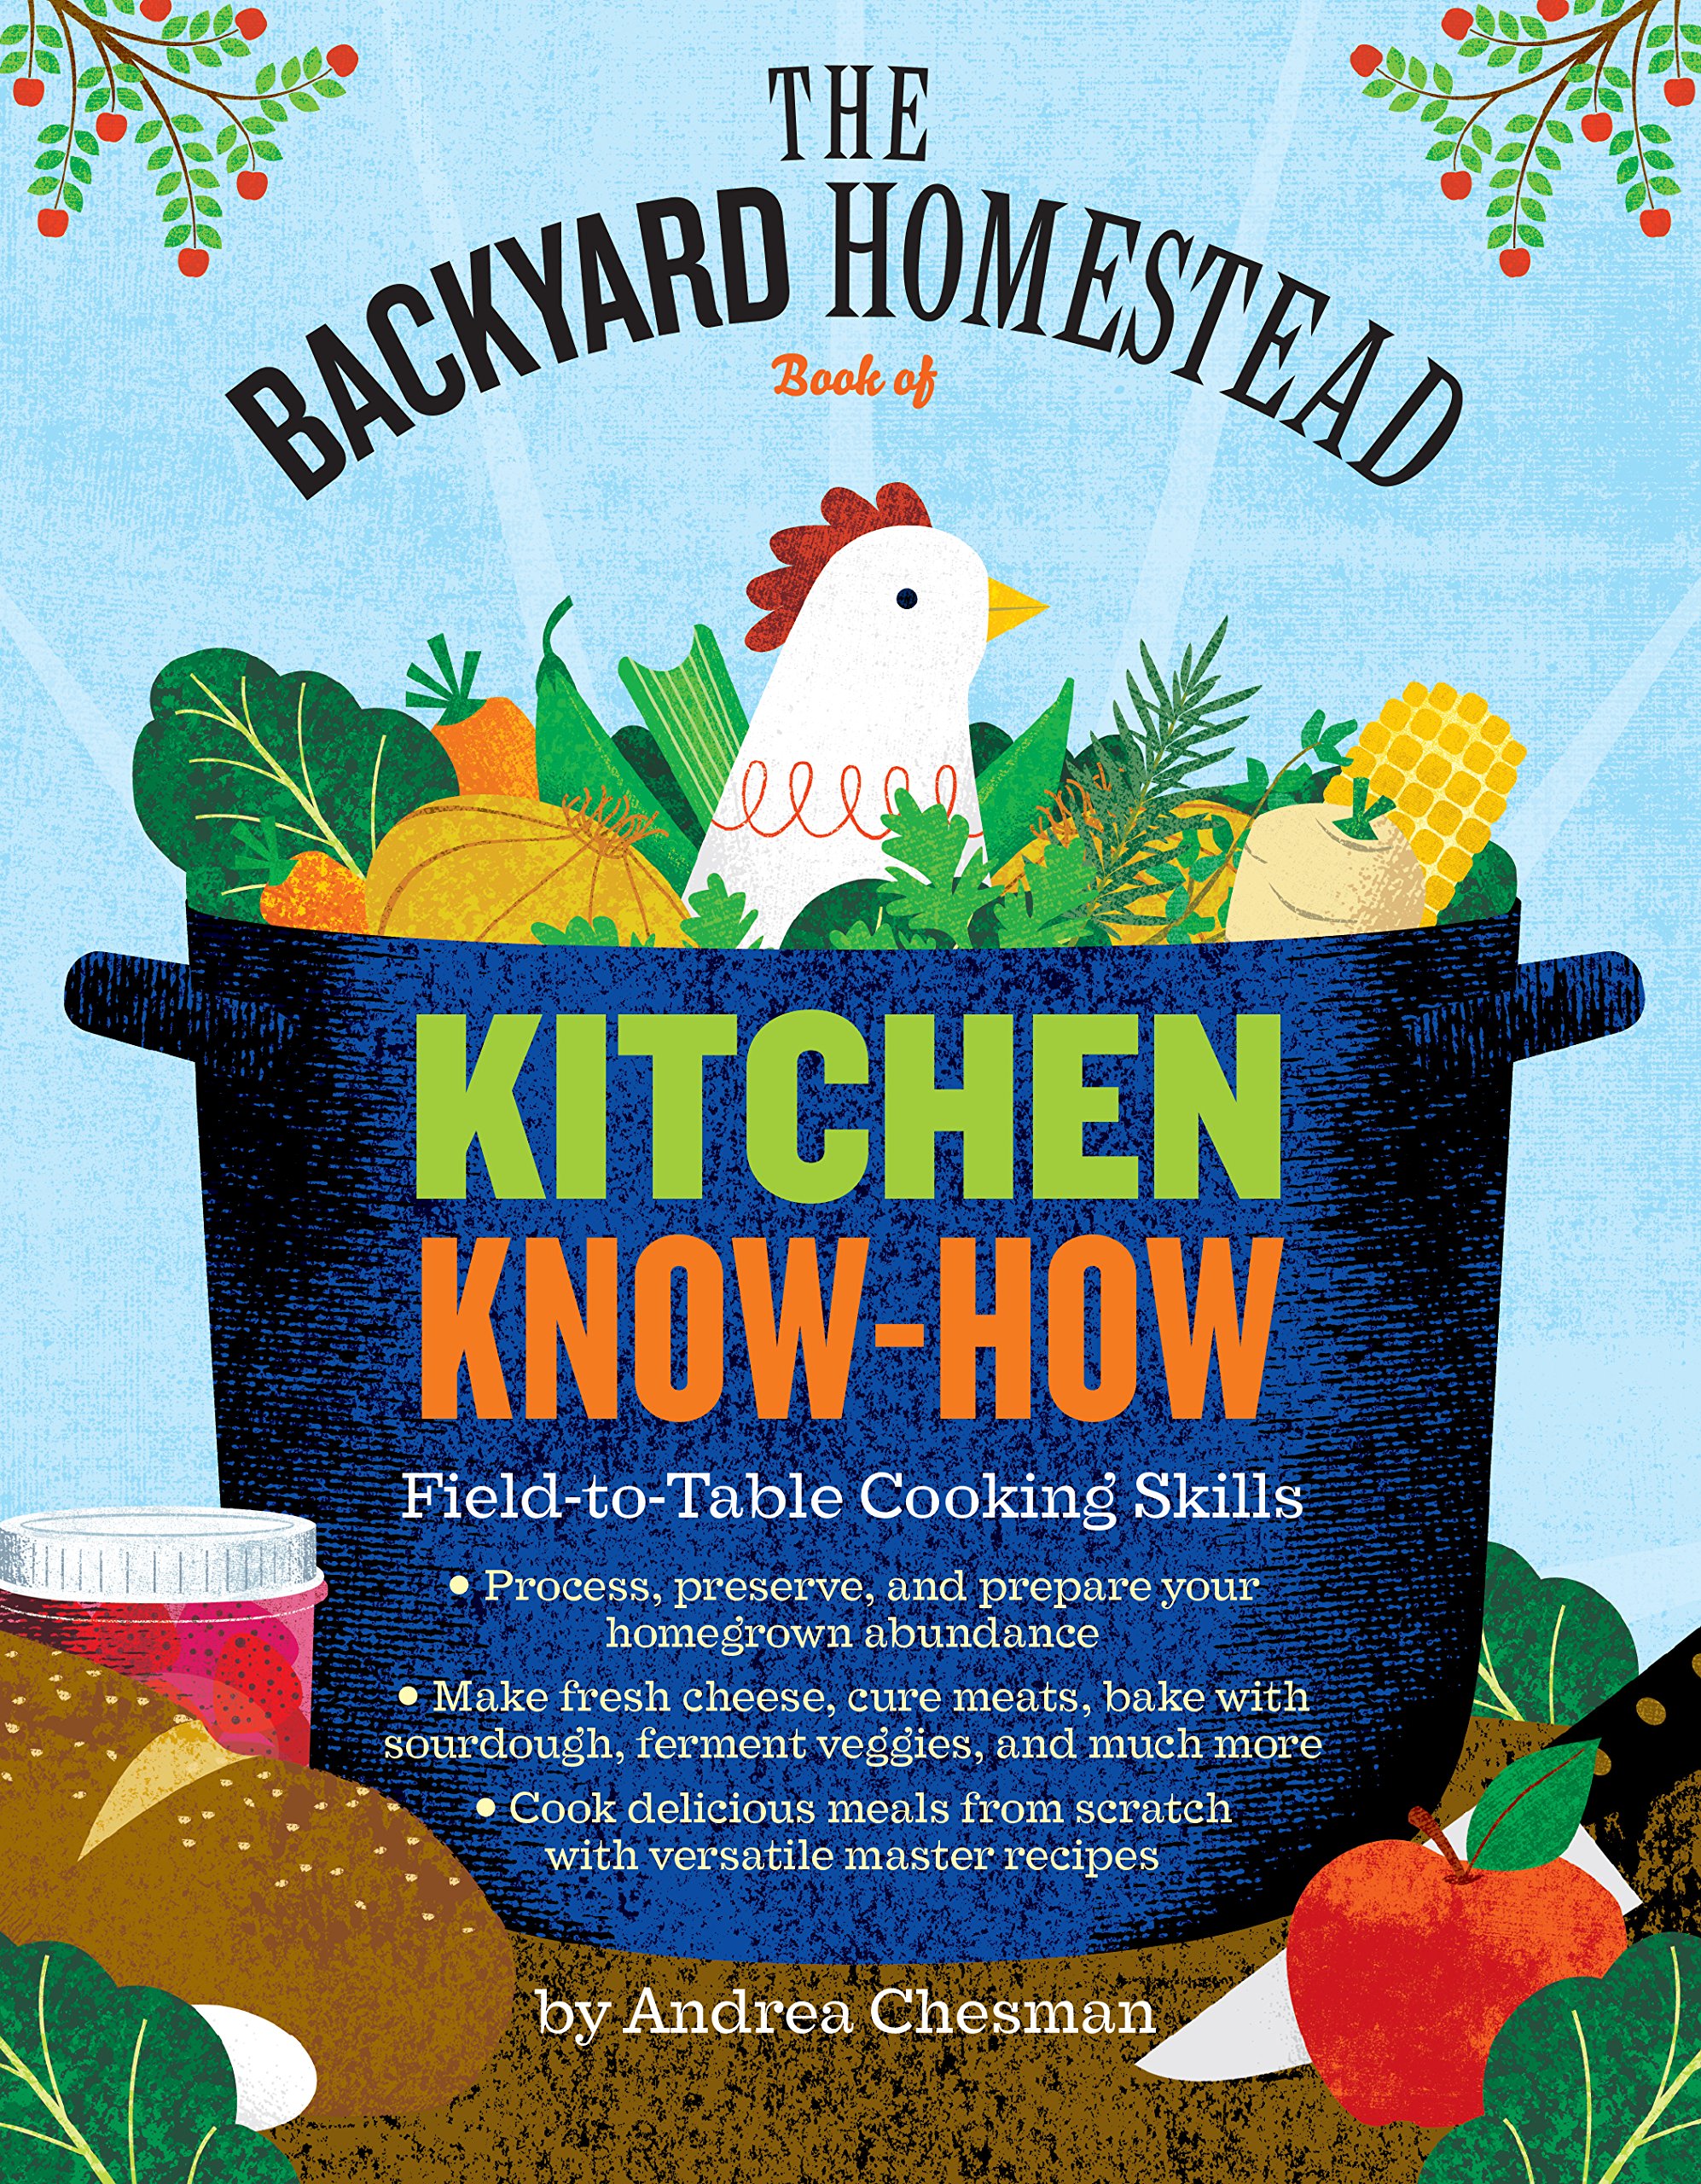
This is a new cookbook, of sorts, by Andrea Chesman (published by Storey Publishing). Ms. Chesman has been writing cookbooks for over 30 years. This book seems to be an updated version of a book that was published five years ago called Back to Basics Traditional Kitchen Wisdom, which Ms. Chesman wrote, and covered similar topics. But, that book was half the length of this one.
I love the way Storey formats books. The font, pictures, columns, bold type--all make it easier to read their books. This book is divided into 3 sections: 1. Harvesting and storing fresh foods, 2. Food Preservation, and 3. Homestead Cooking.
This is an all-in-one kind of book. I love books like this that help me conserve space on my shelves! The first section is exactly what I want. It goes through a list of vegetables and lists when to harvest, how to fix (cooking times) and preserve them. Then, it goes through the fruits (in alphabetical order which is very helpful) as well. She follows that up with a recipe for sourdough starter and no-knead sourdough bread. I can't wait to try this! I need to get a baguette pan first, though, and a big jar for the starter. I've been very disappointed in the baguettes we've bought over the past few months so I have wanted to make my own. This book makes it sound very doable to make my own sourdough starter and make the baguettes. I've read many directions on how to make baguettes over the years and I haven't found any of them that sounded as doable to me as the ones in this book!
In general, I found her directions on making cheese, veggie chips, and other dishes very understandable. What I think I was most surprised by was the dishes she chose to include. She included interesting and simple ethnic dishes like tzatiziki and Mujaddara. I look forward to trying the lentil dishes she included and her recipe for Saag Paneer. I regret that my school year is in full swing now and it is going to be some time before I get to sit down and make these recipes. But, I have worked a few of them into my menu for next month. So, I can't personally vouch for how good the recipes are---yet. I will update this review once I've made the starter and baguettes and other recipes that I am intending to try. But, I've never cooked from a Storey cookbook yet that I haven't liked.
One thing that was very interesting to me was how Ms. Chesman expressed her opinions. She did share her opinions about things such as raw milk, but I felt that she made it clear that they are her opinions. I read one review of the book which remarked about her tone in another passage of the book. I guess she just sounded to me like many women I've met in my life--opinionated, a bit outspoken, weathered, aware that everyone isn't the same and that life isn't as cut and dried as many think it is.
If you're in the market for an all in one food preserving/storing/recipe type of cookbook, this one is definitely worth looking into (especially if you have a large garden and are mini-homesteading of sorts and keep chickens!)
Please note that I received a complimentary copy of this book for review from Storey Publishing.
Monday, August 17, 2015
Nestle Toll House Cookies
A friend of mine was asking me today about Toll House cookies and me in my usual, very honest way about cookies admitted that I think it's one of the worst recipes--it comes out sometimes and other times it doesn't come out at all. I've found this multiple times when I've tried the recipe over the years and I've heard it from others too! Most of the time everyone seems to think it's them that's the problem--not the recipe.
I think it's the recipe that's the problem.
Recently, though, my daughter Sami was working on a regions report and her project for the Northeast US was to make a regional food. She picked Tollhouse cookies over a fluffer nutter sandwich...
Thankfully, we found a recipe that actually worked for us! It's on the blog, Itsalwaysautumn.com. If you click on the name of the blog, it should take you to the blog post that has a download link for a fun printable version of the recipe for kids. I compared it to the recipe on the back of the bag and the only difference is the distribution between brown and white sugar.
There are a couple of other things that I think help make a successful cookie.
1) I don't soften butter unless a recipe specifically says so. All of my cookie recipes, minus one, just call for butter.
2) Cream the butter and sugars together until there NO lumps.
3) I use half size bun pan cookie sheets for my cookie sheets with half of sheet of parchment. Every few years, I order a box from Webstaurantstore.com.


I think it's the recipe that's the problem.
Recently, though, my daughter Sami was working on a regions report and her project for the Northeast US was to make a regional food. She picked Tollhouse cookies over a fluffer nutter sandwich...
Thankfully, we found a recipe that actually worked for us! It's on the blog, Itsalwaysautumn.com. If you click on the name of the blog, it should take you to the blog post that has a download link for a fun printable version of the recipe for kids. I compared it to the recipe on the back of the bag and the only difference is the distribution between brown and white sugar.
There are a couple of other things that I think help make a successful cookie.
1) I don't soften butter unless a recipe specifically says so. All of my cookie recipes, minus one, just call for butter.
2) Cream the butter and sugars together until there NO lumps.
3) I use half size bun pan cookie sheets for my cookie sheets with half of sheet of parchment. Every few years, I order a box from Webstaurantstore.com.
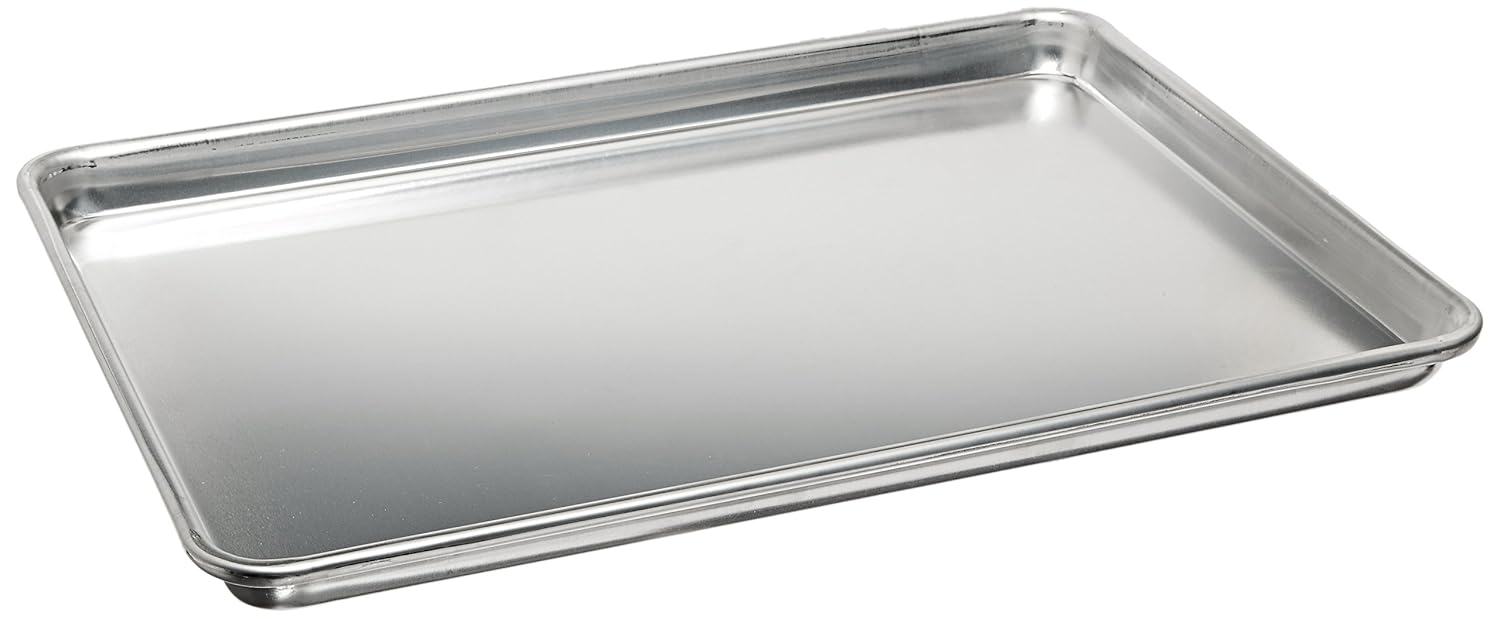

The quilon parchment paper can withstand temps up to 425, which is fine for every cookie I make and biscuits. A box usually costs about $35-$40 for 1000 sheets (which can be torn in half to cover 2 bun pans). I usually divide the box up among a few friends. It does take me several years to go through a box (3-4 yr), but the cost savings is worth it because 1 roll of Reynolds parchment paper is equivalent to 30 pieces (or 15 full size pieces). A roll of Reynolds paper cost about $4.50 at Target the last time I checked. So, 100 sheets from the box cost the same as 15 sheets from the roll.
4) Use a kitchenaid mixer. It makes cookie making so much easier! Kohl's is the best place to get one around Christmas time--combining coupons can make them a much less daunting purchase.
Saturday, August 1, 2015
Beans and Rice, My family's style...
Yesterday, my girls had some friends over for a book group discussion and us moms got to talk. We talked about cooking for a little bit and one of the moms mentioned cooking by looking in the fridge and deciding what to cook based on what was in her fridge. I took a cue from her last night and went downstairs to my freezer. What I had planned for dinner wasn't going to work, so I needed a new plan. I saw some sausage on the top shelf and remembered my husband saying a few days before that he loved beans and rice. So, I thought I'd try my hand at a makeshift version. My kids don't like spicy things, so
Rice
and Beans, My family's style
1 -15 oz. Can black beans,
rinsed
1 -28 oz. Can baked beans,
rinsed
1 small onion, chopped in
small pieces
1 red or yellow bell
pepper, chopped
3 cloves garlic,
minced
2 stalks celery, chopped
finely
½ tsp dried thyme
¼ tsp dried sage
1 handful fresh parsley,
chopped
1 pound Italian sausage
1 tsp. seasoning mix...
the seasoning recipe: ¾ tsp paprika
½ tsp garlic powder
½ tsp black pepper
¼ tsp thyme
¼ tsp ancho chile powder
¼ tsp onion powder
¼ tsp oregano
1/8 tsp salt
1/8 tsp ground mustard powder
Directions:
- Brown and cook sausage through. Then, cut into half length wise and then slice each half. Place in a bowl and set aside.
- Saute onion, bell pepper, garlic, and celery in 2 Tbsp olive oil for 3-4 minutes until softened.
- Rinse beans and add to onion mixture. Add spices and parsley. Cook over medium heat for 5-10 minutes.
- Add sausage to mixture and warm through. Add salt and pepper to taste.
Serve over rice. My kids
like to sprinkle it with a little soy sauce. My husband liked it even without adding any heat (cayenne pepper) which was quite surprising to me!
Thursday, July 23, 2015
Cradle Cap
Many children, like two of mine, end up with cradle cap that doesn't want to go away after they are toddlers. So, I made a trip to the dermatologist and was given a surprising recommendation!
Rub it in every other day. Let it stand for 15 minutes on the scalp and then rinse out. Repeat for a few weeks.
Simple, inexpensive--I tried to find one that smelled the most like shampoo and least like dish soap. And, well, it seems to be working!
My youngest child's cradle cap is finally gone and my middle child's is finally mostly gone.
Just thought I'd pass this on in case it might be of help to someone--and save them a trip to the dermatologist!
Dawn Dish Soap
Rub it in every other day. Let it stand for 15 minutes on the scalp and then rinse out. Repeat for a few weeks.
Simple, inexpensive--I tried to find one that smelled the most like shampoo and least like dish soap. And, well, it seems to be working!
My youngest child's cradle cap is finally gone and my middle child's is finally mostly gone.
Just thought I'd pass this on in case it might be of help to someone--and save them a trip to the dermatologist!
Wednesday, June 24, 2015
IMPORTANT! Scam Phone Calls
I just got a message on my phone from an "unavailable" number. I hate these phone calls :( The message said it was from the IRS and they were getting ready to sue me--and of course, to contact them at an included phone number.
This one was meant to inspire panic in me, but before I even let my mind run, I got on the computer and googled "IRS Scam Phone Calls". I found some very helpful information here on the IRS' website: http://www.irs.gov/uac/Tax-Scams-Consumer-Alerts
No worries. The information on this page totally confirmed that the phone message I received was a scam. It makes me mad that people do stuff like this--make people panic--just to cheat them out of money. The love of money can cause people to do a lot of wrong things...
This one was meant to inspire panic in me, but before I even let my mind run, I got on the computer and googled "IRS Scam Phone Calls". I found some very helpful information here on the IRS' website: http://www.irs.gov/uac/Tax-Scams-Consumer-Alerts
No worries. The information on this page totally confirmed that the phone message I received was a scam. It makes me mad that people do stuff like this--make people panic--just to cheat them out of money. The love of money can cause people to do a lot of wrong things...
Tuesday, June 23, 2015
Quilting Beyond...
Years ago when I was first married, I learned on my own how to quilt. (This was in pre-Youtube days.) I remember looking at a few websites and books--and then I began experimenting. But, I felt like I was cheating somehow when I would applique designs on instead of piecing them into the quilt. I could piece in designs, but I often chose to applique. I've always wondered how I could improve my quilting skills and stop my "sort of" cheating!
Well, I came across a really neat quality book, all points patchwork, by Diane Gilleland. This book
 explains a style, or method, of paper piecing that can be used to make complicated polygon shaped quilts and quilting projects. The pictures and directions are extremely clear and well written. the projects included as examples are appealing and are somehow both modern and old fashioned at the same time. The patterns of the material in the examples seem timeless.
I was impressed with how clear the author was able to explain how to quilt using the method of paper piecing. I've never done this before, but the directions are so clear, I feel fully confident that I can now begin a project!
When I showed this book to a few other moms, who aren't actually even quilters, they loved the projects and expressed how much they would like to have them in their own homes. Quilters naturally love quilts, but it's always interesting to see how people who don't quilt react to them.
If you're interested in beginning to make more complicated designs in your quilts and projects, this book would give you much food for thought and a great place to begin!
Please note that I received a complimentary copy of this book for review from Storey Publishing.
Well, I came across a really neat quality book, all points patchwork, by Diane Gilleland. This book
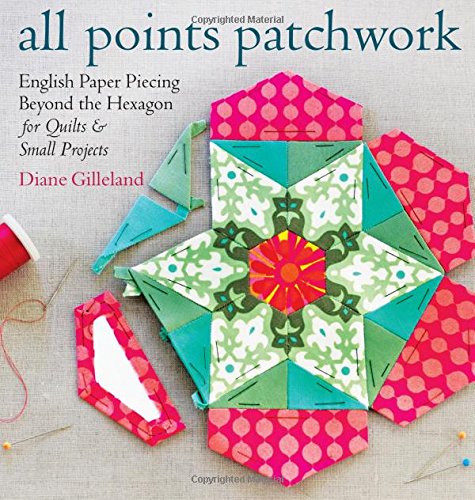 explains a style, or method, of paper piecing that can be used to make complicated polygon shaped quilts and quilting projects. The pictures and directions are extremely clear and well written. the projects included as examples are appealing and are somehow both modern and old fashioned at the same time. The patterns of the material in the examples seem timeless.
I was impressed with how clear the author was able to explain how to quilt using the method of paper piecing. I've never done this before, but the directions are so clear, I feel fully confident that I can now begin a project!
When I showed this book to a few other moms, who aren't actually even quilters, they loved the projects and expressed how much they would like to have them in their own homes. Quilters naturally love quilts, but it's always interesting to see how people who don't quilt react to them.
If you're interested in beginning to make more complicated designs in your quilts and projects, this book would give you much food for thought and a great place to begin!
Please note that I received a complimentary copy of this book for review from Storey Publishing.
Monday, June 22, 2015
Crafting Cookies
When I walk into high end bakeries, I am often amazed at the beauty of the foods. I didn't always notice such things, but I married someone who pays a lot of attention to the "look of food". I, on the other hand, am a person who tends to cook for flavor rather than looks.
Part of it is because I am often disappointed by the "look" of foods in bakeries because they don't match the taste I'm hoping for. Usually, they're drier. So, my solution when I really want to try and bake something is just to find a recipe and make it at home... which brings me to a fun cookbook I received in the mail recently. It's titled Cookie Craft by Valerie Peterson and Janice Fryer.

This book tackles and completely explains how to make those beautifully decorated sugar cookies you've seen in fancy bakeries.
What I love in this book:
--The recipes are clear
--All the vocabulary of cookie crafting is clearly explained
--Tons and tons of ideas for both shapes and potential detailing
--It makes sense. Above all else, this is important when tackling a new and complicated craft!
Why I love this book more than a Youtube video...
--You can flip back and forth to the info and directions you need
--It would take hours to watch enough Youtube videos that would give you all the info in this book
--I need ingredients written down--not on a screen--so I dont' forget what I've added!
Cookie Crafting is definitely a craft. I don't usually think of cooking and baking as a craft, but these cookies are not for the faint of heart. I would compare this craft to scrapbooking--it's time intensive, but you'll have a beautiful end product when you're done!
If you've ever wanted a book on cookie crafting or have wanted to know how to make those fancy, decorated sugar cookies, I'd definitely check this book out!!
Please note that I received a complimentary copy of this book for review from Storey Publishing.
Part of it is because I am often disappointed by the "look" of foods in bakeries because they don't match the taste I'm hoping for. Usually, they're drier. So, my solution when I really want to try and bake something is just to find a recipe and make it at home... which brings me to a fun cookbook I received in the mail recently. It's titled Cookie Craft by Valerie Peterson and Janice Fryer.
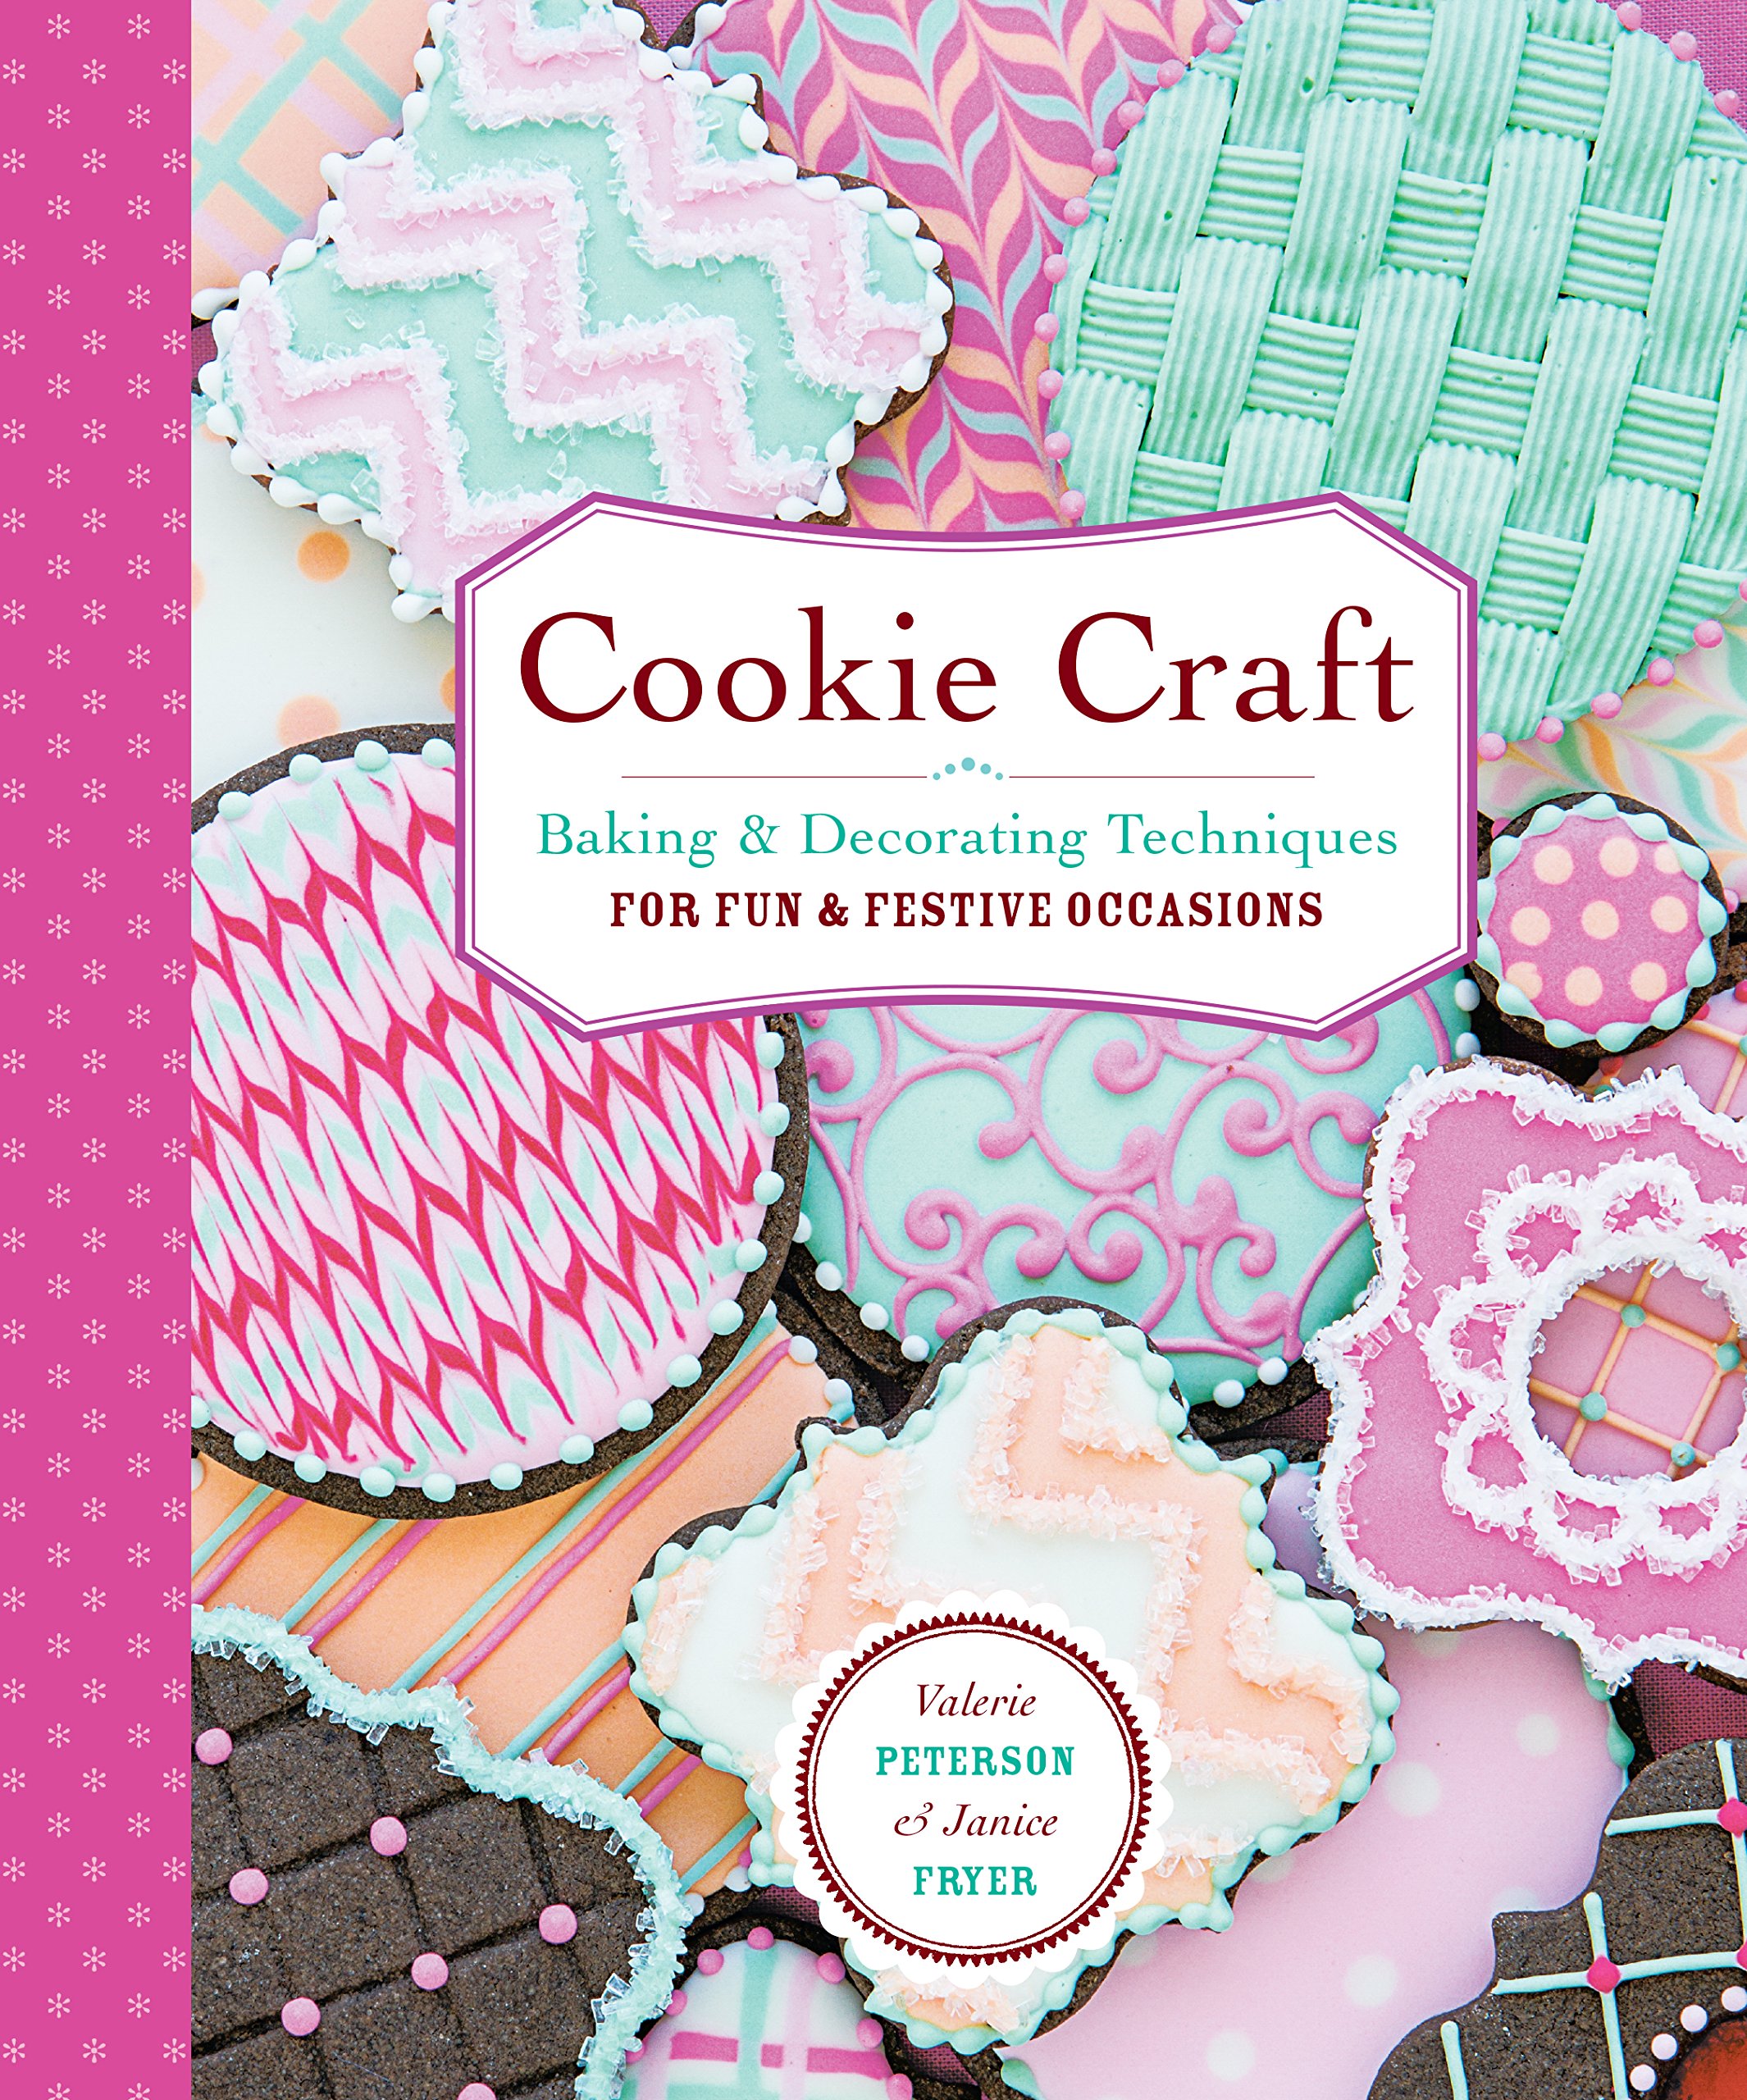
This book tackles and completely explains how to make those beautifully decorated sugar cookies you've seen in fancy bakeries.
What I love in this book:
--The recipes are clear
--All the vocabulary of cookie crafting is clearly explained
--Tons and tons of ideas for both shapes and potential detailing
--It makes sense. Above all else, this is important when tackling a new and complicated craft!
Why I love this book more than a Youtube video...
--You can flip back and forth to the info and directions you need
--It would take hours to watch enough Youtube videos that would give you all the info in this book
--I need ingredients written down--not on a screen--so I dont' forget what I've added!
Cookie Crafting is definitely a craft. I don't usually think of cooking and baking as a craft, but these cookies are not for the faint of heart. I would compare this craft to scrapbooking--it's time intensive, but you'll have a beautiful end product when you're done!
If you've ever wanted a book on cookie crafting or have wanted to know how to make those fancy, decorated sugar cookies, I'd definitely check this book out!!
Please note that I received a complimentary copy of this book for review from Storey Publishing.
Saturday, June 13, 2015
Chicken Tikka Masala
A few weeks ago, we went to an Indian restaurant near us. My kids loved the Chicken Korma and the Chicken Tikka Masala. I had made Chicken Tikka Masala before at home. The first time it was great, but the second not so great. So, last week I thought I'd try again. I looked up several recipes and combined them to make a new one. This is what I ended up with:
Chicken Tikka Masala
1. Mince 1/2 large onion and saute over med. heat in 3-4 Tbsp canola oil for 5 minutes, until they are softened and just beginning to brown.
2. Add 2 garlic cloves, minced (1 tsp.)
2 tsp. coriander
1 tsp. cumin
1 tsp. paprika
1 tsp. garam masala
1/2 tsp. salt
Saute for 30 seconds.
3. Stir in one 8 oz. can of tomato sauce and simmer for 15 minutes.
4. Pound 2 pounds of chicken breast till thin. (between 1/4-1/2 inch thick = 1 cm thick)
5. Mix 1 cup plain yogurt
2 Tbsp. lemon juice
1 tsp. salt
1-2 tsp cumin
1/2 tsp black pepper
1 tsp cinnamon
1/4-1/2 tsp. ground ginger (optional)
6. Put foil on a cookie sheet and place grate on top. Spray grate with cooking spray.
7. Pat chicken dry with paper towels and coat chicken with yogurt mixture. Then, lay chicken on grate. Broil 10 min. @ 475 degrees. Turn chicken. Broil 5 min. more. I place my oven rack on the level as close as I can get and still fit in the tray, but you don't want the chicken to burn--so the first time you make this, I would keep a close eye to make sure your chicken isn't burning.
8. Add 1 cup half and half plus 1 Tbsp. butter to sauce. Whisk in. Tear chicken into pieces and stir in.
Serve with basmati rice and cilantro on the side.
I know the half and half seems like a lot of calories--but several of the recipes I saw called for whole fat whipping cream! So, at least it's less than that. You could probably get away with sauteeing the onion in only 1-2 Tbsp canola oil and without altering the taste of the recipe too much and I will try doing that next time.
Oh, and my kids and I are very mild, so you might have noticed that there's no cayenne pepper in this recipe... My husband loves spicy food so I just leave the cayenne pepper on the table and he can sprinkle it over his food to taste!
:) Let me know how this recipe works for you if you try it and if you have any alterations you make to it!
Chicken Tikka Masala
1. Mince 1/2 large onion and saute over med. heat in 3-4 Tbsp canola oil for 5 minutes, until they are softened and just beginning to brown.
2. Add 2 garlic cloves, minced (1 tsp.)
2 tsp. coriander
1 tsp. cumin
1 tsp. paprika
1 tsp. garam masala
1/2 tsp. salt
Saute for 30 seconds.
3. Stir in one 8 oz. can of tomato sauce and simmer for 15 minutes.
4. Pound 2 pounds of chicken breast till thin. (between 1/4-1/2 inch thick = 1 cm thick)
5. Mix 1 cup plain yogurt
2 Tbsp. lemon juice
1 tsp. salt
1-2 tsp cumin
1/2 tsp black pepper
1 tsp cinnamon
1/4-1/2 tsp. ground ginger (optional)
6. Put foil on a cookie sheet and place grate on top. Spray grate with cooking spray.
7. Pat chicken dry with paper towels and coat chicken with yogurt mixture. Then, lay chicken on grate. Broil 10 min. @ 475 degrees. Turn chicken. Broil 5 min. more. I place my oven rack on the level as close as I can get and still fit in the tray, but you don't want the chicken to burn--so the first time you make this, I would keep a close eye to make sure your chicken isn't burning.
8. Add 1 cup half and half plus 1 Tbsp. butter to sauce. Whisk in. Tear chicken into pieces and stir in.
Serve with basmati rice and cilantro on the side.
I know the half and half seems like a lot of calories--but several of the recipes I saw called for whole fat whipping cream! So, at least it's less than that. You could probably get away with sauteeing the onion in only 1-2 Tbsp canola oil and without altering the taste of the recipe too much and I will try doing that next time.
Oh, and my kids and I are very mild, so you might have noticed that there's no cayenne pepper in this recipe... My husband loves spicy food so I just leave the cayenne pepper on the table and he can sprinkle it over his food to taste!
:) Let me know how this recipe works for you if you try it and if you have any alterations you make to it!
Subscribe to:
Posts (Atom)