Saturday, April 23, 2011

Day 3: Done Before the Rain Came...

Thursday morning I realized that it wasn't raining and I snuck outside to start working even before the kids woke up.  It may have been a bit chilly, but with 3 kids, I have to steal every moment that I can sometimes.


I started with the beds.  I built 3 triangle beds of cedar.  Lowe's carries cedar, but Home Depot doesn't.  My husband mentioned that you can use other hard woods.  Cedar is advantageous though for two reasons--1) it's cheaper (a lot!) than the other hard woods like poplar and Oak that they carry.  2) the smell of the cedar is unappealing to termites.


This bed I added on to my long rectangular bed.

I did have to run out to get more stakes to put around one of the beds but when I was finished, my triangle beds looked like this:

I know triangle beds are probably not the most economically wise use of the boards based on square foot of gardening space, but I made them in triangles instead of squares because my hope is that they will be easier for the kids to garden in and reach the center of.  The line down the middle is because one side belongs to each girl--it is their garden...to plant, to weed, to water, and to care for...  

I also planted the plants waiting to be planted.

I planted the azaleas around the rose bush hoping that it will keep little ones from touching the thorns of the rose bush.  I did forget to check the companion gardening book.  I hope the combination will be okay.  They are a partial sun flower which should work well in this spot, but will need a lot of water in the summer as it gets hot.


My raspberries are now planted.  They're bush raspberries, not trellised ones, so they look a little different.  

The last thing I did was fix the non-existent border on the side of our house.


I transplanted some bulbs (which are flopping down because they need to take root and get watered), an azalea bush, a hosta, and put a brick border in.  This is a funny spot sun wise.  So, although it is partial sun, it gets really hot in the summer so we'll see if the hosta and azalea make it.  There is another azalea nearby so I am hopeful.  If it doesn't, I'll try something else (a plant that needs and tolerates more sun).  I put in the bricks.  I bought simple plain bricks for 44 cents each.  I was amazed at how much just adding the line of bricks helped.  It defined the area.  

Gardening and landscaping, I've discovered are very expensive especially when you're beginning and you need so much.  What I've been trying to do with my garden is be as economical as I can and spread out the cost.  

Two years ago, I planted perennials in my front flower bed.  That was my first dabbling.  I highly recommend planting strawberries if they grow in your area because they've been super easy to grow.  The kids have loved picking of a few strawberries and watching the flowers bloom and then the strawberries develop.  They multiply and you only need to invest in a plant or two.  I think I bought 1 for the front bed the first year and 2 more the second year.  They now fill the flower bed which is probably 10 feet long.

Last year, we put in the fence, pebble walkway, brought in a load of dirt to raise the level near the house, put in the trellis and two square raised beds.  

This year I've added more raised beds, put in borders, bought a few more plants, bought more pebbles, and am hopefully going to build a compost bin next month.

Dirt Cheap Green Thumb talked about picking plants that are right for your cold hardiness zone and the sun that the area receives where you're planting.  Taking these two things into mind will save you a lot of money.  I have found this to be true.  The plants that haven't survived or haven't thrived weren't really the best plants to put in those areas.  I did lose my oregano last year to a disease, but I had that happen to another friend after her oregano was a few years old like mine.  I never used it, so I'm not going to replant it.  That was another tip I read and agreed with--plant things you're going to eat.  Something might sound appealing, but it isn't worth it if you won't use it.  I planted 3 herbs last year that I did nothing with.  I have a huge lemon balm plant outside that I have no idea what to do with!  It does look beautiful though.  

I've realized a few things this week about gardening.  
1) Start out small.  It's a lot more work than it looks like--to build it and take care of it.  I've been sore and tired after only a few hours of work!
2)  Small is doable.  A pot or adding a plant to a bed that's already made.
3) Plant a strawberry first.  
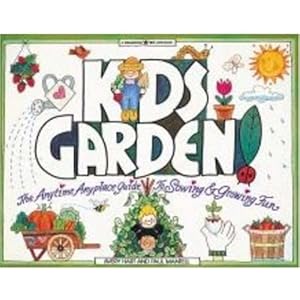
4)  If you have kids, get Kids Garden! and try one of their easy projects first. The book has lots of indoor and outdoor projects.  You can start gardening indoors and then move outdoors.  I'm learning, hopefully.  My girls have loved watching the geraniums grow in their room that we brought home from Longwood Gardens at a free children's activity.  Plants in your home are also good for the air quality in your house.
5)It's not as intimidating as it seems if you haven't gardened before.  Map the sun through the day in the area where you're going to plant.  Note if it drains well but also gets watered.  Pick plants based on how much sun the area gets.  Put tall plants in back and short ones in front (think about shadows from plants onto other ones).  Kids Garden! is the best book I found for explaining how to plant a plant.  Kids books are just simpler than adult books.  Water it in a bit after you plant it and then keep an eye on it.  Weed as needed.  Water as needed.  And enjoy watching it grow!  And last but not least, don't think that if it doesn't grow that you have a brown thumb.  Some or all of your plants may grow.  But, some may not.  Just start back at the beginning.  Think about why you think it might not have grown and try something else in that spot that might work better.

I'll keep you posted as things grow and as we plant... 
I'll also keep you posted on our composting efforts...


PS.  The best part of my gardening efforts this year is that last week, my husband commented about how horrible our yard looked (due to our dog digging everywhere) and the garden hadn't had a makeover yet.  When I took him out to see the final results of my efforts this week, he was pleased with the way the garden looks now.  He suggested putting vining plants around the fence instead of a shrub in the corner and I think it's a great idea.  He would like to help me plant and build the compost bin.  I think it was daunting to him how much needed to be done before I'd started.  

Wednesday, April 20, 2011

Bread a Baby Prefers...

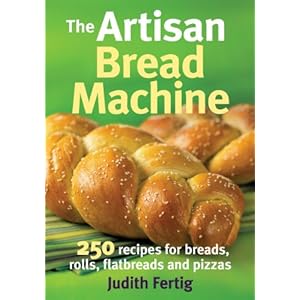
Yesterday afternoon, I took some bread I'd made over to a friend to sample.  She gave a small piece to her one year old daughter.  We were both surprised when her daughter chose the bread over a sugar cookie!  The bread happened to be Anadama Bread made from my bread machine with a recipe from a new cookbook, The Artisan Bread Machine by Judith Fertig.


I tried these recipes from this cookbook:  Old Fashioned Buttermilk Bread, Oatmeal Honey Bread, and Anadama Bread

I primarily bake whole wheat bread.  I was especially curious about how her recipes worked out with my Zojirushi Bread Machine.  So, first I'll address her whole wheat recipes.  She says that you either need to use part bread flour and part whole wheat or add Artisan Dough Enhancer (there's a recipe in the cookbook) with 100% whole wheat.  I use a recipe that allows me to only add Wheat Gluten to my whole wheat flour.  I couldn't find the ingredients for the Dough Enhancer at my local grocery store and I do live in a large metropolitan area.  I believe I'd need to go to a natural foods store.  Since I didn't have the dough enhancer, I chose to make the Anadama Bread using my usual fresh whole wheat modification.  Ms. Fertig adds that you need to watch the dough and add 1-2 Tbsp of flour as needed.  I usually get my bread set up and leave it.  I have found this substitution to work really well for me:
In a recipe that calls for whole wheat flour, 
1 cup whole wheat flour = 1 cup + 2 Tbsp. fresh whole wheat flour
This substitution works with this book as well.  The Anadama Bread is the bread my daughter's little girl held tightly onto.  My 7 year old raved about it.  I loved it's molasses, cornmeal crunch mixed with the wheat flour.  It was surprisingly not too dense.  It wasn't airy, though.  It was just right.  

The Oatmeal Honey Bread was served to the guests at my son's birthday party in the form of peanut butter and jelly sandwiches.  Everyone said, "This is homemade bread, isn't it?!"  I answered affirmatively.  It was well liked.  I thought it turned out a little too moist though.  It would need to be eaten that day--which is pretty easily done in my home.

The final bread I made is the Old Fashioned Buttermilk Bread.  It involves a buttermilk sponge--a type of  sourdough starter.  My sponge did not double in size in 24 hours, though I covered it and followed all the directions.  I used it as is and made the bread.  The bread looked almost undone on top, but when I took it out of the pan and sliced into the bread, it was perfectly done.

My conclusion is that this is a great bread machine cookbook if you like to do part whole wheat breads, are interested in making sourdough breads from scratch, or like to make other all white flour breads.  The Anadama Bread recipe is a keeper for me.  I am looking forward to trying one of the other sourdough recipes.  The directions for all of the recipes are very clear and it makes this cookbook very easy to use.  Just don't lose your place as to what you've already put in your pan like I did once and had to correct.  If you have dough enhancer that you can get at a store nearby, then the 100% whole wheat recipes may be feasible for you.  They aren't for me at this point, but I liked the other recipes enough to say that I really like this Bread Machine book.  If you like using your bread machine at home and are always tempted to buy fancy breads from a bakery, this cookbook would be a blessing.  You can try all the breads you've been curious about without having to spend $4-$6 a loaf!

Please note that I received a complimentary copy of this book from Robert Rose Publishing for review.

End of Day 2 and Gardening Books

Last year, I tried to put in some plastic edging in front of my deck and it did not work out.  It fell over constantly and wasn't very appealing.  So, I decided to go with bricks instead this year--something a bit more substantial...
Here is my result:
I think it looks better than it did before.  I also tried something new with the walkway.  Under the rocks, I put a layer of newspaper.  I read in The Vegetable Gardener's Bible that it's a good organic way to kill grass.  My husband doesn't like black paper so I thought it was a good solution.  Another tip I was given by my friend Jenny as a way to kill grass in walkways or areas you don't want them is to put black plastic (ie. trash bags) down for several days and let the sun kill the weeds.


Here's my new bed waiting for raspberries...
My plan is to plant them in there tomorrow. I put the Humus and top soil in, but haven't mixed it up very well yet.  This is not the perfect site (so don't do what I'm doing).  My side yard is pretty moist and raspberries prefer well draining soil.  I don't have another good option though so I'm going to hope for the best and hope that they will survive.  

I just looked again at these pictures and realized that they probably don't look like much.  They involved a lot of work!  I had no idea how much before I did it.  I have a new and deep appreciation for how hard landscapers work!  I also have no idea how my parents were able to keep up the huge garden that we had at our house when I was growing up.  It must have been a lot of work.  Good work.  Satisfying work, but work nonetheless.

I don't want to give anyone the impression that I know more than I do about gardening.  The truth is that I've been reading a lot and talking to people and now I'm taking the things I've been reading about and doing them.  Here's the books that have been helping me:

Dirt Cheap Green Thumb by Rhonda Massingham Hart
This book is great for sticking in your purse and taking with you where ever you go.  Read a few pages when you are waiting for a doctor's appointment or waiting to pick up your child from school.  The formatting is wonderful and makes it so easy to glean information.  It's concise and straightforward.  The first section is all about the absolutes (which I'm trying to follow as much as I can, but am doing imperfectly).  
I also like that this book has lots of handy charts.  Since it is small, it's easy to store and find room for on your bookshelf.


The Vegetable Gardener's Bible by Edward C. Smith
Last year for Mother's Day, my husband gave me.  It was kind of him, but the book completely overwhelmed me.  I wanted to dip my toes in the water and with that book you have to jump right in up to your shoulders.  Lots of reading and lots of information--though not everything you need.  It is a wonderful resource and covers lots of topics (it gave me the idea for the newspaper under the rocks).  It talks about mulching and sun.  But, because it is specifically for vegetables, there isn't a lot of information on herbs or flowers in it. So, I used it only a little last year.  I'm glad to have it and I've been opening it back up this year.  


Starter Vegetable Gardens by Barbara Pleasant
This book is a good place to start.  It has some great ideas of how to transition a garden and add on to it each year.  It has some wonderful information in it.  I especially like the first garden (the bag garden) because it avoids all the work of building raised beds from the beginning.  You make use of the dirt in the bags and develop your garden over a 3 year period.  I am realizing how wise this is after the 2nd day constructing my garden.  It is not as much work to maintain and plant in your garden as it is to build it!  The other plans are fun to look through and give lots of helpful information.  Each plan comes with a list of what you need (super helpful) and directions of how to build it.  The pictures of how to put in a tomato cage are very helpful!  This book is not as overwhelming as The Vegetable Gardener's Bible.  I also love the section on storing seeds.
  
The last book I have is one that I do recommend purchasing because you'll likely go back to it over and over if you have kids and pets.   But, it isn't a gardening book that covers everything.  It's called Carrots Love Tomatoes by Louise Riotte.  Just like people, some plants like each other better than others.  There is a wealth of information in here about what you should plant with what.  The helpful chapter for gardeners with kids and pets is the list of plants that are poisonous or cause dermatitis.  I happen to have contact dermatitis and wear gloves whenever I garden.  There are quite a few plants that you shouldn't plant within the read of toddlers who put everything in their mouths or pets who won't leave your garden alone.  If you're interested in  companion gardening, this is a great book to look into.  

Back in March, I looked at a lot of gardening books.  I found several books written by authors in the UK and at the back of the book there was a note that you had to adjust the planting season by several months.  All of these books are written for the U.S. and so it is much easier to use the information that is area specific in them.  Storey books are a wonderful resource for gardening.  I have always been impressed by how they're written and the information in them.  The formatting is easy to navigate (some books even easier than others).  The font is clear and the headings make it easy to find what I'm looking for.  

If you're a new gardener like me, check these books out.  I hope they'll be helpful to you too!  I do have one more book that I ordered that I've been looking forward to.  It's called Tips for the Lazy Gardener, which also happens to be published by Storey.  I bought it based on the preview I saw and the realization that it is a lot of work to garden, so if there's anything I can do to make it easier, that would be great!  I'll post a note about it soon hopefully!

Please note that I did receive complimentary copies of Starter Vegetable Gardens and Dirt Cheap Green Thumb from Storey Publishing for review.  They have been very valuable resources.  

End of Day 1

At the end of Day 1, I'd mowed, combined my two raised beds into one and started weeding.  Here are some pictures.  I wish I'd taken some real before pictures--to remind myself that I'm making progress.
This is my side flower bed in front of my deck.  I took the picture this morning.  It gets afternoon sun.
This is my side yard.  It's pretty blah really.  Back against the fence I'm going to put in 2 shrubs, a load of dirt along the side, and build a composter by the shrubs.
This is my combined raised bed.  It worked out pretty well and saved me money which is always a good thing.  My trellis for beans is in the background.

So, that's my garden... my humble garden.  It's really not the best spot sun wise, but it's the spot I have (and I'm thankful to have it!), so what I'm left with is to make the best of it!

Tuesday, April 19, 2011

Day 1 Gardening: Survivors and Casualties

The kids and I began our week of gardening yesterday.  We combined the two raised beds that I had and began weeding.  Autumn was more persistent than Sami.  Eli only wanted to dig into the dirt and throw it out of the bed.  My parsley that had survived the winter was one of his first casualties.  I also got the area mowed.  My friend Jenny came over to talk to me about our garden.  We talked about a lot of things, but the first big one was that I need to map the sun--which I need to run and begin right now.  


One of the main ideas from a book I'm reading, Dirt Cheap Green Thumb by Rhonda Massingham Hart, is to pick the right plants for the right areas.  One of the first things the book recommends is mapping the area of your garden as full sun/partial sun/shade.  It doesn't say to make a map hour by hour as my friend advised me.  She has taken that one step farther--after all how do you figure out if it's full sun unless you observe it and write down your observations?  I was glad to already have the idea in my head from the book and then have her reinforce to me how much it matters.  The point of mapping the sun is that if you don't put plants where they like to be, it will be a waste of time, energy, and money.  Put them where they want to be and you'll be happier--and so will they! 


I learned this last year when I put some hostas in a spot that they did not like!  They quickly withered and faded. Lesson learned.


So, that is my task today:  to map the hours of sun in different areas of my garden.
My other tasks are to weed my existing beds in front of the deck and make another trip to Lowe's for supplies to build my raspberry bed and the raised beds for the kids.  


I was surprised at how I was tired after 2 1/2 hours yesterday of hard work in the garden.  Wow!  What a wimp I am! I can't imagine how strong farmers from days of old must have been (and how strong their children must have been).


Book Note...we did open up the book I mentioned yesterday Kids Garden! and I learned why the tasks are so simply planned.  The kids listened to the circular poem I read them, looked at the page with the tools and their descriptions, and read with me what weeds are (my older daughter knew exactly what the definition was from her science!).  Then my older daughter began weeding and my middle daughter used the kids shovel I bought at Lowe's (a great investment for $4--not plastic) to help me move the raised beds closer together and combine them.  My 3 year old son wandered around and eventually settled into his sand box (after killing my parsley).  


Post Script...
I just looked out the window and realized that it is overcast.  I won't be able to map the sun today!  Hopefully tomorrow will be a better day for it.  I guess that is going to need to be delayed. But, it is supposed to rain and Dirt Cheap Green Thumb notes in the first chapter that you need to test how well the water drains in your garden (with an easy test) and I will likely be able to do that after today!

Monday, April 18, 2011

Gardening Books for Kids

A month ago, I began my search for a good gardening book to use with my children.  I requested 5 books through our library system.  I went to the library and looked through what they had.  I went to the book store...  


There's a very popular book called Roots, Shoots, Buckets, and Boots by Sharon Lovejoy that many people love.    It has 43-5 star reviews on Amazon.  But, would you believe that I don't like it?  I must be crazy.  I thought it was cute and fun to look at it.  It had some great information and neat ideas.  But...  it also required a lot of reading and my children wouldn't be able to read it with me.  Just as with my textbooks, I need books I can grab and go.  I need things to be simple and straightforward.  So, I ordered a book sight unseen from a series that I like--the Williamson Kids Can! series.  


Kids Garden!  is out of print, but you can find it used on Amazon.  It's only $4 with shipping from Amazon.  I like this series because I can read it with my children--and add in extra explanation when I want to.  But, it gives the basics.  It talks about basic gardening tools, gardening inside, gardening outside, companion planting (very, very basically), flower gardens, a few recipes, fun activities to see how things grow, and more.  Of course, since it is a Williamson Kids Can book, the pictures are not in color, but they are outlines, so if you prefer color, you and your children could color the pages you do together as a way to remember what you did and write the date on the picture (even stick some pictures in the book!).  Of all the books I looked at, this was the best for kids to read and for moms like me who want a basic, easy to read book.  If you want to just dabble in gardening or you don't have a backyard, there's plenty of ways in this book to share the joy of how plants grow with your children.  That was one thing I thought was especially neat about this book.  One assumption I would have made before reading this book was that you need a backyard to enjoy gardening with your kids.  Not so!  There's plenty you can do in an apartment, townhome, or condo.  You can have an indoor greenhouse (in a box), you can have a few containers on a deck with plants, you can experiment with beans to see how they grow, or you can even have a cactus garden!  Though I'd be nervous about the last one with kids unless you had really good gloves!  One tip...I did put tabs on the pages I wanted to turn to frequently so I can flip to those pages in a jiffy with my kids.

This is the best and only book that I really loved for reading with my kids about gardening.  I have told the girls that they are going to have their own raised bed this year and that they can plant anything they want in there.  They were thrilled with the idea.  I'll post over the coming months about what I learn as we go through this process.

The rest of the garden is going to be mine to plan, plant, weed, and take care of.  So, I needed a bit more information than what was in this book.  I have found several books that I really like for adults that I'm going to post about in the coming days.  Another review coming tomorrow...

Gardening Books for Kids

A month ago, I began my search for a good gardening book to use with my children.  I requested 5 books through our library system.  I went to the library and looked through what they had.  I went to the book store...  


There's a very popular book called Roots Shoots Buckets and Boots by Sharon Lovejoy that many people love.    It has 43-5 star reviews on Amazon.  But, would you believe that I don't like it?  I must be crazy.  I thought it was cute and fun to look at it.  It had some great information.  But...  it also required a lot of reading and my children wouldn't be able to read it with me.  Just as with my textbooks, I need books I can grab and go.  I need things to be simple and straightforward.  So, I ordered a book sight unseen from a series that I like--the Williamson Kids Can! series.  


Kids Garden!  is out of print, but you can find it used on Amazon.  It's only $4 with shipping from Amazon.  I like this series because I can read it with my children--and add in extra explanation when I want to.  But, it gives the basics.  It talks about basic gardening tools, gardening inside, gardening outside, companion planting (very, very basically), flower gardens, a few recipes, fun activities to see how things grow, and more.  Of course, since it is a Williamson Kids Can book, the pictures are not in color, but they are outlines, so if you prefer color, you and your children could color the pages you do together as a way to remember what you did and write the date on the picture (even stick some pictures in the book!).  Of all the books I looked at, this was the best for kids to read and for moms like me who want a basic, easy to read book.  If you want to just dabble in gardening or you don't have a backyard, there's plenty of ways in this book to share the joy of how plants grow with your children.  That was one thing I thought was especially neat about this book.  One assumption I would have made before reading this book was that you need a backyard to enjoy gardening with your kids.  Not so!  There's plenty you can do in an apartment, townhome, or condo.  You can have an indoor greenhouse (in a box), you can have a few containers on a deck with plants, you can experiment with beans to see how they grow, or you can even have a cactus garden!  Though I'd be nervous about the last one with kids unless you had really good gloves!  One tip...I did put tabs on the pages I wanted to turn to frequently so I can flip to those pages in a jiffy with my kids.

This is the best and only book that I really loved for reading with my kids about gardening.  I have told the girls that they are going to have their own raised bed this year and that they can plant anything they want in there.  They were thrilled with the idea.  I'll post over the coming months about what I learn as we go through this process.

The rest of the garden is going to be mine to plan, plant, weed, and take care of.  So, I needed a bit more information than what was in this book.  I have found several books that I really like for adults that I'm going to post about in the coming days.  Another review coming tomorrow...

Saturday, April 16, 2011

Gardening Books

I am a novice gardener.  When we lived in Georgia, my husband planted a small garden.  I can honestly say that I had nothing to do with it.  It was entirely his project.  When we moved here to Maryland, my husband chose a big spot in our backyard and planned his garden.  By the end of the summer, I was taking care of the garden because he ran out of time on the weekends between our kids and mowing the lawn and his other hobbies.  We didn't have a garden for the next two years.  One year I tried and within minutes of planting it and putting a fence around it, our puppy had tackled the fence and torn my garden to shreds.  So, the next year, no garden except for my front flower bed.


I wanted simple, easy and cheap.  So, I went with strawberries and dusty miller.  My dusty miller took off!  My strawberries did too and they quickly multiplied.  My two plants became 4 and then 8.  I planted a few bulbs, since they would come back year after year and planted two blue salvia plants that have also come back two years in a row.  My front flower bed is now full two years later full of strawberry plants, dusty miller and blue salvia.  My daffodils in the corner brought the first sign of spring.


Then last year, my husband built a wooden fence for me so that I could have a dog-free garden.  It was a much bigger project than I realized.  I am thankful that my husband did it.  It was a bit of a peace keeping effort for me and our dog, Molly.  It is my space.  Molly has no part in it.  I do not have to stress about her digging in my garden and it keeps me from yelling at her more than I already do about digging.


So, I planted in my garden.  My failures were many and my successes a few.
My successes were all mixed with my failures:
--I bought a trellis from Aldis and planted sweet peas plants (which died) on one side and bean seeds on the other side which climbed all over the trellis.  I loved looking at the beautiful vines.
--I bought pepper, tomato, celery, basil, parsley, and several herb plants.  I even planted Marigolds near my tomatoes to incorporate companion planting.  Of all my plants, my parsley, marigolds, and basil did well.  But, many of them were complete flops!  The hot peppers did well too--except that we never did anything with them!  My parsley and lemon balm both survived the winter and have come back this spring.
--I planted one rose that my kids gave me for mother's day.  My friend helped me with the detailed planting instructions needed for a rose and my rose took off.  It went a little crazy, though, so I pruned it back pretty drastically this spring.  I hope it will survive!
--I planted two strawberries two years ago that multiplied last year.


Sadly, I am a bit controlling in my cooking and gardening and I realize it.  In the same way that I am trying to find ways to "lighten up" and relax about my cooking with my kids, it is my desire to do the same with my kids and my garden.


So, here's my plan.  They are going to get to have their own special raised bed where they get to plant what they want to plant.  They will get to weed it, water it, and plant in it.  After they learn how to take care of their garden, they can move into my space where I've planted.  There are other little things that they will be able to help me do like pull the weeds from the rock walkway.  I'm also going to plant two azaleas around the rose bush so that they won't accidentally end up touching the thorny rose bush.


In my quest for encouragement and advice about how to enjoy gardening with my kids, I began searching for a book to help me.  I realize that I am a book person!  Much of this is because with 3 kids, I don't have the time to sit with someone for hours and ask all the questions that I have.  I also don't have a mom or grandma nearby to teach me.  My parents had a huge garden when I was growing up, but it was a bear to me because  my dad was very picky about it.  The only job I had was to water, which had to be done in a very particular way.  I actually never remember planting anything in the garden or preparing the soil.  He wanted things done a particular way.  I don't want to be that way with my kids.  So, I've known I need some good advice to help me through this.  In a book, the advice is also all written down so I can come back and refer to to what I read when I forget it--since I'm always forgetting things!  I do have a great friend Jenny who has been so helpful with the questions I bring to her and she's coming over to help me get started on Monday with my garden.  The biggest blessing from my conversations with her is that she always encourages me to relax and take it easy--something I always need to be encouraged in when it comes to my kids.  As much as I would like things to come our right (or what I think right is), that isn't really the goal.  The goal is to help them learn and enjoy what they are learning.  In this case, I want them to enjoy gardening, being outside, and loving God's creation.  


So, being the book person that I am, I started looking for a book (in addition to my friend Jenny) to encourage me in my gardening with my kids and to help me know what I need to teach them and what are even the most realistic and enjoyable things to do with them.  I looked at a lot of books at the library and then I ordered one sight unseen.  It turned out to be my favorite and thankfully it was the one I'd purchased.  It's from the Williamson Kids Can! series (which I am really coming to love) and it is called Kids Garden!  I need to go to bed now, but I'll write a little more come Monday about why I liked this particular book over others and what I found when I looked for a gardening book for kids.  After that, I'm going to write a few posts about the gardening books that I'm enjoying and learning from....

Thursday, April 14, 2011

Some cookbooks are just not worth reading...

I have two cookbooks in my reviewing queue right now.  One is on my kitchen table waiting to be used again tomorrow when I make another attempt at sourdough bread.  The other is right beside me waiting to find a new home...but that home won't be on my bookshelf.  That's the book I'm going to review today.

Sometimes cynicism catches me by surprise.  I know that it has permeated our culture in an enormous way.  In my mind, I imagine it to be like the wild strawberry plants that are growing in my backyard.  They are poisonous, though they look innocuous.  They aren't real strawberries.  They have these little fruits on them that remind one of strawberries but that isn't what they are.

This cookbook in front of me is written in a very cynical tone.  I requested it hoping for a few good ideas on how to integrate meatless, dairy-free meals into our monthly menu.  I should have looked a little closer at the preview before I agreed to review it.

Here's the cookbook's title:  The Part-Time Vegan:  201 Yummy Recipes that put the fun in flexitarian by Cherise Grifoni.
Let me start with a quote from the introduction:
"Let's just get this out there.  I'm not here to tell you how to save the world, maybe just how to save your waistline...Here's the deal: You're curious about veganism but you don't want to read some eco-policing loony drone on and on about how trees are our friends and chickens would rathr be playing poker in their hen houses than lay eggs for us.  I get it.  It doesn't matter if you're a saint; if you're hungry, you're never going to get anything done...That's where I come in:  your no-nonsense, quick-witted guide to veganism." (from p. VII)  The thing about cynicism is that it sounds very "quick-witted" but it's really based on the idea that you can see through what others can't and that you can see what's really real and what really matters, while others can't.

All the vegans I know have a reason for becoming a vegan.  It may be because they care about how food is produced.  It may be because they simply don't like the taste of meat.  It may be because their bodies are allergic to dairy.  But, they all have a reason.

I was disappointed in this cookbook because many of the recipes use nutritional yeast, tempeh, vegan margarine, and egg replacer.  If I am going to cook vegan recipes, 1) I'd like the ingredients to be real without preservatives, 2) I don't want to eat foods that pretend to be like non-vegan foods, 3) I like photos because they make the recipes look appealing, and 3) I want to enjoy reading the cookbook and recipes.  Sometimes books just rub you the wrong way and I think this cookbook was that way for me.

Rather than going any more into why I don't like this cookbook, I'd rather recommend a few others.  Laurel's Kitchen and the Moosewood Collective have published several cookbooks that have many vegan recipes (non-meat and non-dairy) that use real foods without preservatives.  Simply in Season also includes many recipes that would be considered vegan.

I think it's important not to bring non-meat and non-dairy meals into our diets.  I just wouldn't recommend this cookbook as a way to do that.

Please note that I received a complimentary copy of this cookbook from F&W Media for review.

Tuesday, April 12, 2011

Nurturing a Love of Nature

Last fall, a friend of mine invited us to go with a few other families on a nature hike.  At one point, my friend picked up a worm and held it out to my daughters.  They each eagerly and gently touched the worm.  I cringed.  I am a city girl.  I grew up in L.A., where the sky is never blue, but rather a pale blue-gray.  I feel so inadequate when it comes to teaching my children about nature and fostering an awe of God's creation.  But, I desire for them to enjoy being outside and to smile with amazement at what they see.  I have been pondering what I can bring into our homeschooling to help us pursue the enjoyment of being outdoors as a family.  


I realized I needed a plan, or rather a set of plans.  A plan holds me accountable when I am frazzled and busy.  This is why I turn to published curriculums rather than trying to create my own lessons.  I find that there is great freedom for me in working my way through a book and someone else has done all of the prep work for me.  When I realized I wanted a book to help guide me in our studies, I began to imagine what kind of curriculum I would want and what the book would look like.  I wanted...pictures...language that was readable for my children and at their level...engaging writing...interactive reading/writing activities...for a love for nature to be clear in the writing...and formatting that made the book very easy to navigate and enjoy.  


I found a book that is all of these things.  I did also find two other books that are great supplements to it, but I will be able to use this primary book as the base for a year of nature study with my children.  


The book...


The Nature Connection: An Outdoor Workbook for Kids, Families, and Classrooms by Clare Walker Leslie
This book is wonderful!  From the first page, I knew this book was what I looking for.  First, she explains why we study nature.  I agree with her reasoning that we need to understand that we are connected to this world we live in and we need to take care of it.  Her desire, which she makes clear, is that children would grow to love being outside and begin to see all that is around them every day.  I would also add one more reason why we study nature which is that God created this world and in realizing how amazing His creation is, we realize how amazing God is.  His creation can't help but point to Him.  This reason is the most important to me, but as the parent and teacher I can share that with my children when we begin our study.

Part One of this book is about How to Be a Naturalist.  Ms. Walker explains how to look, what to write down, what you will need, and how to record observations.  Part Two goes on to talk about the Sky, weather, and seasons.  There are wonderful hand drawn illustrations and lots of great information in this section.  The third part is a month by month guide which gives several activities for each month and relevant information for that time of year.  

How will I use this book?  I will get a copy for each of my children and myself.  I will begin the school year going through part one and helping my children learn how to observe nature and record their observations.  Storey Publishing also has a page where you can download printable copies of the pages which you would need duplicates of to make a nature journal.  They are on this page:  http://www.storey.com/thenatureconnection.php  After we've put their nature journals together, we'll start in October or November with the monthly activities and divide them amongst the weeks.  We typically study science one-two days a week.  What makes this a good book to use with multiple ages is the writing, illustrations, and activities.  Children can draw as simple or as elaborate pictures of what they see as they are able to.  They can also write single words, simple phrases, or complete sentences to describe what they see.   

What I most appreciate about The Nature Connection is that it makes nature study seem so simple and it no longer seems daunting to me as it has before.  I'll be able to pick up this book, open it up, and use it to help us enjoy nature together.  On Amazon, you can see a very thorough preview of this book which shows the table of contents, examples of the illustrations, and nature study information.

To supplement this book, The Kids Nature Book by Susan Milord, a Williamson Kids Can! Book is a great resource.  It has 365 indoor/outdoor activities and experiences to do through the whole year.  It would give you additional ideas for materials for your nature journal.  Many of the ideas in the book are just pick up and go, very low prep activities--which happen to be the best kind for my family and me.

The other book I have to supplement The Nature Connection is a wonderful bird watching book, What's That Bird? by Joseph Choiniere and Claire Mowbray Golding.  It is perfect for kids ages 7-12.  In the beginning, there are pictures of the different types of feathers birds have.  Then, a bird's body is illustrated with its anatomy identified.  The diagrams are clear and easy to understand.  From there, you will learn so much about birds.  75 of the most  common birds are in a bird identification guide.  The writing is clear and concise and is for a 5th or 6th grade reading level.    I shared this book with a friend who grew up bird watching and she loved it.  On Amazon, you see a great preview of this book.
If you're looking for a way to integrate nature study into your homeschooling or looking for an option for your science studies for next year, this might be a great option.  I think these books would work well whether you lean towards unit studies or towards individual subject textbooks.

Please note that I received complimentary copies of The Nature Connection and What's That Bird? for review from Storey Publishing.

Tuesday, April 5, 2011

Panera's Broccoli Cheddar Soup

Have you ever been to a restaurant and realized that you really want 3 different things on the menu?  It happens to me all the time.  It's handy that my husband is often willing to share with me.  But, that still excludes one thing.  On Sunday, we went to Panera for lunch after church.  I got half a salad and half a sandwich, but I really wanted some broccoli cheddar soup.  So, I decided to come home and see if I could find a recipe in one of my cookbooks or on the internet.  None of my cookbooks had a recipe for broccoli cheddar soup, but the internet did.


I found this recipe:  http://www.cdkitchen.com/recipes/recs/1833/Panera-Bread-Broccoli-Cheese-S79119.shtml


Of course, I made an alteration.  When I printed off the recipe, I didn't realize that it called for 2 cups of half and half.  2 CUPS!  So, I pulled out The Substitution Bible by David Joachin and looked for a healthier alternative.  Here's what I ended up doing (I used and then modified one of his substitutions):


2 cups half and half = 1/2 cup half and half   PLUS   1 1/2 cups lowfat milk   PLUS 1 1/2 Tbsp. butter


Calories:  2 c. half and half = 640 calories
    My substitution =  160 + 195 + 150 = 505
If I'd taken all of the half and half out, and substituted 2 cups milk + 2 Tbsp. butter = 460 calories


Cost:  It's not a huge calorie savings, but there's also a cost savings.  $1-$2 for 2 cups of half and half or 50 cents for my substitution.


At the end of the day, what really matters most is whether the soup tasted good.  And it did.  I will definitely make it again, although I will serve a little grated cheddar on the side for everyone to add per their liking.