It's time for iced coffee as the days get longer and hotter. In our house, we love to have a pitcher of iced coffee in the refrigerator for us and for guests. It's been turning out really well lately, so I thought I'd share our recipe.
To brew the iced coffee:
You want extra strong coffee for iced coffee. The ratio I use is 1 1/3 cup beans and 40 or 42 oz. water. I use the decaffeinated Columbian beans from BJs. Costco's beans are roasted by Starbucks, so if you like a dark roast, I'd recommend Costco's beans. I use a medium grind on my coffee grinder.
Normally, I use 1 1/3 cup beans for 56 oz. of water for regular coffee. I brew a strong cup of coffee anyways. I believe the Starbucks bag says 2 Tbsp. per bag. One thing to note is that every coffee maker has a different size cup. It used to all be the same, but Bunn, Krups, and Mr. Coffee all vary. One is 4 oz, one is 5 oz. and one is 6 oz., though I can't remember right now which is which. That is why I measure my beans the oz. of water--to make a consistent cup of coffee/iced coffee.
After brewing the coffee, put it in a pitcher in the refrigerator to keep it cold. I find I can keep it in there for a week and it tastes fine all week long.
Making a cup of iced coffee:
Fill a glass 2/3 full with ice. Pour iced coffee over the ice cubes up to the top of the cubes. Add milk to taste. I add 2-4 Tbsp. Then, add sweetener. Granulated sugar doesn't dissolve easily in cold coffee. So, we keep Torani's cane sugar syrup on hand and a shot glass (again to make it consistent and know how much I should put in). I would start by adding about 1/2 shot and then add more/less based on how you like it. Stir and enjoy!
Where I live, there's a few shops that carry Torani syrup. Normal grocery stores now have small bottles of vanilla, hazelnut, and often chocolate. For the larger and more economical bottles, you can go to Baltimore Tea and Coffee, Kitchen & Co., or a Starbucks. If Starbucks has an extra bottle, they will sell it to you for $8 (the same price at the other shops). I prefer the cane sugar syrup without a flavor. If you like Vanilla or Caramel or another flavor, Amazon does sell it in packs of 3 for a great price ($17.45!) But, unfortunately, they don't sell the plain cane sugar syrup which is my favorite.
I plan on making some tonight, so I'll take a picture and post it soon! And if you're over at our house this summer and like iced coffee, I'm sure we'll have some on hand! (though it will probably be decaf).
Last note, why I make decaf iced coffee--not everyone can have caffeinated coffee, but everyone can have decaf. A lot of people don't like the taste of decaf, though, so I try to find a good one. Bj's decaf Columbian is pretty good, it isn't great, but it's okay. It does really well as iced coffee, though (even better than as a hot cup of coffee). It runs about $6/lb. It's is much cheaper than Trader Joe's decaf Columbian at $12/lb., which I love.
Sunday, May 27, 2012
Tuesday, May 22, 2012
Flavorful Crock Pot Recipes
Everyone I know loves their crockpots. They love the idea of putting everything in a pot, leaving to cook, and coming back in the evening to a prepared meal! I love this idea!
 BUT, I've tried so many crock pot cookbooks over the years. They always seem to produce the same results--palatable, but bland meals. So, you can imagine my hope when I saw 150 best Indian, Thai, Vietnamese & more Slow Cooker recipes by Sunil Vijayakar. When the cookbook arrived and I opened it up, I was pleased. The formatting was so easy to read and follow. There was a heat rating for each recipe. The pictures were appealing, though I noticed that they photographed ingredients as well as dishes. Curries strike me as not the most photogenic of dishes. Several of the recipes do require various curry pastes. I chose to fix several recipes which did not use them.
The first recipe I tried was The Bombay Chicken Curry. My mom, who came to live with us last October, has told me before that she doesn't like curries. But, I knew my husband loves them, so I hoped she would enjoy it. Before I go any farther, my whole family (husband, me, my mom, 3 kids...) all loved it! The curry powder I use is mild and it was a very mild curry, but my husband was able to spice it up with cayenne. If your whole family loves spicy food, just add more spice while you're putting the recipe together.
So, the my first recipe I tried was a great success!
My mother in law happens to be a vegan who loves curries, so I invited her over for lunch after church and tried two more recipes--a sweet potato curry and a cauliflower curry. These two curries were well liked by all of the adults in the room, though not as favored by my children. I think it was the looks of the curries that put them off a bit. The cauliflower curry looked unusual and children are quick to judge foods by how they look. I did make some small substitutions on these recipes. I wanted the sweet potato curry to be milder, so I substituted some Ancho Chile powder for the 2 hot chiles that the recipe calls for. I didn't make any alterations to the other recipe.
I would make both of them again. My husband felt very good about eating so many vegetables.
There is only one caveat I want to mention--I read another reader's review of this cookbook and it mentioned sticking to the cooking times for the recipes. I took this advice and I'm glad that I did. I did modify the cooking temp (high/low) and time based on what I know of my crockpots--I do not have a medium sized one. I have a large and a small. My small cooks fast and the large one cooks slower. I would recommend doing the same for your crockpot. Notice how they cook--fast or slow--is the food mushy for the time in the recipes? Then decrease the time or switch the temp to low from high.
It is rare to find flavorful crock pot recipes, but I believe this cookbook contains some! I feel like a schoolgirl who wants to stand up and yell, "Yippee! Yippee!" I am so thankful to add this cookbook to my collection. It has refueled my hope that I can find even more truly flavorful crock pot recipes. This cookbook by Sunil Vijayakar is a great find!
Please note that I received a complimentary copy of this cookbook from Robert Rose Publishing for review.
My Own Student Planners
This year I purchased 2 student planners for my girls to use. They were $4 ea. at Lakeshore Learning. I wrote in their daily assignments and they checked them off. It worked well overall, but as with every system, tweaks are always needed.
I have started to think ahead to next year. Over the past two days, I spent time making a new planner for them. I found that it was time consuming for me to write down everything. It was equally time consuming to write everything down on my own planner. I found that I was often a week behind. But, a planner is one thing that my homeschooling umbrella requires to see at the end of the year and I really think that it's a beneficial thing to keep. So, I also made a page for my own planner. Making one's own planner is not necessarily money saving, but it is time saving. My girl's planners will probably cost more for me to print (I have a binding machine at home), but it will save me a lot of writing because it will be geared to our homeschooling and the sheets only took me an hour or two to design from scratch in Excel.


I thought I'd share these in case you've thought of making your own planner. Using the Mom's Home Journal for my family forms book has given me a lot of ideas about how to make a useful form. I thought I could share my planner ideas by posting these pictures.
The biggest problem I've found with planners over the past 6 years that I've used them is that they don't have the writing space where I've needed it. I tried the Well-Planned Day (well intentioned, but it didn't have space for the number subjects I teach), Lakeshore's Teacher planner (the best by far), and three other planners. I think I've used a different one every year! But, I decided last week that it was time to make my own. I'm pleased and excited to use what I've come up with. I'm going to make them one quarter at a time, so that I can modify the checklists as needed if I make any changes to the curriculum as we go through the year.
I have started to think ahead to next year. Over the past two days, I spent time making a new planner for them. I found that it was time consuming for me to write down everything. It was equally time consuming to write everything down on my own planner. I found that I was often a week behind. But, a planner is one thing that my homeschooling umbrella requires to see at the end of the year and I really think that it's a beneficial thing to keep. So, I also made a page for my own planner. Making one's own planner is not necessarily money saving, but it is time saving. My girl's planners will probably cost more for me to print (I have a binding machine at home), but it will save me a lot of writing because it will be geared to our homeschooling and the sheets only took me an hour or two to design from scratch in Excel.

The girls do not study their specials each day, but I designed my planner in such a way that I could decide each week when we would put each subject in the daily schedule.
On the girls' pages, I included the books that they normally use everyday with a box to check them off. For the subjects that have different pages assigned each day or particulars I need to write down, I put those subjects on my master teacher planner. I am going to highlight the special for each day that they are to study and write any notes for them in the longest column on the right.


I thought I'd share these in case you've thought of making your own planner. Using the Mom's Home Journal for my family forms book has given me a lot of ideas about how to make a useful form. I thought I could share my planner ideas by posting these pictures.
The biggest problem I've found with planners over the past 6 years that I've used them is that they don't have the writing space where I've needed it. I tried the Well-Planned Day (well intentioned, but it didn't have space for the number subjects I teach), Lakeshore's Teacher planner (the best by far), and three other planners. I think I've used a different one every year! But, I decided last week that it was time to make my own. I'm pleased and excited to use what I've come up with. I'm going to make them one quarter at a time, so that I can modify the checklists as needed if I make any changes to the curriculum as we go through the year.
Tuesday, May 15, 2012
Preventing Disposal Calamity
A couple we know just moved into their first home. It's a great home for them. It's a townhome which is in good shape and doesn't need any repairs right now. But, there's maintenance that I realized comes with anyone's home. And a few little things came to my attention that I thought I'd post about.
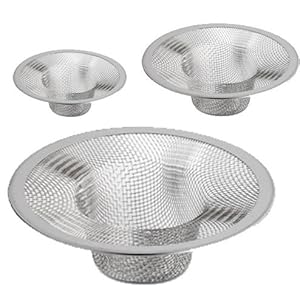 1) Sink Disposals... The second week we were in our home we had to have a repairman come check on it. A piece of silverware happened to be stuck in it unbeknownst to us. We hadn't used it, but when we had we knew that it didn't work. I spoke with the repairman and his first piece of advice was to get a strainer for both sinks. I knew what he was talking about because I'd been using them for several years in my kitchen sinks.
I know that the point of a disposal is to be able to "dispose" of food, but disposals are known for being temperamental.
2) Contact Paper... A few weeks ago, I helped a friend by cleaning out everything underneath her kitchen sink. She is a busy lady and has a very full plate. So, I set to work. As I pulled everything out, I realized that something had spilled on the bottom of her sink cupboard. It had warped the board in spots. The soapy substance had formed a crust on a large portion of the board. I scrubbed away and got it all off. I ran to the dollar tree and picked up two placemats and a covering for the bottom of the cupboard and a few baskets to organize everything. Dollar Tree didn't have any contact paper which is what I'd really wanted. Contact paper or foam (not the holely kind) is very helpful to line kitchen cupboards with for a couple of reasons. First, kitchen sinks can have issues (my sink at our old house had an ongoing leak problem for a while) and they can leak all over the bottom of the cupboard. Cupboards aren't made the way they used to be with real wood. Particle board and MDF warp very easily. Second, other liquids can spill under sinks like dish soap and other cleansers. In the case of my friend, it wasn't water that caused the problem, but some kind of dish soap. The other cupboard that often gets into trouble is the one with glasses. They often have a little water left on them after being in the dishwasher. That water can drip down onto the cupboard surface and cause a problem over time. Contact paper is a solution to this dilemma!
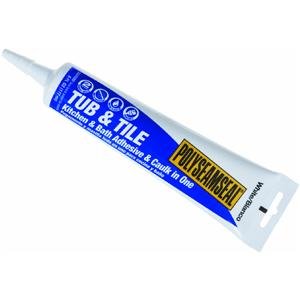 3) Caulk... Whether you move in the spring or fall, caulk is helpful around doors and windows. Caulk helps with insulating your home. I use a plastic bag to protect my finger and small, resealable tubes of caulk rather than a caulk gun. It's so much easier to manage the tubes. They are more expensive overall, but the caulk just squirts out of the gun so fast. You can find it in the painting department at any hardware store. I usually get tub and tile or kitchen and bath because it's more water resistant than the door and window kind.
4) Weatherproofing your deck... I have found that where we live I have to weatherproof my deck every year. The rain and snow gives our deck a run for the money. The cans say you only have to do it every 5 or 10 years. But, I do it each year. I use a deck wash and spray it down. Then 5 minutes later wash off the deck wash. A day later, I use a deck pad to apply the stain to the deck. I use a neutral stain that deepens in color with each application. Honestly, I am relieved not to have a wooden deck at our new house, because I waited each summer for 3 days of sun (and no rain) in which I could do this task.
5) Perennials... Whenever possible, I plant perennials. Perennials come back year after year. So, they're less expensive than annuals in the long run. Annuals are beautiful, but they only last one summer. The annuals that I like are zinnias (which thankfully a good friend has given me the past 2 years) and sunflowers, which grow great from seeds.
So, those are my random thoughts this afternoon about house things...
I know that the point of a disposal is to be able to "dispose" of food, but disposals are known for being temperamental.
2) Contact Paper... A few weeks ago, I helped a friend by cleaning out everything underneath her kitchen sink. She is a busy lady and has a very full plate. So, I set to work. As I pulled everything out, I realized that something had spilled on the bottom of her sink cupboard. It had warped the board in spots. The soapy substance had formed a crust on a large portion of the board. I scrubbed away and got it all off. I ran to the dollar tree and picked up two placemats and a covering for the bottom of the cupboard and a few baskets to organize everything. Dollar Tree didn't have any contact paper which is what I'd really wanted. Contact paper or foam (not the holely kind) is very helpful to line kitchen cupboards with for a couple of reasons. First, kitchen sinks can have issues (my sink at our old house had an ongoing leak problem for a while) and they can leak all over the bottom of the cupboard. Cupboards aren't made the way they used to be with real wood. Particle board and MDF warp very easily. Second, other liquids can spill under sinks like dish soap and other cleansers. In the case of my friend, it wasn't water that caused the problem, but some kind of dish soap. The other cupboard that often gets into trouble is the one with glasses. They often have a little water left on them after being in the dishwasher. That water can drip down onto the cupboard surface and cause a problem over time. Contact paper is a solution to this dilemma!
4) Weatherproofing your deck... I have found that where we live I have to weatherproof my deck every year. The rain and snow gives our deck a run for the money. The cans say you only have to do it every 5 or 10 years. But, I do it each year. I use a deck wash and spray it down. Then 5 minutes later wash off the deck wash. A day later, I use a deck pad to apply the stain to the deck. I use a neutral stain that deepens in color with each application. Honestly, I am relieved not to have a wooden deck at our new house, because I waited each summer for 3 days of sun (and no rain) in which I could do this task.
5) Perennials... Whenever possible, I plant perennials. Perennials come back year after year. So, they're less expensive than annuals in the long run. Annuals are beautiful, but they only last one summer. The annuals that I like are zinnias (which thankfully a good friend has given me the past 2 years) and sunflowers, which grow great from seeds.
So, those are my random thoughts this afternoon about house things...
Saturday, May 12, 2012
Hot Wings
My husband loves hot wings. I've been meaning to make them for some time, but just haven't gotten around to them. Finally, I made a plan to fix them tonight. I used America Test Kitchen's recipe. Here's a link to the recipe I used: http://www.mealsmatter.org/recipes-meals/recipe/31975
What had always intimidated me about wings before was having to cut the tips off and all that. But, I bought the wings from BJ's (huge bag!) and didn't have to cut them at all.
My husband gave the recipe a thumbs up. Actually, he said they were as good as any he'd had at a restaurant. The nice thing is that at the same time when I was frying the hot wings up, I fried up ones without cayenne pepper and tossed them with a teriyaki sauce. And the kids loved the little chicken legs and wings of their own!
Monday, May 7, 2012
Cupcake Baking
Cupcakes have become a very popular treat where I live. I think they've become popular all over, actually. This weekend I gained a new appreciation for my friends who love to bake cupcakes.
I love to bake. Cookies, brownies, pies... I love making treats. I also enjoy trying new things. So, I have been wanting to try my hand at making cupcakes (especially because they are $2.50 at the local bakeries!) Last year, I had picked up a book called The Cupcake Doctor from a bookstore on clearance. I have two other cookbooks by the same author (The Cake Doctor and Chocolate from the Cake Mix Doctor). I use these two books regularly for the frosting recipes. Last year, my husband banned cake mixes for good in our house so now I only use the cookbooks for their frosting recipes (which are wonderful). I found that the frosting recipes in the Cupcake Doctor to be repeats of the other two, so I found the cookbook a new home with a friend.
But, I still longed to try my hand at making cupcakes from scratch. When Eli's birthday came around, I planned on making cupcakes, but couldn't find a "cupcake" recipe in my cookbooks or one for white cupcakes that didn't require that time consuming task of beating egg whites. So, I settled on making chocolate chip muffins and frosting them. My desire to make true, fancy cupcakes was not satisfied.
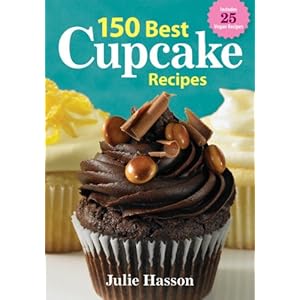
So, I was excited when a new cookbook arrived in the mail. 150 Best Cupcake Recipes by Julie Hasson
I flipped through the cookbook and found 10 different cupcakes I wanted to try and several interesting frosting recipes. There was a great selection of regular cupcakes with dairy in them, but there were also a lot of vegan recipes. There were also some great photos that made my children's mouths water! But, I settled on making 2 different chocolate cupcakes and one of the frosting recipes.
First, I tried the Best Chocolate Cupcakes. The recipe is supposed to make 12. I made 15 out of the recipe. I used an ice cream scoop. They baked up beautifully and had nice rounded tops. I think if I had made a strict 12 with the recipe, they might have spilled over a little. I always lean on the lean side when it comes to filling cupcake papers because I don't want extra mess.
The second batch I baked up were the Chocolate Surprise Cupcakes. I did have to make one substitution becuase I don't have chocolate cream liqueur. I substituted the same amount of Torani Chocolate syrup. These cupcakes didn't rise quite as much, but I followed the directions and they looked just fine. I got 14 out of this recipe for 12. This recipe requires you to scoop out a little cake at the end and put something in them (the surprise!). The cake tasted delicious and my mom and I both agreed that we're usually stuck with those cake odds and ends. They usually just end up in the trash. But, these odds and ends were quickly gobbled up.
Then, it was time to make the frosting. I tried the Chocolate Fudge Frosting. I have discovered that frosting is something to be experimented with. I followed the recipe as it was written and it didn't turn out as I had hoped. I needed to add 3 more tablespoons of liquid until the frosting was the texture I wanted it to be. That's a lot in the world of frosting making, I think. But, once I'd added the liquid, the frosting tasted very good.
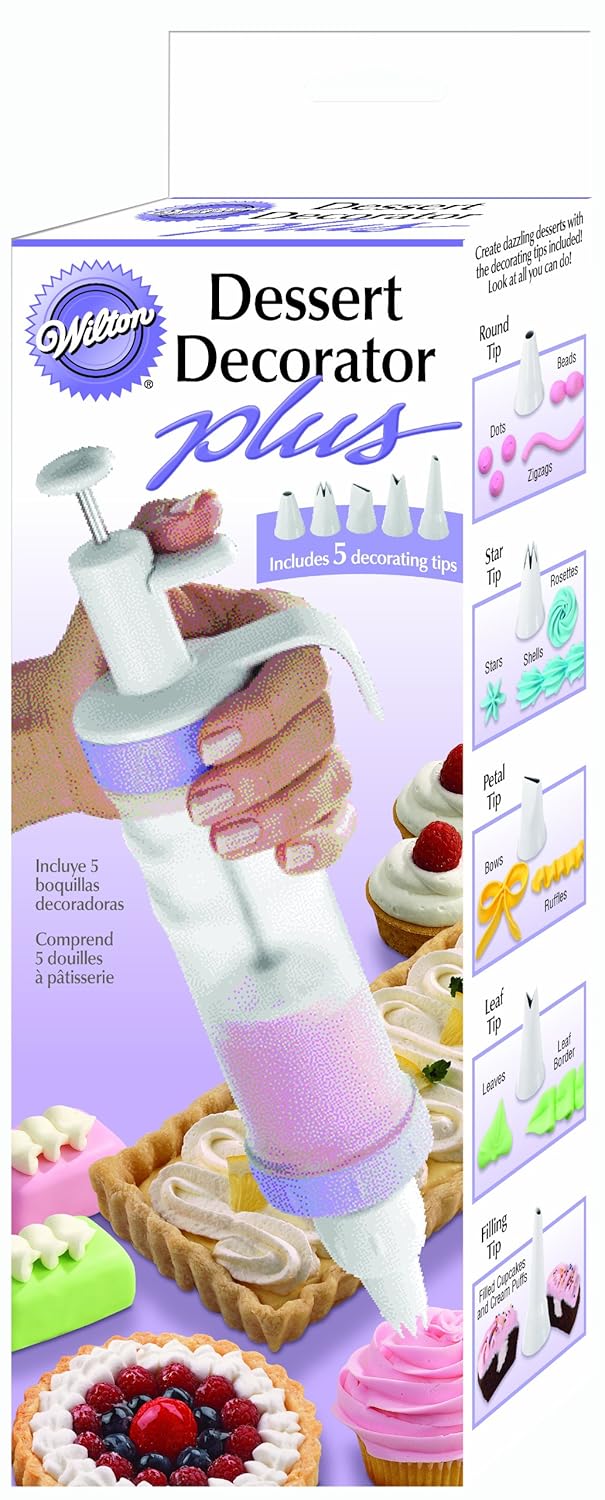 I bought a Wilton Cake Decorator a few weeks ago at a garage sale. I pulled it out and put the frosting into it. I had never done this before so this was definitely a trial by error adventure. I first tried to frost by doing an outward spiral (starting at the center). That didn't work well, so I started on the outside the second time and worked my way inward. It worked! I didn't frost the edge so that I could pick the cupcakes up and set them down without touching the frosting. I sprinkled just a few decorations on top and--Voila! My first batch of cupcakes were ready for tasting.
For the second batch (the surprise ones), I used a frosting recipe from The Cake Doctor which worked quite well.
 I took my cupcakes over for lunch to a friend's house. I asked for their honest opinions of the cupcakes and asked them and their children (ages 3-14) to tell me how they thought they compared to other cupcakes they'd eaten. I heard nothing but rave reviews. (You can see the finger mark on one of them!) I would definitely say that they measure up to anything I've had in a bakery. The chocolate chips didn't all sink to the bottom and the frosting was rich and fudgey. This cookbook is likely going to have a place on my bookshelf for a long time!
Please note that I received a complimentary copy of this cookbook for review from Robert Rose Publishing.
I love to bake. Cookies, brownies, pies... I love making treats. I also enjoy trying new things. So, I have been wanting to try my hand at making cupcakes (especially because they are $2.50 at the local bakeries!) Last year, I had picked up a book called The Cupcake Doctor from a bookstore on clearance. I have two other cookbooks by the same author (The Cake Doctor and Chocolate from the Cake Mix Doctor). I use these two books regularly for the frosting recipes. Last year, my husband banned cake mixes for good in our house so now I only use the cookbooks for their frosting recipes (which are wonderful). I found that the frosting recipes in the Cupcake Doctor to be repeats of the other two, so I found the cookbook a new home with a friend.
But, I still longed to try my hand at making cupcakes from scratch. When Eli's birthday came around, I planned on making cupcakes, but couldn't find a "cupcake" recipe in my cookbooks or one for white cupcakes that didn't require that time consuming task of beating egg whites. So, I settled on making chocolate chip muffins and frosting them. My desire to make true, fancy cupcakes was not satisfied.
I flipped through the cookbook and found 10 different cupcakes I wanted to try and several interesting frosting recipes. There was a great selection of regular cupcakes with dairy in them, but there were also a lot of vegan recipes. There were also some great photos that made my children's mouths water! But, I settled on making 2 different chocolate cupcakes and one of the frosting recipes.
First, I tried the Best Chocolate Cupcakes. The recipe is supposed to make 12. I made 15 out of the recipe. I used an ice cream scoop. They baked up beautifully and had nice rounded tops. I think if I had made a strict 12 with the recipe, they might have spilled over a little. I always lean on the lean side when it comes to filling cupcake papers because I don't want extra mess.
The second batch I baked up were the Chocolate Surprise Cupcakes. I did have to make one substitution becuase I don't have chocolate cream liqueur. I substituted the same amount of Torani Chocolate syrup. These cupcakes didn't rise quite as much, but I followed the directions and they looked just fine. I got 14 out of this recipe for 12. This recipe requires you to scoop out a little cake at the end and put something in them (the surprise!). The cake tasted delicious and my mom and I both agreed that we're usually stuck with those cake odds and ends. They usually just end up in the trash. But, these odds and ends were quickly gobbled up.
Then, it was time to make the frosting. I tried the Chocolate Fudge Frosting. I have discovered that frosting is something to be experimented with. I followed the recipe as it was written and it didn't turn out as I had hoped. I needed to add 3 more tablespoons of liquid until the frosting was the texture I wanted it to be. That's a lot in the world of frosting making, I think. But, once I'd added the liquid, the frosting tasted very good.
For the second batch (the surprise ones), I used a frosting recipe from The Cake Doctor which worked quite well.

Please note that I received a complimentary copy of this cookbook for review from Robert Rose Publishing.
Saturday, May 5, 2012
Using Promotion Codes
Last weekend, I was trying to use a promotion code on Kodak Gallery's website to get free shipping. I tried and tried. I probably tried 4 or 5 times. But, it simply wouldn't work. I checked all the details about it and still couldn't figure out why it wasn't working. Finally, I gave it one last try. I had been typing in the letters in all caps myself. Instead, I searched for a spot on the webpage that would let me copy the text (by right clicking with my my mouse). I copied the text into the promo code box this way. And... Finally, it worked!
I wanted to share this in case anyone else has run into the same cunundrum with a code that simply won't work!
I wanted to share this in case anyone else has run into the same cunundrum with a code that simply won't work!
Subscribe to:
Posts (Atom)