Friday, August 26, 2011

Birthday Parties

Birthday parties are expensive.  A less expensive option than having a party at a bounce place or Chuck e. Cheese's is to have a special party at home.  I try to do it as wisely as I can.  The parties are always on the back of my mind.  During the year as I'm walking through Target, I watch for clearance items that could be the future stuffings of birthday treat bags.  I watch for invitations and decorations.  I even watch for plates.  This has worked as my kids have been little and I've had a lot of say in the themes of their parties.  But, as they get older, I am finding they have more opinions and it is important that I listen to them.

Fortunately for me, my girls have loved the princess theme for several years.  This year is no exception.  So, I've been doing my usual.  Collecting supplies, invitations, etc.  My girls will have a joint birthday party at the beginning of November.  A few years ago I tried to have separate parties.  The problem?  Six little girls could come to Autumn's party and none to Sami's two weeks later, because everyone had gotten sick.  So, now we have one party.

The princess theme can be a little tricky for me because we don't do the whole "Disney Princess" thing in our house.  So, what can I do new this year?  Well, I found a little book to help me.

It's the Pink Princess Party Cookbook.


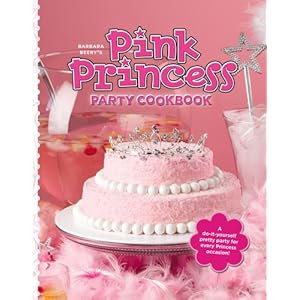
Inside you'll find plans for 6 different types of "princess" parties like a "Snowflake princess party" and "Enchanted Pony Princess Party".  There's one called the "Spa Princess Party which I think would be perfect for a young tween that mom wants to have a party for and the daughter wants to be a kid and a grown up at the same time.  

Each party has food suggestions and recipes as well as crafts you can make.  The crafts are appropriate for 6 or 7 year olds to 11 year olds.  In the front, the author does say that children can make the recipes and crafts.  Her advice is that 5 to 7 year olds will need more help and that children 8 and older will be able to do things with less assistance.  

This party guide is smaller than you'd expect.  The font is small, but readable.  The directions are pretty simple.  At first, I thought they were too simple.  Then I tried the author's directions for the Snow Princess Punch.  She suggests dampening the glasses with a lemon or sugar half (I just used a lemon wedge).  It worked well!  I've tried putting salt on margarita glasses before with mediocre success.  The lemon wedge worked much better!  So, I learned through trial and error that the directions were enough with some recipes and crafts.  In one craft, the directions weren't quite enough.  Or rather--I'd do it a little different.  The craft was the Pink Princess Tiara.  It would have been nice to know how much room you needed to leave on each end of the pipe cleaner without beads and also that a little bit of space should be left between the beds.  The other change I would make is to use glue dots instead of tacky glue.  It would be very hard to make 4 or 5 little girls wait an hour for their tiaras to be dry!   

As my girls and I looked through the book, we picked from each of the parties what we wanted to include in theirs in a few months.  Autumn wanted to do the snowflake meringues, but they didn't go with the other things they picked out.  So, we'll save them as a special treat for Christmas.  

If you're wanting to throw a princess party for your daughter, this book will give you lots of ideas.  Some are easier than others, but amidst the bunch, you'll find enough to have a fun party!

Please note that I received a complimentary copy of this book for review from Simon and Shuster Publishing.

Thursday, August 18, 2011

Confessions of a Sugar-Loving Mom

Two or three weeks ago, I wrote that I was going to cut sugar out of my diet.  I did...for a few days.  I continued to ponder it and decrease my daily sugar intake, but I didn't continue to cut it out completely.  I like sugar!


Almost two weeks ago, I was among friends and our kids.  The occasion was a beautiful day and a picnic at one  friend's house.  The other gals had the discipline to forgo half of an Eskimo Pie for dessert.  I didn't.  I never buy Eskimo Pies.  They were a treat to me.  So, I chose to have half of one as my dessert for the day.  I felt bad because my friends and I had been discussing forgoing sugar...  And there I was eating half an Eskimo Pie!  Ay Ay Ay!  


After talking with my husband, I've been trying to eat sugar in moderation.  If I cut it out completely, I am afraid I will crave it all the more.  If I'm able to choose a dish that has less sugar in it, I am.  I've cut back the sugar in my coffee and I still drink it before anything sweet in the morning--even yogurt.  I've also been taking acidophilus pills because a friend said she had greater success with those than with eating yogurt.  


So, that's me.  I needed to confess to you that sugar is a weakness of mine--but I'm trying.  I respect my friends who are much stronger than me and were able to forgo the Eskimo Pies!

Monday, August 15, 2011

Buzzzzzz Bars

I went to college in Oregon.  The little coffee shop on campus made these super yummy bars called "Buzz Bars".  Before I left college, I somehow got a copy of the recipe even though I didn't work there.  Here it is:


For a 9x13 pan:


Cream 2/3 cup butter with 2/3 cup brown sugar.  Cream well.
Mix in 1 egg plus 1 egg yolk.  
Mix in 2 2/3 cup rolled oats.
Mix in 3/8 cup light corn syrup.


Spread in a 9x13 sprayed with cooking spray.  Bake at 350 degrees for 15-20 minutes (I did 18 minutes.)
The "crust" will be a little runny, but put immediately into fridge and let cool completely.


Melt 2/3 cup Skippy Natural peanut butter to spreadable consistency in a pyrex measuring cup.  I microwaved it for a minute.  Spread over the base and cool in the fridge.


Melt 1 cup of chocolate chips in the microwave for 1 minute.  Don't overcook the chocolate chips or they'll harden up.  Stir for a minute or two.  If you need a little more time and the lumps aren't all getting out, microwave for 15 seconds more.  When all the lumps are out, pour over the peanut butter and spread with a spatula.  When cool, cut and eat them!


Today, I made a bigger pan.  I have a half size bun pan (half of the commercial size cookie sheet). It has a low lip, so it works really well for this bar.  At the cafe, they used full size bun pans to make them.  


If you make the larger pan (18 x 13)like this one that I bought at the webstaurant store online, here are the measurements you'll need:
1 cup butter
1 cup brown sugar
2 eggs
4 cups uncooked rolled oats
1/2 cup corn syrup
1 cup peanut butter
1 1/3 cups chocolate chips


If you try them, I hope they turn out well for you!  

Thursday, August 11, 2011

My first dresses

Last Sunday, two of the little girls at church were dressed in the cutest matching dresses.  I could tell they were homemade so I asked my friend about them.  She explained that her mom had bought them from someone who had made them and that they were called "pillowcase" dresses.  


Hmmm... the wheels in my mind started spinning...  could I make one?  I've only ever attempted one outfit and it was with the help of a friend in Australia.  AND that was 17 years ago!  


I went home and found this youtube video:


It seemed pretty straight forward so I thought I'd give it a try.  Here's my first attempt on the hanger:


The hem and dress are actually not tilted--it's just hanging on the hanger that way.  Here is my younger daughter modeling her new dress

After she tried it on, I hemmed the yellow piece so that the dress would be shorter.  When she's taller, I can let out the hem and she'll be able to wear it for longer.

Here's my second attempt:


The video was very helpful.  It doesn't give measurements though.  I figured those out on my own.  The dresses are called pillowcase dresses because they were originally made from pillowcases for little girls.  I believe they are similar to the flour sack dresses of old.  I searched for sample measurements and came up with these for a size 6x dress:  The top piece is 26" long and 18" wide.  You need two of these pieces (front and back).  You need one piece for the trim that is about 37" long (room for trimming) and 4 1/2" wide.  This will give you a dress that is about 28" long.  The armhole I cut was 4" long and 1 1/2" wide.  The video shows a good example of how to cut these.  I did fold my material in half to make sure the hole cuts match in size.


The first dress I made took me about 2 1/2 hours.  The second about 2 hours, The third about 1 1/2 hours and the same for the fourth.  The first dress took so much time because I needed to remember everything from the video and figure out the fabric measurements.  


Tips I learned in the process:
1) I took the time to wash and dry the fabric first so that the dresses won't shrink.  I made myself slow down and make sure to wash and dry the fabric before I started this project.
2) White thread on fabric that has a white background blends in.  White thread on the red dress really showed up!
3)  These are simple dresses so you don't need pins if you feel comfortable with eyeing things.  But, if you feel better with pins, use them :)


I'm excited.  I never thought I could make a dress for my girls.  They were thrilled.  The most challenging part was juggling making the dresses with the rest of my life.  It was very stressful having the girls attempt to come in and out of the room where I was sewing and ironing.  I am very anxious about one of my children knocking over my iron and getting burned.  This morning I made my third and most of my fourth dresses while my kids were at vacation Bible school.  I have to admit that this was so much easier.  In the future, I am only going to work on these when they are in their rooms.  When they are a little older, I look forward to teaching them how to make these dresses!  But, I think that time isn't here yet.  They need to be able to slow down and concentrate a bit more.  They also need to be better at obeying my directions to a tee.  There's no room for error around a hot iron!

Monday, August 8, 2011

Credit Monitoring and The Stuff Movies are Made Of

For the past year, we've had some very quiet neighbors living next door to us.  The house was bought by a man who owns several properties and he rented it to a family of 4, sometimes 6 people.  It was hard to know how many people were living there at any given time because they almost always stayed inside.


There was a mom, a dad, and 2 young kids 3 and 5 years old.  There were two teenage boys who seemed to come and go.  The mom and dad worked in the mortgage business.  He said he worked on restructuring loans for the people struggling to pay their mortgages.


Two weeks ago, they suddenly packed up and moved.  They told my neighbor they were moving back to where they came from one day and left 3 days later.


This weekend the landlord started cleaning out the place...that was full.  It was as if they left their children's whole lives behind--baby pictures, wedding pictures, toys, figurines, furniture...  The strange part is that they left here in a Uhaul--and made 2 trips.  Does this sound like an episode of a drama on television yet or a 48 hours mystery?


It sounds very sketchy and strange to me.  I'm not sure what the real story is, but I'm sure it's complicated.  Honestly, whatever it is can't be good.  It likely involves a lot of the yuckiness and troubles in this life.


There's a catch though, because my neighbor happened to process loans for people with troubled mortgages.  The landlord said he is a skilled liar.  That statement alone makes me very uneasy considering what he purported to do for a living.


I read a recent article in the Sun about some of the recent scams that have been pulled on people with troubled mortgages.  One of the scams was that someone would offer to help them refinance or restructure their loan.  They would give them a fake pay booklet and instruct them to stop paying their old mortgage company and to instead pay the new amount (based on the new, but fake loan) to another address given to them by the person who is restructuring/refinancing their loan.  After missing a few payments, the bank that still held the loan would foreclose on the property and the property owner would lose the property.


There have been other scams that I've read about over the past few years, but this was the most recent one I remember.


So, what would you do if you found yourself duped?  Or potentially duped?  I've been reading the business section of the Baltimore Sun for the past 6 years and it's been surprising to me the little financial issues that I've begun to think about. (It used to be a much better and thicker section before the recession of course.)  But, all that I've read gave me several ideas of what I would do.


#1  Get credit monitoring.  If I'd given forms to someone and I didn't know where they were or what the status on them was, I'd make sure to get credit monitoring right away.  There would have been a lot of personal information in those forms that would enable someone to easily steal my identity.


#2  Start a real refinancing loan or a restructuring loan via a bank.  I would look for an organization that was financially backed and secure.  I would begin this process quickly so that no one would step in and mess with my home.  I would want to take control and know what was going on.


#3  I'd watch my back and be wary.  I'd check my credit card and checking balances and stay on top of them.  I would want to notice anything unusual right away.  


I guess I'd be a bit paranoid, but I've already been the victim of minor identity theft as have other members of my family.  I am naturally on my guard.  My job is to protect my family.  I hope that the situation for my former neighbors isn't as bad as I've imagined it might possibly be.  This experience has reinforced the belief that I need to be observant and careful.  You never know...

Shampoo and Conditioner

Back in June, I ran out of conditioner one morning for my hair.  I'm one of those people that always has a spare in the closet.  I don't like to run out.  But, I had mistakenly bought a 2 in 1 shampoo and conditioner (which doesn't work as conditioner).  So, I was stuck.  I had shampoo, but no conditioner.  I wondered if I could use Suave or a more inexpensive conditioner.  I have pretty plain hair.  It's stick straight.  I don't perm or color it.


So, I tried.


First, I tried Suave.  I used it for a few days and felt like I was tearing my hair  out.  Every day, I found that my hair got rougher and rougher.  I knew I had to get some new conditioner for my hair--fast!


I had been using Herbal Essences for about 7 years.  Before that, P&G used to make a great shampoo and conditioner comparable in price to Suave that was as good as Herbal Essences.  I've always saved the coupons for Herbal Essences, but this time when I ran out, I didn't have any.  That was really what prompted me to think about Suave.  Over the years, I've tried a few others like Dove (really watery), Tresemme, Aussie, Pantene...  But, I've found that Herbal Essences works the best for my hair.  


Since I still didn't have any coupons for Herbal Essences and I am quite stubborn, I felt determined to see if I could find something else that would work.  


I discovered in my search of shampoo aisles that ShopRite carries a generic of Pantene.  I also discovered that Costco has tried to make a generic professional shampoo and conditioner.  


I tried both, but with so-so results.  The generic Pantene was quite watery.  I like conditioner that is thicker because it coats my hair better, goes farther, and I can use a smaller amount.  The Costco conditioner works pretty well, but it has weighted my hair down so that it's flatter and straighter than normal.  I am still using it because I didn't want to waste the bottle.  


Over vacation, I used VO5 conditioner and I found that I had the same results with my hair that I did with the Suave.  


Finally, some coupons came out in the paper for Herbal Essences and in the BJs coupon book!


With the combination of the two, I got a great deal on two large bottles (40 oz.) of Herbal Essences conditioner for $5 ($2.50/each).  I did use coupon in July and get two large bottles (40 oz.) of Pantene Conditioner for $4 ($2/each).


In all this time, I had been using my herbal essences coupons at Target because they had the best price and I learned long ago, that using coupons on the smallest size is often a better deal than using the coupon on a large size item.  So, I had never checked the prices at BJs using coupons (store and manufacturer together).  It turned out to be a great deal and a much better value than buying them at Target!  


I'm really looking forward to finishing up my Costco conditioner and getting back to my old Herbal Essences!


What can you do when your hands burn?

Yesterday, we were at a church picnic with friends and the topic of jalapenos came up.  What do you do when you've cut a jalapeno and your hands burn?


One of my friends said she'd looked online and found that if nothing works to take 2 benadryl and go to bed--sleep it off.  I've done the same recently to cope at times with my outbreaks of hives.


Jalapenos and other peppers can really be a doozy.  For me, plants can have the same effect on me.  I have contact dermatitis so my skin is particularly sensitive.  I have found something that works for me.  


My dermatologist several years ago recommended cleaning my hands with Cetaphil.  I found that Target carries a generic.  When I have touched anything--a jalapeno, a plant, crabs with tons of Old Bay on them, I wash my hands as soon as I'm able to with Cetaphil.  It has worked wonderfully for me.  If I forget, as I did once last week, and just use regular soap I end up with burning or itchy hands.  So, I really try to remember to use it.  Honestly, I've been surprised at how well it works.  When I bought the generic at Target about 2 years ago, the bottle I bought cost about $3.50.  It may cost about $4 or $5 now, but it will last you quite a long time.  I get my hands wet, put a quarter size amount in the palm of my hand and rub it all over for a minute or two and then rinse my hands.


So, if you're in the same predicament I am--try the generic Cetaphil.  


I do also try to use gloves as much as possible.  I wash my dishes with the pink lady gloves from Casabella.  I save my coupons for Bed Bath and Beyond and buy a few pairs at a time.  A friend recommended these to me about 5 years ago and they've been a lifesaver for my dishwashing!  They do unfortunately have latex in them so if you are allergic to latex, as several friends of mine are, they won't work for you.  But, if you aren't, they are great.  I find that one pair lasts me several months.  They're about $5 or $6 a pair at BB&B.


If you know any other good solutions for burning or itching hands, I'd love to hear what you've found works for you!

Tuesday, August 2, 2011

Making the Most of the Harvest

Every summer there's squash and cucumbers a plenty at our farmer's market.  I have to admit that every week when I go to the market my eyes are bigger than my stomach, or rather my family's stomachs.  Part of my problem is not knowing what to do with the squash and cucumbers.  


This summer I have started using a cookbook that I've mentioned in a few other entries on this blog, Put 'em Up by Sherri Brooks Vinton.  I've made some Asian Cucumber Pickles, Cumin and Coriander Beets, and Blueberry Vinegar.  I know that if I have extras this summer--there's something that I can do with them.  


I really was expecting this book to be mostly about jams and jellies.  After all, that's what most people think of when they think of "canning" or "preserving".  But, I'm so thankful that it's not!  Instead, this is a cookbook all about how you can preserve the varied fruits and vegetables of your harvest.


The explanations, illustrations, and general information in this cookbook about how to can are great.  They are easy to read, well formatted, and simple to follow.  For someone like me who has a lot of questions when I try something new, most of the answers are here.  


I did write a few weeks ago that I'd keep you posted about how my blueberry vinegar turned out.  It turned out just fine.  I used it in a salad dressing with tomatoes just the other day!


If you're looking for a canning cookbook that focuses on sauces, pickles, jams, jellies, and other toppings (there's even a lemon curd recipe!), I think this is a great cookbook.  One way that I know whether I really like a cookbook is whether I continually want to come back to it.  I've had this cookbook for two months now and it has been one that I've opened up numerous times--which says a lot to me!


Please note that I received a complimentary copy of this book for review from Storey Publishing.