A while back, I posted the recipe I used to make pork tacos. A friend made it and it didn't turn out as she had hoped. Her cooking experience made me realize a few things that would be wise to mention...
For the pork taco recipe, I would recommend adjusting the amount of sauce to how much meat you cook. With BBQ pork, I like to have lots of sauce, but with pork tacos, you want enough to give it flavor, but not make it "saucy". I have to admit that I cook by how things look. I am not a very exact cook. I throw things together and make adjustments as needed. I recommended starting with 1/2 a recipe of sauce, but if that seems like it will be a lot (mix the sauce outside of the pan where the pork is), then only add part of what you've made.
When I post a recipe, I try to note all of the changes I've made, but my meat measurements are approximate-- My mom told me that it's because I was a camp cook (and head cook) for 4 summers, worked at a deli, and then at a restaurant. I do things fast. That's my goal. It's been my primary goal for the past 9 years since my first daughter was born. There's always something else that needs my attention when I'm cooking--besides my cooking!
Here's another example of how I cook. It was interesting to watch my husband cut the pork for mu shu last Saturday night. He was precise and accurate. Every piece of pork and chicken was exactly the same, slender size. This is is how he and I are different. I joked with my mom afterwards about how I would have done it. chop chop chop chop chop chop chop chop chop--- quick and fast. The pieces wouldn't have all been the same size or thickness, but it would have worked. I appreciate my husband very much and admire that he enjoys cooking this way.
It's just different than me.
I thought I'd explain this for future reference in case one of my recipes that I post doesn't turn out as you'd hoped. Comment or please email me--I like to share my recipes, but I want them to work!
Thursday, December 27, 2012
Wednesday, December 19, 2012
Paper Flowers
The daughter of a friend of mine is having paper flowers for her wedding bouquets. I hadn't heard of these, so I looked them up. There's all sorts of ways to make them. They really are quite pretty!
My mom is moving into her own apartment in 2 weeks and she needs a decoration for the little shelf outside her door, so I thought of the paper flowers when I found a small yellow bucket downstairs. Here's how they turned out:
 I learned several things from this project.
1) They can be fun to make. Here's the page I used for directions... http://jonesdesigncompany.com/flowers/rolled-paper-flowers-tutorial/
2) These are NOT for kids to make. The hot glue burned me several times and it really hurt! I've used hot glue a lot over the years, but because of how these had to be glued together at the end and how the leaves had to be glued, I got burnt several times.
3) Trying to do crafts when you have kids walking around is different than when you can do them while your kids are napping or asleep at night. I felt a lot of pressure to get this project done as quickly as I could. Having to hold the flowers, leaves, and stems in place took time and tied up my hands. I finally realized that wooden clothespins helped me with the leaves so I could let them sit without me having to hold them together one by one.
4) Paper flowers are a fun, inexpensive decoration. My mom is big about being frugal--she is the most frugal person I know. So, I wanted to make her a fun, cute decoration that would only use craft supplies that I already have on hand.
It was fun to try a new craft!
My mom is moving into her own apartment in 2 weeks and she needs a decoration for the little shelf outside her door, so I thought of the paper flowers when I found a small yellow bucket downstairs. Here's how they turned out:

1) They can be fun to make. Here's the page I used for directions... http://jonesdesigncompany.com/flowers/rolled-paper-flowers-tutorial/
2) These are NOT for kids to make. The hot glue burned me several times and it really hurt! I've used hot glue a lot over the years, but because of how these had to be glued together at the end and how the leaves had to be glued, I got burnt several times.
3) Trying to do crafts when you have kids walking around is different than when you can do them while your kids are napping or asleep at night. I felt a lot of pressure to get this project done as quickly as I could. Having to hold the flowers, leaves, and stems in place took time and tied up my hands. I finally realized that wooden clothespins helped me with the leaves so I could let them sit without me having to hold them together one by one.
4) Paper flowers are a fun, inexpensive decoration. My mom is big about being frugal--she is the most frugal person I know. So, I wanted to make her a fun, cute decoration that would only use craft supplies that I already have on hand.
It was fun to try a new craft!
Monday, December 17, 2012
No-Cook Fudge
This weekend I made fudge for the first time. Fudge has always been my favorite when it comes to Christmas treats. But, I've never made it. I've been intimidated by the soft boil/candy making. So, this year I tried two different recipes. The first was called Easy Fudge. It involved stirring on the stove for a full 5 minutes at a full boil... The second recipe was titled "No-Cook Fudge". I really expected the one that required a lot of work to be the recipe I preferred. But... I was wrong!
My family all agreed that the no-cook fudge was really, really good! It was just what I love about fudge. Creamy, rich, and chocolatey. So, here's the recipe I used. I found the same recipe I used on Cooks.com
NO COOK FUDGE
1/2 c. butter
1/3 c. water
4 1/2 c. powdered sugar (sift!)
1/2 c. nonfat dry milk powder
1/2 c. unsweetened cocoa powder
dash of Salt
Stir butter into boiling water. Stir until melted. If it doesn't completely melt, put in the microwave for 15 seconds. Beat in powdered sugar, dry milk, cocoa powder and dash salt. I mixed it well in my stand mixer. Pour into buttered (or pan sprayed with cooking spray) 8 x 8 x 2 inch baking pan. I prefer pyrex for it. Refrigerate several hours. Cut into squares. Makes 3 dozen 1 inch pieces.
One thing that I especially loved was that my son (4 1/2 yo) was able to help me by sifting the sugar.
I am so glad to have finally found an easy fudge recipe!
Wednesday, December 12, 2012
Baked Oatmeal Recipe
Last week at the women's Christmas brunch at our church, one gal made baked oatmeal. I like the recipe because it's easy to make gluten free and super yummy... Note to gluten free folks, I read online that you have to get rolled oats that specify that they are gluten free if you have a severe allergy. Quaker Oats doesn't guarantee that their oats have not experienced cross-contamination and can't be considered gluten free :( But, I read that there are oatmeal brands that certify that their oats are gluten free and have been processed on gluten free equipment.
Baked Blueberry Oatmeal
3 cups rolled oats or old fashioned oatmeal
1/2 cup brown sugar
1/4 cup honey
2 heaping tsp. baking powder = 2 1/2 tsp. baking powder
1/2 tsp. salt
2 eggs
1 cup milk or 1 cup rice milk
1/2 cup vegetable oil
1/2 tsp of vanilla
1 cup frozen blueberries
1/2 cup finely chopped pecans
Combine all ingredients in mixing bowl. Stir and pour into square 8 x 8 pyrex baking dish. Pour frozen blueberries over top and spread out. Press blueberries lightly into the top. Bake at 350 for about 40 minutes. Test with spoon in middle to see if done. The middle shouldn't be wet.
My husband loved it and my kids liked it too, so this is sure to become a regularly made dish in our house.
My husband, of course, liked it topped with whip cream!
Sunday, December 9, 2012
Italian Red Sauce
It took me 12 years of being married to an Italian, but I finally came up with a red sauce for pasta that my husband loves.
Here it is:
First brown 1 lb. of italian sausage (I like sweet, mild for my family) cut into 4 inch lengths in a skillet. Once browned, put into large crockpot.
Then, start on the meatballs.
Mix:
Meatballs
2/3 cup bread crumbs
1/2 cup buttermilk or 1/2 cup milk + 1 tsp. lemon juice (let sit for 5 min. to sour)
1 lb. ground beef
1/2 cup grated Parmesan cheese
2 tsp. dried parsley leaves
1 large egg yolk
1 small clove garlic , minced (1/2 teaspoon from a jar)
3/4 teaspoon salt
Mix bread crumbs and buttermilk/sour milk together for 5 min. and let sit. Then, add rest of ingredients and form into meatballs (some people like small and some like large). Brown meatballs on all sides in a skillet with 1/4-1/2 inch canola oil. You don't need to cook the meatballs through. Once browned, place in crockpot with sausage.
Sauce:
Saute 1 large onion and 3 cloves of garlic (minced) with 2 Tbs. olive oil., then add to crock pot.
Add 1 29 oz. can crushed tomatoes, 2 29 oz. cans tomato puree, and 1 can of water (add less if you like a thicker sauce)
Add 2 tsp. oregano, 2 tsp. sugar, 2 tsp. salt, 2 tsp. basil, 1/2 tsp. black pepper, and a handful of fresh chopped parsley to the sauce (or 2-3 tsp. dried parsley).
Add 1/3 cup red wine if you enjoy red wine in your sauce. My kids don't like wine, but my husband does, so I usually opt for 1/4 cup and meet them in the middle.
Let sauce cook in crockpot on high for 4-6 hours. The sausage and meatballs will cook through in the sauce.
So, that's my sauce recipe :)
Cannoli
Yesterday, for our church's Christmas brunch, I made cannoli. It was actually my first attempt, but they turned out well! Yippee! So, here's what I did.
There are two ways of making cannoli shells. You can make the dough, use a form, and fry them. OR you can make pizzelle cookies and roll them around a wooden dowel to shape them. I opted for the second way.
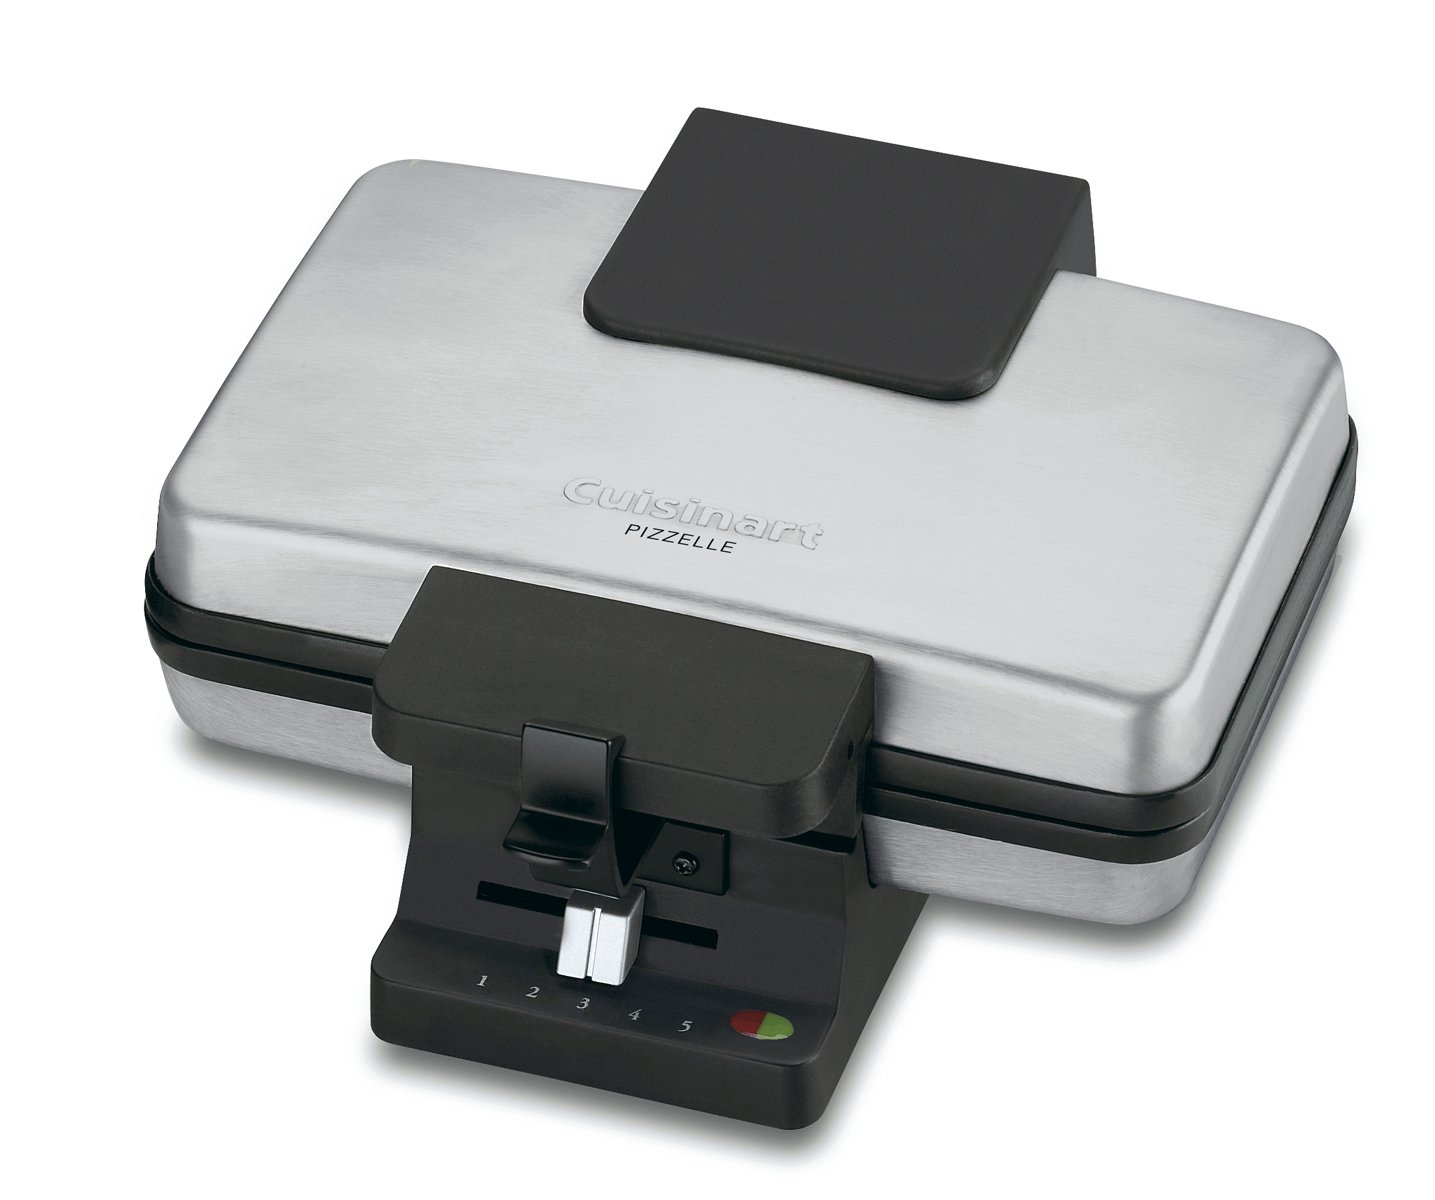 I have two pizzelle makers. I bought a cuisinart pizzelle maker 7 years ago. The clasp quickly broke off, but it has continued working. Last year, I bought a Chef's Choice Pizzelle maker. It makes 3 smaller pizzelles at a time. The Cuisinart makes 2 larger ones. I thought I would love the newer one, but I found that neither one works better than the other. I still have to spray them both before each pizzlle with cooking spray.
I use the Pizzelle recipe that came in the manual with the cuisinart maker.
This recipe is almost the same:
http://allrecipes.com/recipe/pizzelles-iii/
When the pizzelles are done, the green light goes on. I set my machine to 3. It makes a light colored pizzelle. I take one of with a fork and gently roll it around the dowel. I lean it against the black base of the maker. Then I take the other one off and wrap it around a second dowel and lean it against the other side of the pizzelle maker. Then, I spray the maker and start another 2 pizzelles. After about 30 seconds, I gently slide the dowels out and move the cannoli shells off to the side (I put them in a rectangular tupperware that I have).
I made the filling using this recipe:
CANNOLI FILLING
1 lb. Ricotta
2 c. powdered sugar (1 c. if you don't want the filling super sweet)
1/2 tsp. vanilla
3/4 c. mini chocolate chips
8 oz. cool whip
Mix ricotta, powdered sugar and flavoring. Beat well. Add mini chocolate chips. Fold cool whip into mixture. Store the mixture in the fridge until you're ready to fill the cannolis.
I filled the cannolis right before we ate them. At first, I used a Wilton pastry tube contraption, but the chocolate chips got stuck. So, then I switched to a plastic bag--sandwich size. Put the filling in the bag and seal. Snip off one corner and squeeze filling out of the bag into cannolis.
Voila! Cannolis :)
There are two ways of making cannoli shells. You can make the dough, use a form, and fry them. OR you can make pizzelle cookies and roll them around a wooden dowel to shape them. I opted for the second way.
I use the Pizzelle recipe that came in the manual with the cuisinart maker.
This recipe is almost the same:
http://allrecipes.com/recipe/pizzelles-iii/
When the pizzelles are done, the green light goes on. I set my machine to 3. It makes a light colored pizzelle. I take one of with a fork and gently roll it around the dowel. I lean it against the black base of the maker. Then I take the other one off and wrap it around a second dowel and lean it against the other side of the pizzelle maker. Then, I spray the maker and start another 2 pizzelles. After about 30 seconds, I gently slide the dowels out and move the cannoli shells off to the side (I put them in a rectangular tupperware that I have).
I made the filling using this recipe:
CANNOLI FILLING
1 lb. Ricotta
2 c. powdered sugar (1 c. if you don't want the filling super sweet)
1/2 tsp. vanilla
3/4 c. mini chocolate chips
8 oz. cool whip
Mix ricotta, powdered sugar and flavoring. Beat well. Add mini chocolate chips. Fold cool whip into mixture. Store the mixture in the fridge until you're ready to fill the cannolis.
I filled the cannolis right before we ate them. At first, I used a Wilton pastry tube contraption, but the chocolate chips got stuck. So, then I switched to a plastic bag--sandwich size. Put the filling in the bag and seal. Snip off one corner and squeeze filling out of the bag into cannolis.
Voila! Cannolis :)
Monday, December 3, 2012
Figuring Out Photoshop
Nine months ago, we purchased Photoshop. The whole kit and caboodle. As a homeschooler, you can purchase Photoshop for a third of the cost through Adobe's website directly. Lightroom and Photoshop Elements are also reduced. I think the cheapest way to get elements, though, is when BJs or Costco has a coupon for it. I've seen it for as low as $50 there. I wish now that I had started with Elements or Lightroom. I have been using Google's Picasa program to edit my photos. It's free and super easy to use. You can download it here if you're interested: Google Picasa
Last summer I met a woman at one garage sale who was pretty snooty about photography to me. But, I still wanted to glean from her what I could. She spoke of Elements so poorly that I was convinced that the only option was to get the whole Photoshop program.
There's two ways of approaching photography:
1) to take the picture you want with your camera. To develop your understanding of aperture, speed, white balance, etc...
2) to use auto settings and a photo editing program to give your photos the effects you want.
Then, there's a middle road. I strive for #1, but use #2 when I have to along the way. I'm learning. Many of my pictures need to be cropped, straightened, or lightened. So, that's where photo editing software comes in.
Picasa has worked great for me. I still use it. I have started to play around with Photoshop when I have time--it really takes a lot of time to learn how to use it. Many people learn via youtube--which has been highly recommended to me as a way of learning how to use Photoshop. My way of learning something is to use books. So, I requested two books for review on the new version of Photoshop--CS6.

The first book is The Missing Manual, by Lesa Snider. During college, one of my professors told me that I wrote reports that would win the "throw them down the stairs" contest. This contest said that the ones that went the farthest were the best. Of course, this was a joke, but what he meant was that my group was very thorough. That's exactly what I'd say about this book. It would definitely win that contest, because it's a thick, thorough book.
This book covers absolutely everything. I have to admit that after reading the first two chapters and having no experience with Photoshop, I set it down. I was completely overwhelmed and doubted if I could ever learn how to use this program. After a few months of simply playing around with the program once in a while and using another book, I opened it back up. Now, it makes a lot more sense to me. If I want to really get good at Photoshop, this book would help me do that. It starts from the ground up and builds skills on top of each other. The writer does make it as interesting she can--this is a computer manual after all. I chuckled at the first chapter and smiled. The illustrations are from a PC version, but she regularly makes notes about the differences for mac and pc users. Photoshop is a very complicated program that requires a lot of skill. My brother in law told me that you can never fully know how to use all of Photoshop. Would I recommend this book? Definitely. Take a look at it if you're looking for a book that will cover everything.

The second book I requested was the Top 100 Simplified Tips and Tricks for Photoshop CS6 by Lynette Kent. This is a shortcut book. I thought I'd be able to simply pick it up and use it to do what I wanted since I was overwhelmed by The Missing Manual. Nope. Not the case. I had to play around a bit and feel comfortable getting out of the shallow end. Then, last week a friend came to me with a project and I used this book to edit a picture she gave me. I opened up the index and found the topic I was looking for. I followed the directions step by step and successfully edited the picture. I also attempted to do one thing that didn't work. What I love best about this book is the illustrations. Each numbered step is labeled on the diagrams. It was so easy to follow.
After working on that project and realizing I need more time on the basics, I have decided to go back to The Missing Manual when I have time and begin trying to work through it bit by bit. I think Photoshop is a little like cooking. If you haven't cooked much, it would be difficult to jump right into making a hollandaise sauce. But, you can practice with the whisk over time and get better at making gravies and sauces. But, if at the same time, you pull out a cookie recipe and it turns out well, you'll feel hopeful. Having something come out right encourages us that eventually we'll be able to cook the harder recipe, too.
Photoshop is that way for me. I've taken some baby steps, but I fear I have a hundred miles to go before I'm competent in the program. But, I'm hopeful.
Please note that I received complimentary copies of these books for review from O'Reilly publishing and John Wiley and Sons Publishing.
Last summer I met a woman at one garage sale who was pretty snooty about photography to me. But, I still wanted to glean from her what I could. She spoke of Elements so poorly that I was convinced that the only option was to get the whole Photoshop program.
There's two ways of approaching photography:
1) to take the picture you want with your camera. To develop your understanding of aperture, speed, white balance, etc...
2) to use auto settings and a photo editing program to give your photos the effects you want.
Then, there's a middle road. I strive for #1, but use #2 when I have to along the way. I'm learning. Many of my pictures need to be cropped, straightened, or lightened. So, that's where photo editing software comes in.
Picasa has worked great for me. I still use it. I have started to play around with Photoshop when I have time--it really takes a lot of time to learn how to use it. Many people learn via youtube--which has been highly recommended to me as a way of learning how to use Photoshop. My way of learning something is to use books. So, I requested two books for review on the new version of Photoshop--CS6.
The first book is The Missing Manual, by Lesa Snider. During college, one of my professors told me that I wrote reports that would win the "throw them down the stairs" contest. This contest said that the ones that went the farthest were the best. Of course, this was a joke, but what he meant was that my group was very thorough. That's exactly what I'd say about this book. It would definitely win that contest, because it's a thick, thorough book.
This book covers absolutely everything. I have to admit that after reading the first two chapters and having no experience with Photoshop, I set it down. I was completely overwhelmed and doubted if I could ever learn how to use this program. After a few months of simply playing around with the program once in a while and using another book, I opened it back up. Now, it makes a lot more sense to me. If I want to really get good at Photoshop, this book would help me do that. It starts from the ground up and builds skills on top of each other. The writer does make it as interesting she can--this is a computer manual after all. I chuckled at the first chapter and smiled. The illustrations are from a PC version, but she regularly makes notes about the differences for mac and pc users. Photoshop is a very complicated program that requires a lot of skill. My brother in law told me that you can never fully know how to use all of Photoshop. Would I recommend this book? Definitely. Take a look at it if you're looking for a book that will cover everything.
The second book I requested was the Top 100 Simplified Tips and Tricks for Photoshop CS6 by Lynette Kent. This is a shortcut book. I thought I'd be able to simply pick it up and use it to do what I wanted since I was overwhelmed by The Missing Manual. Nope. Not the case. I had to play around a bit and feel comfortable getting out of the shallow end. Then, last week a friend came to me with a project and I used this book to edit a picture she gave me. I opened up the index and found the topic I was looking for. I followed the directions step by step and successfully edited the picture. I also attempted to do one thing that didn't work. What I love best about this book is the illustrations. Each numbered step is labeled on the diagrams. It was so easy to follow.
After working on that project and realizing I need more time on the basics, I have decided to go back to The Missing Manual when I have time and begin trying to work through it bit by bit. I think Photoshop is a little like cooking. If you haven't cooked much, it would be difficult to jump right into making a hollandaise sauce. But, you can practice with the whisk over time and get better at making gravies and sauces. But, if at the same time, you pull out a cookie recipe and it turns out well, you'll feel hopeful. Having something come out right encourages us that eventually we'll be able to cook the harder recipe, too.
Photoshop is that way for me. I've taken some baby steps, but I fear I have a hundred miles to go before I'm competent in the program. But, I'm hopeful.
Please note that I received complimentary copies of these books for review from O'Reilly publishing and John Wiley and Sons Publishing.
Saturday, December 1, 2012
Affordable Treats
When the Christmas season comes, I expect my food budget to increase. But, I try to moderate this increase. I choose cookies that involve more work than cost. I am careful about when I use nuts (an expensive ingredient) because not everyone likes them. I make a variety of cookies and don't make all chocolate chip ones.
Today I was pondering what snack to make to take to a gathering. I found a very affordable one to make. I realized that sometimes I make cookies because I want people to think I'm a good baker--I know this is prideful and totally silly!! Once this occurred to me, I decided to make something I thought other people wouldn't make, but that would give variety.
I made the snickerdoodle chex mix. Here's a link to the recipe: Snickerdoodle Chex Mix
I did substitute Rice Chex and Kix for the cereal, because that's what I have. It's a simple and quick snack to make.
My experience with Food Processors
On Black Friday each year, I usually find myself shopping for myself and my family--not for other people. It's a great time to get kitchen appliances and clothes. I like to get gifts for people that are personal and that usually means buying things that aren't on sale or don't go on sale. Clothes, at least for me, are hard to buy for other people (except for my husband).
So, this year, I had 2 appliances I was looking for. A food processor and a toaster oven. I scoured the ads and finally found what I was looking for. A cuisinart 7 cup food processor for $68 at Macy's (best regular price is $100 on Amazon) and a Black and Decker Toaster oven for $20 (regularly $45 on Amazon).
Food Processors: Here's my story.
16 years ago, I had a tiny 1 cup food processor/chopper and a 7 cup cuisinart food processor. Both were given to me by my father because he didn't want them. He wanted the big one--12 or 14 cup capacity. I found that I only used the 1 cup chopper on rare occasions. The cleaning it required wasn't worth the effort it saved. I did use the 7 cup often, though. I used it for salsa, chopping, shredding carrots and cheese, making hummus... A few years ago, I thought I really wanted a larger one--12 cups. So, I handed down my 7 cup to a friend (I'd given the smaller one to someone years before) and saved up for the larger one. I purchased a kitchenaid one though because it was a better price and I was able to open the bowl. I couldn't figure out how to open the cuisinart bowl for some reason.
A year later, my husband got me a vitamix. I loved it and it meant I didn't need my blender anymore. My husband was convinced that it meant I didn't need my food processor either. So, I passed it on to a loved one. I made do. I learned how to make bread crumbs in my Vitamix (though it took a lot ! longer) and haven't made a carrot cake in a long time. I also stopped buying chunks of mozzarella because they don't shred as well by hand. I stopped making hummus for my husband. I made less salsa the past two summers.
Then, a few weeks ago, a gal at church mentioned chopping carrots for carrot cake in her food processor. I prefer to use the grating disc and grate them because of the texture. But, it made me stop for a moment and think of all the things I've stopped making the past three years ago with the arrrival of my Vitamix. So, I decided to use my allowance and save up for a new food processor.
I started looking around. I looked at less expensive brands, but the grating disks were plastic with a small metal portion for the grater and/or they combined disks and/or the food processor blade wasn't reinforced well. I'd had experience with bad blades because the old style mini chopper by cuisinart constantly came apart on me, which is one reason I only rarely had used it. I looked at a new model recently and they've improved the design. So, I went back to looking at cuisinarts and resolved to save up for the size I wanted.
I do love my Vitamix and I'm very thankful for it, but it can't completely take the place of a food processor. It definitely takes the place of a blender though, because it is one!
Food Processors are one of those things that go along with my theory--middle of the road is best. I often want the biggest--kitchenaid, toaster oven, blender, etc. But, it's not the best choice. The largest kitchenaid (575 watts) still rocks and doesn't do any better than my 375 watt did. I didn't need the largest food processor--12 cups. A 7 cup is great. I like using it and it takes a lot less space on my counter. So, if you're thinking about getting one, I'd look in the middle. :)
Thursday, November 29, 2012
Keeping the Oven Clean
When we bought our house in Georgia, I found an interesting thing in the oven. I had never thought of doing this, but I have done it ever since!

Here's a picture:

In the bottom of my oven is a thin aluminum plan (the kind that you buy at the grocery store) covered in aluminum foil. I purchase the extra long roll of foil for this project. I cover the pan and place it in the bottom of my oven.
When something spills, all I have to do is replace the aluminum foil on the tray. Many people put a cookie sheet under things to catch spills. I don't like to do this because it can impede the cooking of the bottom of the pie or other baked food.
Yesterday, my muffins spilled over and the smell of something burning crept into the kitchen. After the oven had cooled, I just pulled the tray out and replaced the foil! Yippee!
I've had self-cleaning ovens before and have tried oven cleaners, but they leave horrible smells. This little trick has saved me a lot headaches!
Coping with Food Allergies
Recently the husband of a good friend of mine was diagnosed with celiacs. It feels as if I am meeting more and more people who have special diets. I have watched from afar as my friend has just jumped right in. Her whole family is eating differently to make it easier on her husband because of his need to take gluten and lactose out of his diet. I have been so impressed with her dedication and her efforts to love her husband well.
As a host, I want to love our guest well when they come into our home. I want to understand what I need to watch out for. In my mind, food allergies are different than being a picky eater. I remember trying to accommodate one picky eater who came to our home on New Year's Eve 9 years ago. I changed my main dish just for her and then it turned out that she didn't like that either! I couldn't do anything more. But, food allergies are much more serious. My friend's husband has to miss a day of work if he eats the wrong thing.
 So, I was excited when I got the chance to review The Total Food Allergy Health and Diet Guide for review. This book was by Alexandra Anca, a registered dietician, with Dr. Gordon L. Sussman, a medical doctor. It is a chockful of information! This book covers various food allergies, associated health conditions, the diagnosis of food allergies, managing the allergies, what products to watch out for, and then recipes. Half of this book is recipes, which is the part I most wanted.
I found the information about allergies informative. If I was starting down the road to food allergy testing, this book would provide good explanations of allergies vs. intolerances, how to understand different types of testing, and what I need to watch out for. One note the author does make strongly, which I agree with, is that elimination diets shouldn't be started without medical supervision and advice. We can unintentionally take nutrients out of our diets without making up for them. The first half is full of charts and medical information. But, if you or someone close to you has a food allergy, this information would be very important to have.
I have reviewed one or 2 gluten free cookbooks before. The mix of flours used has always been very expensive, which has deterred me. That was something I noticed right away with this cookbook. The baking ingredients are much more doable--both to find and afford. I made the applesauce muffins for my friend, her husband, and another gluten-free friend. I did substitute cranberries for the raisins because I didn't have sulfur free raisins. They were all very impressed! Both families wanted the recipe and said they were better by far than other gluten free muffins they'd had. The recipe did specify things like gluten free baking soda and gluten free vanilla. I had to buy a new container of Clabber Girl and my Costco vanilla was labeled gluten free.
As I looked through the other recipes, I was pleased. The recipes are ones I'd make for company and are simple enough to prepare. I wanted this book so that I could be a good host and make meals that everyone will eat when we have gluten free guests.
If you're looking for a general food allergy book to help you cope with multiple food allergies in your family, or if you are like me and need some recipes when you have guests with food allergies over, then this is a very informative and helpful book!
Please note that I received a complimentary copy of this book from Robert Rose publishing for review.
As a host, I want to love our guest well when they come into our home. I want to understand what I need to watch out for. In my mind, food allergies are different than being a picky eater. I remember trying to accommodate one picky eater who came to our home on New Year's Eve 9 years ago. I changed my main dish just for her and then it turned out that she didn't like that either! I couldn't do anything more. But, food allergies are much more serious. My friend's husband has to miss a day of work if he eats the wrong thing.
I found the information about allergies informative. If I was starting down the road to food allergy testing, this book would provide good explanations of allergies vs. intolerances, how to understand different types of testing, and what I need to watch out for. One note the author does make strongly, which I agree with, is that elimination diets shouldn't be started without medical supervision and advice. We can unintentionally take nutrients out of our diets without making up for them. The first half is full of charts and medical information. But, if you or someone close to you has a food allergy, this information would be very important to have.
I have reviewed one or 2 gluten free cookbooks before. The mix of flours used has always been very expensive, which has deterred me. That was something I noticed right away with this cookbook. The baking ingredients are much more doable--both to find and afford. I made the applesauce muffins for my friend, her husband, and another gluten-free friend. I did substitute cranberries for the raisins because I didn't have sulfur free raisins. They were all very impressed! Both families wanted the recipe and said they were better by far than other gluten free muffins they'd had. The recipe did specify things like gluten free baking soda and gluten free vanilla. I had to buy a new container of Clabber Girl and my Costco vanilla was labeled gluten free.
As I looked through the other recipes, I was pleased. The recipes are ones I'd make for company and are simple enough to prepare. I wanted this book so that I could be a good host and make meals that everyone will eat when we have gluten free guests.
If you're looking for a general food allergy book to help you cope with multiple food allergies in your family, or if you are like me and need some recipes when you have guests with food allergies over, then this is a very informative and helpful book!
Please note that I received a complimentary copy of this book from Robert Rose publishing for review.
Thursday, November 15, 2012
Why I Conserve
A few weeks ago, I was talking with a young gal about saving money when it comes to groceries. She shared with me that she was concerned about thinking too much about it--and focusing on the money saved.
This popped into my mind this morning as something else crossed my mind.
I have started to play around with turning off the burners on my stove and turning off the oven before the food is done cooking. I've been trying to conserve energy. During last winter, our energy bill was high for my tastes so through the year, I tried to find ways to minimize our home's loss of heat.
* I made sure the doors and windows were caulked and sealed around the edges. I was quite surprise at what I found!
* We put a storm door on the front door and screen door on the back. We also replaced the back door.
* We installed a low flow showerhead on our shower so that we would consume less hot water.
* I time the girls' showers.
On our to do list is to replace the older windows and insulate the water pipes in the basement. But, that didn't get done yet. They haven't come to the top of our priority list yet for our budget.
So, in the meantime, I have been thinking about how I can conserve energy that we consume. We already turn off lights in our home when those rooms aren't in use. My mother in law once came to our house recently and wondered if we were home, because so many lights were off! I also don't turn the lights on in the bathroom unless I need them. During the daytime, there's plenty of natural light from the window.
So, that leaves laundry and cooking--the largest consumers of energy (next to bathing). Laundry. I run everything on cold and our clothes (even whites) do come out clean. With our dryer, I only run full loads. I do add extra time instead of having to rerun the dryer twice because a very full load wasn't drying completely on a regular time amount (41 min. normally vs. 50 mins. with the extra time).
Cooking... We have a gas stove and electric oven. Ovens are a huge energy hog. And sometimes I forget to turn it off as soon as I'm done baking. So, recently, I started playing around with turning it off early. I tried one tray of cookies. They did cook through in 14 min. (normal 8 min. cooking time), but they weren't browned. So, instead whenever I remember, I've started turning off the oven halfway through the last tray. It extends the time less. We have a gas stove and I often cook with cast iron, which retains heat well. When I'm making pancakes, I turn the stove off when I've flipped the last batch and am cooking the last side. It helps me not forget to turn the stove off and it saves a bit of energy.
But, why do I do it? I could say it's just to save money, but that isn't the whole truth. Honestly, I really like to use less--energy, stuff... I feel better about conserving. It is a way that I can be a wise steward of what God has blessed us with. I don't want to be wasteful.
The mattress arrived...
2 nights.
First night. Did we make the right choice?
Second night. I slept. I don't know if I woke up in the night, actually. Maybe I didn't. My husband agreed that he slept better too. I'm thinking that it takes a bit of time to get used to the foam mattress.
I'm hopeful!
We'll see what happens tonight. Will I sleep through the night? For the first time in a very, very, very long time? I really, really hope so!
Monday, November 12, 2012
Mattress Shopping... Again
The past two weeks I've been shopping for a new mattress for our bed. We bought a bed 11 1/2 years ago when we got married. For the past four or five, it has been too soft. As my husband's shoulders have become increasingly more painful, we both realized that it's time to get a new mattress. My husband lives with chronic pain, so if I can do something to help, I always want to. So began the search for a new mattress...
I went to three chains around us. Sleepy's, Mattress Discounters, and Boscov's (a department store). At Sleepy's and Boscov's, the salespeople couldn't tell me much about the mattresses or the differences between them. It was up to me to figure things out. The third store was where I learned a lot.
I met a salesman who's been selling mattresses for 30 years. He explained so much to me. So, I'll try and explain it clearly here.
Point #1: Sleep number beds are like the waterbeds from 20 years ago. With waterbeds, the water was always trying to find a way out and it often eventually did. With sleep number beds, air is under pressure in the beds. That air is constantly trying to find a way out. And eventually, it does. The salesman explained to me that after a few years, people find themselves waking up in the night to pump their beds back up.
Point #2: Sixteen years ago, mattresses were flippable. You could use both sides of the mattress. Then about 12 years ago, one of the manufacturers used the results of a survey (which said that 40% of people never flipped their mattresses) and began making 2 or 3 nonflippable mattresses. They sold well. So, they started making more and pretty soon all manufacturers followed suit. Now, they've reengineered the coils so that you really couldn't flip them even if you wanted to. Of the three stores I went to, only Boscov's carried 3 mattresses that were flippable.
Point #3: More springs. That sounds great, doesn't it? Sure. But, the salesman explained to me that in order to do that, the springs had to be smaller and of a smaller gauge wire. So, is it a better deal after all? Maybe, maybe not. It isn't certain. What is for sure is simply a selling point if people want more springs.
Point #4: Warranties. The total warranty period is a combination of 2 things. 1. a full warranty for the first so many years. Then, 2. a prorated warranty for the remainder of the period. What's covered? Pretty much if the mattress turns out to sag in the middle after a few years because of defects.
Point #5: Mattresses are made for our society at large. So, decide what mattress you like based on how it feels, not the label. A person's weight will affect how they sleep on a mattress. This was the point that made me know that I needed my husband to try out the mattresses too. He had wanted me to just pick one out. But, he weighs 70 lbs more than me, so of course the mattress will feel different to me than to him.
Point #6: Foam is the new thing. For years, it was only tempurpedic who made foam mattresses. Now, there's another option. icomfort from Sealy has 2 choices. 1 is a completely foam mattress (which is supposed to have a cooling layer in it) and 2 is a coil mattress with a foam topper. The mattresses vary by the thickness of the foam and the effect on how you sleep. icomfort prices are a bit negotiable, but tempurpedic's prices are firm. They should be the same wherever you go.
Point #7: The price of a mattress at most mattress shops is like buying a used car. The price the salesman gives you is based on the % commission he would like to earn on the sale. They have a book that says, If you want x% commission, then sell the mattress for y price---for all mattresses (except Tempurpedics) in the store.
In the end, I heard from several friends that a good mattress made all of the difference in the world for them and that a good mattress is worth it's price. I couldn't bring myself to pay the price for a foam queen mattress though without my husband trying it out first. So, we went out Saturday night. My husband is like many men. He asked me 1) we only have to go to 1 store, right? 2) we aren't going to be at the store all night are we?
In the end, we tried the icomforts and the tempurpedics. The Tempurpedics felt more firm to him, so we settled on the second to the bottom one, which was comfortable and in our price range. Tuesday it will arrive and we are looking forward to it. I really hope it will help him sleep and not wake up in pain every morning. I'm secretly hoping that I will be able to sleep through the night too (since I haven't in almost 10 years).
So, that's what I learned about mattresses this week!
Thursday, November 1, 2012
Carnitas Tacos (sort of)
Tuesday is taco night at our house. This week we had a gaggle of people over, so I continued with our tradition of Tuesday Taco night with a little extra food.
Normally, I make either a meat filling or refried beans as our base. This week, I made refried beans, meat filling and pork filling.
As I was getting ready to make the pork, my husband requested that I go to the store and get a pork roast. I told him I was going to use pork chops. He began to object, but then I asked him to give me a chance to do it my own way and to see how it turned out. I can't remember the exact way it played out, but that's the gist of it. He didn't know that I'd been using pork chops instead of pork roasts for a while.
It turned out well. There was only a tiny bit of the pork left after the meal that my mom scraped together into a tupperware because she didn't want to waste any of it!
My refried bean recipe is here: http://makingthingsstretch.blogspot.com/2010/02/refried-beans-and-bean-flautas.html
For the meat, I brown 1 lb. of ground beef with 1/2 yellow onion, minced or chopped, and 1-2 cloves of garlic, minced. I keep a jar of minced garlic on hand to make things quick (BJs or Costco is the cheapest place to get this). When it is all cooked through, I add 1- 8 oz. can of tomato sauce. Then sprinkle cumin, chili powder, and oregano over it. Stir to mix.
For my taco shells, I put a little oil (2-3 Tbsp) in a nonstick frying pan. My mom used to do this when I was a kid. Heat up the oil in the pan. Place the corn tortilla in the pan. Little bubbles should surround the tortilla right away (but you don't want it too hot). Let it fry for a few seconds. Then, turn over with tongs. Use a wooden spoon in your other hand and the tongs to gently fold the tortilla in half. You want to be careful not to break the tortilla as you fold it. Let one side crisp up and then flip over to crisp the other side. Place on a paper towel lined plate when done.
For the pork filling (which got the best reviews of the bunch), I used boneless pork chops. I have found that you can get these on sale for less than a pork roast goes for and they work great in a crock pot. I trim off the fat off the outside of the chops because then I don't have to worry about getting it out of the crock pot when I'm ready to shred the pork.
First, brown the pork chops in a little oil in a fry pan until they are lightly golden on each side. Then, place the pork chops in a medium crock pot. I used 2 lbs. of pork chops and this crock pot. Add all ingredients from this recipe to the crock pot: Actually, for 2-3 lbs. of pork chops, I added half of the sauce ingredients to the crock pot which was just right. When I'm making BBQ beef or BBQ pork, I use a full recipe of sauce and 3-4 lbs. of meat (and serve it with grated cheese, sauteed mushrooms, and buns). Depending on how thick the pork chops are, this recipe can be fixed in 3-4 hours. On Tuesday, they cooked in 3 1/2 hours on high in the crockpot I used.
On the side, we had sliced olives, minced red onions, chopped cilantro, shredded lettuce, chopped tomatoes, salsa fresca/onion salsa, cholula and Tapatio, grated cheddar cheese, and sour cream.
I need to be honest and admit that my kids don't love tacos. But, my husband and I do, so this is just one of those meals that I make every week. They like some combinations of fillings quite well, though. Unfortunately, they each like a different one, so I can be assured that each week 1 of my 3 might object. But, they eat their tacos and I am hopeful that they will acquire a taste for them. :) The refried beans are nice because the vegetables are already in them (without the kids knowing).
Monday, October 22, 2012
Anabaptist Cooking
I think it's so interesting that there is this fascination with Amish and Mennonite cooking. I had a thought about why this might be just now. I think they are seen as simpler, back to the basics, from scratch cooks--who embody that idea of "wholesome goodness" in their cooking. I think it is because we romanticize the way of life of the Amish and Mennonites.
 That being said, I have been told by many who make treks up to nearby Lancaster, Pennsylvania, that the Amish and Mennonites are good cooks. Such comments pique my curiosity. I've had Amish cookbooks before and they have never wowed me. But, I can't resist trying a new cookbook. Hence, my mom and I found ourselves trying out recipes from a new cookbook coming out, A Farmer's Daughter: Recipes from a Mennonite Kitchen by Dawn Stoltzfus. My rule of thumb is that I must try at least three different recipes from a cookbook before reviewing it. In this case, we tried the Baked Peach French Toast, the Creamy Baked Macaroni and Cheese (crockpot option), and the Chocolate Chip Peanut Butter Oatmeal Bars.
Here's my take:
1) Cookbook mechanics: The recipes are easy to read and well written. Ingredients are easy to identify, common, and labeled well. It's black and white without any pictures, but the ease of reading the recipes partially makes up for that.
2) The food itself: I admit it. I'm picky. I have tried a lot of recipes over the years. Of the three recipes, they were all just okay. The peach french toast was pretty good for oven baked french toast, but it really wasn't anything special. The "creamy" mac and cheese was not "creamy" at all when make according to the author's crockpot directions. Finally, the bars were well received by the folks who ate them, but I found fault with them. The peanut butter was very difficult to spread on the bottom layer and the chocolate chips just wouldn't stick at all to the top! When I cook recipes from a cookbook I'm reviewing, I want to feel like I'd definitely want to make them again. I just didn't feel that way with any of these recipes. They're fine, really. Competent. Just nothing out of the ordinary or especially yummy.
Verdict: If you want from scratch cooking, I have a list on one of the tabs on this blog of my all-time favorite cookbooks and I am a cook who cooks from scratch. I am coming to realize that I am very picky when it comes to cookbooks. Reviewing so many over the past four years has made me much more selective about what I recommend and what I consider fine, good, and great cooking. Sadly, I'd pass on this cookbook. It's just one I'd rarely pick up.
Please note that I received a complimentary copy of this book for review from Revell Publishing.
Friday, October 19, 2012
Maple Butter Recipe
A friend of ours is from Vermont and she made some maple butter, which she kindly shared with us! I asked if I could share her recipe because it was so good. It totally trumped my homemade strawberry jam which was on the table.
Sami told me she was sorry, but that if the maple butter wasn't there, then she'd eat the jam. What a cutie!
So, here's the original recipe my friend started with and her recipe. She had to play around with it to get it to work right, so the testing and experimenting has already been done!
Original recipe:
1 cup pure maple syrup and 3/4 cup melted butter.
Heat the maple syrup until a small amount forms a soft ball in
cold water.
Then add the butter and beat w/ a rotary beater
until thick and creamy. Serve it warm on hot bread.
Our friend's version:
1 cup pure maple syrup
heated as above.
Beat it into room
tempeture butter (not melted), then put in the fridge until it cools. If you
don't put it in the fridge, it tends to separate a bit.
According to the
internet, it can take up to 10 minutes.
She noted that Martha Stewart
recommends putting the butter into the pot once the syrup is at the soft ball
stage and having it melt there, then immediately transferring it to a bowl
where you beat it for 8 minutes until it's the right color/consistency. But, Martha Stewart's recipes and I have never seen eye to eye (for some reason they never work for me). So, I think I'll stick with my friend's version!
Happy Maple Buttering!
Oh, as for the best price--Costco or BJs. Both used to have a great price a few years ago before Maple Syrup took a huge price hike. But, their price is still better than other places.
Thursday, October 18, 2012
Photography for Children
One of my methods for saving money right now is to write my own curriculum. So far, I've put together a PE curriculum (here) for this year and two literature units for 4th/5th grade (email me if you're interested and I'd be glad to share them). I'm starting work on a photography curriculum. The curriculum I'm working on is for ages 6-8 or 9 years old. It's the very basics of using a digital camera. When I'm done, I'll post my basic outline on this site. In a year or two, we're going to do another quarter of curriculum and then in a few years after that another quarter. There's so much to learn when it comes to photography.
 There are two books that have been awesome tools for me. One book helped me break down the basics that I need to teach my children this year and the second book will come into play more after they learn the basics. The second book actually has helped me a lot in my own photography. It's easier to read and more simply written than an adult photography book. This book is titled the 4-H Guide to Digital Photography. It is written by Daniel Johnson. It is perfect for anyone in grades 6 or 7 on up. This book covers and talks about both point and shoot and DSLRs. The other book that helped me condense and figure out what I need to teach my children was DK's Digital Photo Magic.
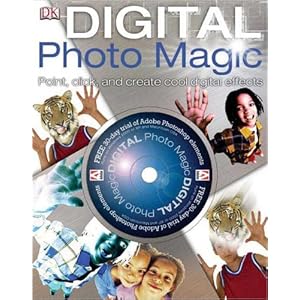 To teach photography to elementary children, I'd start with DK's book (which is $4 including shipping and handling used on Amazon). Take one lesson at a time. The smaller the amount of info, the better. The most important thing is practice. Explain a concept to your child. Show them by example what you're talking bout. Then let them practice--a lot. Don't rush. The practice is what will improve their skills. Upload the pictures periodically during your practice so they can see the pictures better. Google's Picasa program is an easy editing software that is free and easy to use.
For middle school students and older who know the basics of how to use a digital camera, I'd start with the 4-H Guide to Digital Photography. One of the first things I look for in a photography guide is whether I like the photographer's pictures. In this case, I definitely do. Mr. Johnson includes great examples of the concepts he is talking about in the book. He covers all of the basics and then some. It's simple enough for a beginning photographer, but reviews the basics well for people and students who've dabbled in photography already. I'd still start with identifying the parts of the camera and then turning it on and off (Chapter 1). I have to admit that I didn't pick up the manual for the first year I owned my DSLR and I was completely unaware of how to really use my camera. So, no matter how much a student thinks he or she knows, I think it's good to review the basics to begin with. When I use this book with my children in a few years, my plan is to take each chapter and write out a brief assignment. That assignment will be for the student to explain the major concepts of the chapter and illustrate what that means by showing me at least two pictures--one that uses the information from the lesson (taken after the lesson) and one that doesn't (taken before reading the chapter). Preferably, I'd have a student pick three subjects and go out and take 3 pictures. Then, the student would read the chapter and take 3 new pictures of the same subject using what they know. Then, we'd look at them and discuss them together. There is a lot of vocabulary in this book and I would also ask my students to keep a vocabulary notebook with the terms and their meanings written in their own words. Still, photography is a class that is less about reading and writing and rather more about doing. So, I would recommend previewing each chapter and dividing it into section. Practice one concept at a time. Sometimes it's too complicated to do everything at once.
For middle schoolers and high schoolers interested in dabbling in photography, I think Mr. Johnson's book is a great place to start. As for the question of whether a student should use a point and shoot or a DSLR-- if you have a point and shoot, then start with that. You'd be surprised at how many different features it has when you look at the manual and all of the settings that you can adjust. Then, if a student is really interested in photography, get a DSLR. A basic DSLR will start at about $500. I'd go with Canon or Nikon because they are the major brands and usually you stick with one brand over time. I'm a Canon person.
If you only want to purchase one book, I'd get the 4-H Guide to Digital Photography. At $13 on Amazon, it isn't priced too badly and it won't take up too much space on your shelf. I'm much more conscious of this these days as I need to have materials on our bookshelf for three homeschooling students.
These websites give a quick list of what to teach them:
http://digital-photography-school.com/how-to-teach-and-introduce-children-the-wonders-of-photography
http://digital-photography-school.com/13-lessons-to-teach-your-child-about-digital-photography
http://content.photojojo.com/photojojo-original/teaching-photography-to-children/
None of these are homeschooling sites. I'd pick the middle one. Use those 13 lessons and teach one for a week or longer. Give your student plenty of time to practice before moving on. Use the 4-H Guide by Johnson to give you the background knowledge you need and the websites to succinctly list what you want to teach them.
So, that's my plan. In case you're interested, my plan is to post my outline of our photography course by Christmas since we're going to be starting photography in January.
Please note that I did receive a complimentary copy of the 4-H Guide to Digital Photography for review from Voyageur Press.
Friday, October 12, 2012
Super Yummy Mac and Cheese, from scratch
Below is my mother in law's recipe for mac and cheese. It came from an old BHG cookbook. The new one they post on the web isn't the same. Variation #2 is my own version.
Macaroni and
Cheese
ingredients
16 ounces dried elbow macaroni or desired-shape pasta
6 tablespoons butter
or margarine
4 tablespoons all-purpose flour
1/8 teaspoon ground black pepper
1 tsp. salt
4 cups low-fat milk
16 oz. sliced American cheese
directions
1.
Cook macaroni according to package directions;
drain. Meanwhile, for cheese sauce, in a large saucepan, melt butter over
medium heat. Stir in flour, salt, and pepper. Add milk all at once. Cook and
stir until slightly thickened and bubbly. Add cheese, stirring until melted.
Stir macaroni into cheese sauce in saucepan, stirring to coat. Cook over low
heat for 2 to 3 minutes or until heated through, stirring frequently. Let stand
for 10 minutes before serving. If you like to reheat mac and cheese, this is the best way to make it.
Makes 8 servings
But if you like a crispy crust on top, then try this variation...
Makes 8 servings
But if you like a crispy crust on top, then try this variation...
Variation: Oven
Macaroni and Cheese:: Preheat oven to 350 degrees F. Prepare as above, except
increase milk to 2 cups. Transfer mixture to a 2-quart casserole. Sprinkle panko bread crumbs over top for a crispy crust. Bake,
uncovered, for 25 to 30 minutes or until bubbly and heated through. Don't overbake! It will dry out if you do. Let stand
for 10 minutes before serving.
Variation 2: Add 16 oz. frozen peas (defrosted and cooked) with 1 ham steak (chopped) for a more complete main dish.
Happy Mac and Cheese making! We've been eating this a lot lately because my kids love it so much and honestly, it's just as good for you as the packaged stuff (several people commented online that they were concerned about the fat content. If the American cheese and milk are reduced fat, I feel like it's a pretty good ratio. It is mac and cheese after all!
Thursday, October 11, 2012
The consequences of having kids
I was thinking of some other title, but that one sounded the best for the moment. I had 3 kids and gained 40-45 lbs with each pregnancy. I exercised after each one, but there was a consequence of having 3 kids for me. It was my stomach. I hate ab exercises. I can get myself to walk and do walkerobics, but not do ab exercises.
This week, I finally found something I'm willing to do--and that will fit in my schedule (which feels so busy right now). For me, that's the key to exercise. It has to be something I'm willing to do. And honestly, I hate pain! Part of what I'm doing is PE with my kids. A few weeks ago, I felt the Lord bring PE to my attention. I needed to make it a daily part of our lives in a way that it hasn't been before. We started running around our house each day and stretching. But, running won't fix my stomach.
So, here's what I'm doing. My husband hung his pull up bar on a door frame on Sunday. I am doing 5 leg lifts (just to waist height) 2-3 times a day. It takes me a few seconds (which is all I have). I'm also doing 2 plank exercises 2-3 times a day. (also just a minute)
Exercise #1: Dolphin Plank
http://pilates.about.com/od/pilatesroutines/ss/Tip-To-Toe-Pilates-Workout-With-10-Beginner-Exercises_9.htm
I hold this for 20 seconds.
Exercise #2: Plank with Arm Lift
This plank I don't go down onto my forearms for. I do a push up position, and then lift one arm back to my side for 2 breaths. Then, I repeat it on the other side. I do this 2-3 times.
There are many variations of the plank exercises, but I can feel the effects of these two and I'm thankful for that. I probably will add other variations over time.
I think the biggest thing I've found with exercising is that I have to want to do it! These exercises are doable for me, so I'm thankful.
Tuesday, October 9, 2012
Tracking and Hacking
Last night, I watched something on youtube in several parts. I have trusted youtube over other sites. But, every time you're on the web, the reality is that there are risks.
Tonight, I was logging into one of my email accounts and I briefly saw a pathway flash through the toolbar. It was a youtube pathway. Red lights went off in my head. So, I started a virus scan right away. Then, I went into my browser settings and cleared all cookies and data. Then, an interesting thing came up. It said that there were 2 users on my computer.
2 users? The second user had a funny name and a hamburger symbol next to it. Hmmm...
I went to my husband and asked if he'd created it.
No.
So, I went ahead and deleted it.
The internet is a scary place. I'm praying and hoping that's all there is to this, but I'll be on my guard for a while. My husband was just telling me last week how important it is to regularly change passwords and make sure information is secure. I wish the world wasn't this way, but it is.
Sunday, October 7, 2012
Dangers of Delaying
This Sunday's paper contained the Parade magazine as usual. The cover article is this one: http://www.parade.com/health/2012/10/07-why-so-many-parents-are-delaying-vaccines.html on vaccines. I think this article is well written and not extreme.
I have been concerned about the increase in the number of parents who are not vaccinating their children. Honestly, this article expresses my concerns well. I remember visiting a church a few years ago where I knew many of the parents were choosing to delay or not vaccinate their children. I was quite anxious about my children being in the nursery. One thing most people don't realize is that when they choose to delay or not vaccinate their children, they are not only putting their own children at risk, but also those who are unable to be vaccinated for health or age reasons.
Our culture is so self-centered. We are encouraged to think more of our own families than of the greater good. We don't think about how our actions will affect others.
I have a friend who is a pediatric ICU nurse. We've had long discussions about the vaccines. She explained to me about what she's seen in her job and that people don't realize the impact of the diseases that we are warding off by vaccinating our children. I've even heard people make light of whooping cough and hepatitis.
Our generation has not had to experience these diseases in epidemic proportion. So, I believe it is very difficult for us to accept the reality of how an epidemic would impact everyone. But, outbreaks are increasing.
Can you imagine having your child die of a disease that could have been prevented by a vaccination?
Many people are now putting off the hepatis vaccine, because they believe it is not necessary. I have known several people with hepatitis. While it is not life threatening, it is life-altering. There are many effects. One is that it can affect one's ability to get pregnant. Another person I knew struggled with fatigue and other symptoms that made it impossible for her to hold a ft job. It also damages a person's liver and can lead to liver cancer.
Another vaccine that people are putting off or not getting is the chicken pox vaccine. It is seen as not essential. But, there is an additional affect of not getting the vaccine besides chicken pox. Many people who got the chicken pox as children are now getting shingles as adults. It is the same virus that causes shingles. I have one friend who's had shingles 3 times. She has explained to me how painful it is and that she made sure her children got the chicken pox vaccine. Most parents think that if their children get the chicken pox then it is done. But, unfortunately, it isn't.
I know many parents believe that vaccines have damaged their children. I do not know how to respond to what they believe in their hearts to be true. I do know, though, that the link between vaccines and autism has been consistently disproven and debunked by research. There are other potential causes that researchers are investigating. This article lists a few of them: http://www.rodale.com/autism-and-vaccines Our culture is so cynical and distrustful. We are prone to believing conspiracy theories, like the ones that have been perpetrated about autism and vaccines. We need to be careful about such theories--they affect our well being and that of others.
Wednesday, September 26, 2012
Do I need it? Homeschooling Material Issue
This morning I woke up to realize that I hadn't completed a purchase of a book online yesterday that I'd intended to. Usually, this would make me feel disappointed, but in this case, I was relieved by the possibility.
Need vs. Want... I find that it's often a moment by moment question.
Yesterday afternoon I was sitting with Autumn trying to explain longitude and latitude. She wasn't getting it with the Evan Moor book I was using. I felt at a loss. I instantly regretted not purchasing a book I'd intended to last spring. So, I walked over to the computer and quickly ordered the book and workbook. Then, I sat for a minute and felt the push to not give up. I pulled the book back out and opened it up again. I brought over the globe and showed it to her. I pointed out the line around the middle. She immediately recognized the equator. Then, I showed her the latitude and longitude lines. She said, "Wow! I never noticed those before." I explained the degrees, which of course she asked "why are they degrees?" My answer to that was a bad one, because I only knew they always had been measured that way. She accepted it, though, for now.
I went back over to the computer and cancelled the part of my order that I knew I could. I accepted that I'd have to pay for the second part. But, I was so relieved to realize this morning that I'd never completed the second part of the order. It wasn't a need--though I thought it had been. I didn't need the other books after all. I just needed to use my brain! And spend some time with my daughter being patient--finding a hands on way to explain latitude and longitude to her.
As a side note, my husband explained to me at dinner because it is measured in degrees because each measurement is an angle.
For latitude, picture a line from the center of the earth to the equator. Then, draw a second line to a latitude line north of the equator. The angle those two lines create is the degree of latitude--North or South of the equator.
For longitude, picture a line from the center of the earth to the prime meridian. Then, draw a second line to a longitude line East of the prime meridian. the angle those two lines create is the degree of longitude--East or West of the prime meridian.
I'm so glad to understand now that I'm 38 years old why they're measured in degrees! My daughter doesn't understand angles fully yet, but will be this year. And when she does, then I can explain to her better why latitude and longitude are measured in degrees.
Friday, September 21, 2012
Super Quick Homemade Tomato Soup
As my husband and I were driving earlier this week, I gave him a quick synopsis of why our grocery budget is what it is. I explained that many items we use have almost doubled in cost over the past 4 years. This increase has caused me to cut back in a lot of ways. One part that has been cut is my monthly trips to Trader Joe's. I love Trader Joe's. They have great food! But, the increase in prices has made me rethink what I've been buying there. Over the past year, we've been trying out less expensive whole bean coffee alternatives and other products at Aldis, Wegmans, and BJs to substitute for the products I purchased monthly at Trader Joe's. One of my kids favorite foods from Trader Joe's has been their tomato soup.
I haven't had any in the house for several months, so I thought I'd try my hand at making some. Mollie Katzen has an extremely basic recipe in one of her kids cookbooks, Salad People. I used this recipe to get me started and then completely ended up altering it.
Here's the recipe I came up with:
Quick Tomato Soup
1 - 28 oz. can crushed tomatoes
1/2 onion, chopped and sauteed in a little canola oil (next time I'm going to add 1-2 cloves of garlic, minced)
2 tsp. sugar
1/2 tsp. salt
1/2 tsp. pepper
1/2 cup milk
Put all in a blender and puree until smooth. Heat over med-low heat for 5-10 min.
I thought it tasted especially good with some grated parmesan stirred into it after the soup was served. If your kids object to parmesan, add it while the soup is on the stove so it can melt in before they see it (maybe 2-3 Tbsp.)
I did make a trip to Trader Joe's this week on Wednesday. I knew it would likely be my only trip until December. The nuts drastically have jumped in price (a staple I used to purchase their). I chose to forego the soup, crackers, nuts, frozen fish, dairy, and cereal. Instead, I purchased the items that are still a better deal there than other places.
1. dried uncrystallized ginger--I keep this on hand instead of fresh ginger, which always seemed to go bad on me
2. sundried tomatoes--they are dried in an airtight package instead of being packed in oil
3. Kansas City Style BBQ sauce (only available late spring-early fall)
4. 1 bag of Trader Joe's cheetos--for a snack on the way home
5. A few noodle bowls for emergency food supplies for my husband when I don't have a lunch to send with him to work
6. 2 containers of soup--just for an emergency
7. 2 jars of roasted red peppers--good to have on hand for recipes when I've forgotten to buy a red bell pepper at the store
8. One package of corn pasta for when friends on gluten-free diets come over.
no coffee. no juice. no nuts. It's okay.
As for the coffee... I had to find a good alternative. We had been mixing Trader Joe's decaf Columbian ($10 for 13 oz.) and caffeinated Joe Blend ($5 for 13 oz.). Together our coffee was costing around $9.25 per pound.
So, here are the alternatives I've been trying out. I regularly brew half caf coffee, so I had to find good decaf and caffeinated coffees that could be mixed.
BJ's carries a decaf Columbian whole bean that is pretty mild.
I like their Costa Rican coffee and my husband likes their Ethiopian.
All three are pretty good and run about $6/pound.
Eight o-clock Columbian from BJ's is next on my list to try.
I've also been trying out Costco's caffeinated whole bean coffees. They have a Kirkland house blend that is roasted by Starbucks. It runs about $6/pound. Larger Costcos also carry a whole bean decaf roasted by starbucks that is $6.40/lb. (when I bought it this week). They have several other Costco brand coffees that we're going to be trying over the next few months that are also around $6/lb.
It's okay. I'm thankful for the things I bought! I've also been thankful to find alternatives!
Subscribe to:
Posts (Atom)