I am turning to the internet these days for worksheets to keep Eli busy. I found some great pre-handwriting worksheets, alphabet worksheets, and number sheets this morning at this site:
http://www.shirleys-preschool-activities.com/free-printable-preschool-worksheets.html
Wednesday, January 30, 2013
Yippee! Rubbing Alcohol!
A few weeks ago, my mother in law emailed me and asked if I knew what to do for an oil stain in clothing. I didn't. I had no idea. I use Shout when I need to, but I haven't known what to do with oil stains. So, I googled it.
The answers I found were to use Baby Powder and let it sit on the stain to draw out the oil or to rub the stain with rubbing alcohol. I emailed her the second answer. She tried it and it worked.
On Monday, I was cooking in one of my favorite t shirts when I got a big oil stain on it (from canola oil). Bah! After dinenr, I went to the bathroom and doused it in rubbing alcohol. I rubbed it and then rinsed it out. It looked okay, so I was hopeful. I washed it yesterday and pulled it out of the dryer this morning.
Yippee! No oil stain! Yay for rubbing alcohol! My new laundry aid.
Monday, January 28, 2013
Crummy Food Processor...
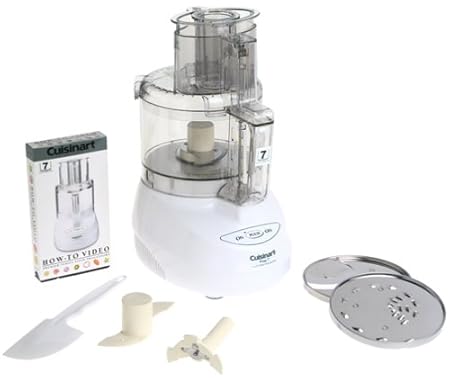
What do I like to use it for?
1) Hummus--this doesn't get it as smooth as my other food processors did in the past.
2) Shredding carrots. It works okay, but the chute is so small that only one carrot goes through at a time and I had to remove the lid often to take off pieces that got stuck.
3) Shredding cheese. This is what I've done before and did tonight. With this cuisinart, it's a disaster! The oval part of the chute must be in in order for the machine to work. That leaves a very small opening (the older ones weren't like this). I had to cut the cheese into small pieces to begin with. Tonight I had to hold the lid on with one hand, put the cheese into the chute and then press down on the round plunger at the same time. The cheese continually got stuck. I was about ready to throw it out the window by the time I was done.
It's just not worth it. And I don't think my shoulders would like me. I'm going to go back to using my sharp knives, my vitamix, and buying hummus. This cuisinart is going in the basement until I figure out what to do with it. I was really hoping that this appliance would be like my old one and it just isn't.
Sunday, January 20, 2013
Another Book O' Tips
When I read the introduction to this book, it sounded like it was a new and improved version of the old one. I didn't find this to be so. Improved to me would have been an improvement in the formatting and the ease of use of this book. I am the kind of person who loves charts and being able to come back to information easily. This book is really formatted for bathroom reading, like the old one. It can be read 1/4-1/2 a page at a time. It can be read in any type of order. It is simply a book to read for fun--for ideas. As the author says in the beginning of the book, no one could do all of the ideas in this book in their lifetime. You can just look through and find the ones that sound fun to try!
If you love money saving tips, but would prefer to browse through them in book form than on the internet, then you'll enjoy this book. My mom enjoys it, but I don't. It's hard for me to find my way around it and at this point in my life, I prefer organized books of tips that I can use and refer to easily rather than ones that need me to sit down and read. My life just doesn't allow for that right now. But, my mom, who's in her 60s, does have the time to sit in the evenings with a book and a cup of tea.
So, that's how I'd describe this book. It's for folks who have time to sit, but not for those who don't!
Please note that I received a complimentary copy of this book for review from Revell Books.
Wednesday, January 16, 2013
Free Piano Lesson Resources Online
As I mentioned in my last post, we recently decided to teach our kids piano at home.
I found several
sites that have given me the information I needed.
Here they are:
http://gmajormusictheory.org/Freebies/freebies.html
This site has free
printable sheet music for levels primer through 4. I have been using
these pieces with my girls the past two weeks. Autumn started on the
primer level and Sami toward the end of the first section of 1st pieces.
http://www.opusmusicworksheets.com/free-music-theory-worksheets/
This site has 17
music theory worksheets.
http://makingmusicfun.net/htm/printit.htm
This site has
practice records, great kid friendly (K-5) note naming and other music theory
worksheets. The font and graphics on these worksheets are very appealing.
We also purchased
a metronome to help our kids get a sense of rhythm and note value.
This is how our
lessons proceed.
I ask my child to
play a piece that she's been assigned previously. I want her to play the
correct rhythm (including holding notes for the correct value) and for the
notes to flow together. If it is played well, then I put a check mark on
the piece and assign a new piece. I want her to play these short pieces
well and work on the skills I'm asking her to improve, so they're only practicing
3 pieces a week. Last week, I listened in the middle of the week and
checked off pieces that were done well and assigned new pieces rather than
waiting for Monday to make all new assignments.
It is common for
music teachers to write in the letter notes at first, but since my kids already
had exposure to piano, we name all the notes and then clap the rhythm for each
song. Then, I play it once for them. Then, they play it through
once. I write their name and date at the top of the page along with anything
in particular that I want them to remember to work on with it.
My older daughter
is finishing up a note speller that she had from her piano teacher and she does
2 pages a week. My younger daughter is finishing up her theory book and
doing 1 page a week. In addition, I have assigned each of them a note
naming page from the making music fun site.
We did love our kids' piano teacher and she faithfully taught my
children, but we decided that it would be best for our family if I began
teaching them.
I tried to find a clear description of how to teach piano at home online and couldn't. I found lots of pieces of information though and culled through them to come up with my plans. I hope sharing this might be helpful to someone else too!
Homeschooling for free?
There are a lot of books out there with tips on how to homeschool for free. I have found myself dabbling with finding material on the internet that I can use for free. It has been an often frustrating endeavor because many sites require a subscription. That's not worth it to me. I don't feel like I can guarantee that what I want is on that site. And I definitely don't want multiple subscriptions to different sites to cover my bases, either.
I have found several good sites along the way to meet my family's needs, though. Still, I need to balance free vs. the time it takes me to search or make my own curriculum. Right now, I'm working on a photography curriculum for this quarter for my kids. My plan is to write 9 lessons and I'm half way through it. Earlier this week I put together a US Regions curriculum for Autumn. I have a textbook, but it is a yearlong textbook so I needed to figure out a way to get her the information that I want her to learn. After a bit of searching I found the maps online that I wanted, found some sheets in a book I already have, will use the textbook for 3 chapters, and found a list of activity choices for each region. But it took some time (and made me feel stressed in the process).
Tonight at dinner I was talking to my husband about the US History curriculum I've been considering for next year. This morning I looked at its price tag-- $100! The price tag made me pause. Actually, it's still making me pause. The question I face is, "Is it worth it?" I don't know the answer on that one yet.
My husband's response is that if it's the right curriculum it is. He feels that I need to have curriculum I can pick up easily and use. He's right. That's my problem with the science curriculum I'm using this year. I am so visual that I need multi-colored texts and illustrations. My eyes gravitate to the bold words and then to the smaller ones. I find such texts much easier to teach from!
But, then there's the budget. We've chosen to start teaching our kids piano at home this semester for several reasons. The biggest is really that I felt a growing desire to do it. But, I have to be honest that I am excited to be saving money on their lessons! I'm also saving the time of getting to and from their weekly lessons. I'm going to post links to the sheet music and music theory I'm using in the next post.
Sometimes materials can't be found in print and internet is the best option. That is the case of teaching my kids about computers. I finally found a computer curriculum online here: http://allinonehomeschool.wordpress.com/individual-courses-of-study/computer/
When I started to use it yesterday, I realized that I need to design worksheets to go along with it, though, to reinforce the concepts and vocabulary. (I'll post that information here when it's done.)
I find that choosing homeschooling materials is a continual dance. I reevaluate throughout the year. Is what I'm using working? Do I need a supplement to help with a particular concept? Is there something that will help me timewise that is worth the investment? Sometimes there is. That's the case of several cds we're starting to use to help my children learn their math facts. I need to make better use of their play time and the cds will help them learn these facts in an enjoyable way.
With every addition or subtraction, there's an adjustment and I try to be slow to veer off course. It's easy to think that if I just add or subtract "x" or "y" or "z", then things will work better. I have found that for me and my personality, it's best to stay the course and add on extra scaffolding on the sides to help support our learning! Sometimes I can find that scaffolding on the internet for free and sometimes I can't.
Sunday, January 13, 2013
Snowball Cookies
My mom has been on a kick since she found these cookies because she loves them. My kids do too because they're easy to make with her.
They're called Snowball Cookies. The recipe she uses can be found here: http://www.food.com/recipe/snowball-suprises-193873
She also likes to make them just as a simple butter cookie if she doesn't have kisses on hand.
Sometimes simplest tastes the best!
They're called Snowball Cookies. The recipe she uses can be found here: http://www.food.com/recipe/snowball-suprises-193873
She also likes to make them just as a simple butter cookie if she doesn't have kisses on hand.
Sometimes simplest tastes the best!
Crock Pot Ham!
A few weeks ago, I asked my friend and her husband what they were having for Christmas dinner. The husband replied that he was fixing a ham--in the crock pot. I was surprised. Really? The crock pot? I have a few recipes I really like with the crock pot, but I wouldn't have expected a Christmas meal from it.
I was wrong!
On Friday, I put a ham in my large crock pot. This ham was a bone in shank ham (not a spiral sliced). It was quite large and I had to cut off the sides, turn the bone sideways, and then squeeze the cut parts around it. I put 1 cup of water in the bottom of the crock pot and nothing else. I turned the crock pot on high and hoped for the best. High on this crock pot is like low on my smaller one. For some reason, it takes a lot more to heat it up and cook well. In any case, the smell started creeping around the house by 3 p.m. I was afraid to check on it or touch it. I hadn't asked my friend any specifics about the ham so I was really winging this.
At 6:20 p.m., my husband called from the road and asked what we were having for dinner. I replied that we were having ham, mashed potatoes, cranberry sauce, and a veggie. I knew he wasn't excited about ham. Honestly, none of my family would have been except for Autumn. Periodically, I'll fix a ham steak on the stove and though it's cooked perfectly fine it has not been a big favorite. But, he was looking forward to being with us after a week away for seminary.
Back to the ham... The kids and I fixed all of the sides and got the table set. When everything was out, I knew it was time--for better or for worse--to take out the ham. I took it out and found that it separated like corned beef. I put a heaping portion on a serving plate and sat down to dinner.
Within minutes my family wanted nothing but the ham! It was so delicious! It was extremely tender and yummy. Autumn is my little girl who will stop eating dessert when she is full. She went back for thirds on the ham!
I am definitely going to be doing this again! (I think this will be our new Easter dinner.)
So, here are my directions:
Crock Pot Ham
Ingredients: Bone in Shank ham (these are less expensive than spiral cuts, too!), water
Place ham in crock pot. If you need to, cut portions off the sides to fit the ham in the crock pot. You will need a large crock pot. Add up to a cup of water to the bottom of the pot. Cook on high for 6-7 hours.
Serve with potatoes and a veggie!
Sunday, January 6, 2013
Chocolate Cookie Bars
I have to admit that I much prefer chocolate chip cookies to chocolate chip cookie bars. But, BUT, I made these tonight and they were super yummy.
You can find the basic recipe HERE. Of course I made some alterations to it though...
My alterations:
1) I used a 9 x 13 pan that I greased on the bottom. I took them out at 28 minutes. You might need 2 or 3 more minutes though. My oven isn't a convection, but it tends to cook things a tad faster than the oven at our old house.
2) I substituted oatmeal for the pecans (cheaper alternative).
3) I didn't add the vanilla this blogger added, but I think I might try it next time.
I got lots of compliments on them and everyone asked for the recipe, so I'd definitely say these are worth making again! The recipe comes from King Arthur's Cookie Companion, which I love. If you're looking for 1 all inclusive cookie book, I'd definitely look at this one :) Everything I've made from it has been great!
Subscribe to:
Posts (Atom)